Outline for Homemade Glazed Donuts
When it comes to creating the perfect batch of homemade glazed donuts, there’s something immensely satisfying about the entire process—from mixing the ingredients to watching them rise and finally indulging in that first bite of sweet, fluffy goodness. In this section, I’ll guide you through a comprehensive outline to make your own delicious glazed donuts using a milk bread dough recipe. If you’ve got a passion for baking or just a love for donuts, you’re in for a real treat!
Understanding the Basics of Donut Making
Before we dive into the homemade glazed donuts recipe, it’s crucial to understand the fundamentals.
-
What is Milk Bread Dough?
Milk bread dough is enriched with milk and often eggs, making it soft, slightly sweet, and perfect for fluffy donuts. This dough provides a unique texture, rich flavor, and an irresistible tenderness that you won’t want to miss. -
Why Choose Glazed Donuts?
Glazed donuts are a classic treat enjoyed by many. Their shiny frosting adds sweetness that complements the soft dough perfectly. Whether you’re serving them at a brunch party or simply enjoying them with your morning coffee, glazed donuts are universally loved.
Gathering Your Ingredients
Before kicking off your baking adventure, make sure you have all the necessary ingredients. Here’s what you will need to whip up your own glazed donuts:
-
For the Dough:
-
4 cups all-purpose flour
-
1 cup whole milk, warm
-
1/3 cup granulated sugar
-
1/4 cup unsalted butter, softened
-
2 large eggs
-
2 1/4 teaspoons active dry yeast
-
1 teaspoon salt
-
For the Glaze:
-
2 cups powdered sugar
-
1/4 cup milk
-
1 teaspoon vanilla extract
-
Optional Toppings:
-
Sprinkles, chocolate drizzle, or chopped nuts for extra flair
Preparing the Dough
Creating a soft, supple dough is the cornerstone of achieving mouthwatering glazed donuts. Here’s how you can do that:
-
Activate the Yeast:
In a bowl, combine warm milk, sugar, and yeast. Let it sit for about 5–10 minutes until bubbly. This step is crucial since it ensures your donuts will rise beautifully. -
Mix the Dry Ingredients:
In another bowl, whisk together the flour and salt. -
Combine the Mixtures:
Add the yeast mixture to your dry ingredients, followed by the softened butter and eggs. Mix until the dough forms a cohesive ball. -
Knead the Dough:
Transfer the dough to a floured surface and knead for about 8 to 10 minutes until it’s soft and elastic. If you’re feeling adventurous, check out the King Arthur Baking Company for fantastic tips on kneading techniques! -
First Rise:
Form the dough into a ball and place it in a greased bowl. Cover it with a clean kitchen towel and let it rise in a warm place for about 1 to 2 hours or until it doubles in size.
Shaping Your Glazed Donuts
This is where the fun begins! Once your dough has risen, it’s time to shape those heavenly glazed donuts.
-
Roll Out the Dough:
On a floured surface, roll out the dough to about 1/2 inch thick. -
Cutting Out the Donuts:
Use a donut cutter or two different sized circle cutters to cut out the donuts and holes. If you don’t have a donut cutter, don’t worry! You can use a large and small cookie cutter as a substitute. -
Second Rise:
Place the shaped donuts on a baking sheet lined with parchment paper, cover them, and let them rise again for about 30 minutes.
Frying the Donuts
Here comes the moment of truth! To achieve that irresistible crunch and fluffy interior, frying is a must.
-
Choose Your Oil:
Use a neutral oil with a high smoke point, such as vegetable oil or canola oil. This ensures even cooking without burning. -
Heat the Oil:
Heat your oil in a deep pan or fryer to around 350°F (175°C). A thermometer can be handy here to avoid any mishaps. -
Fry the Donuts:
Carefully place a few donuts at a time in the hot oil. Fry for about 1–2 minutes on each side until they are golden brown. Remember to keep an eye on them; no one likes a burnt donut! -
Drain the Donuts:
Once cooked, transfer them to a wire rack lined with paper towels to drain excess oil.
Making the Glaze
While your donuts cool, it’s time to whip up that creamy glaze!
-
Mixing the Ingredients:
In a bowl, combine powdered sugar, milk, and vanilla extract. Start with less milk and add more until you reach your desired consistency. If you want it thicker, simply use less milk. -
Glaze the Donuts:
Dip the tops of your cooled donuts into the glaze, allowing the excess to drip off. For added texture, sprinkle toppings while the glaze is still wet.
Storing Your Glazed Donuts
If you manage to have leftovers (which is unlikely), here are some excellent storage options:
-
Room Temperature:
Keep them in an airtight container. They’re best consumed within 1–2 days. -
Refrigeration:
Alternatively, for slightly extended freshness, store them in the fridge for up to a week. -
Freezing:
If you’d like to save your glazed donuts for a special occasion, they freeze well. Seal them in a zip-top bag and enjoy them within 1–2 months.
Enjoying Your Homemade Treats
There’s nothing quite like biting into a freshly made glazed donut. The soft, fluffy texture coupled with the sweet glaze creates a delightful experience that is worth the effort. What’s more satisfying than sharing your delicious creations with friends and family? Imagine serving them at your next brunch or as an afternoon treat!
Final Thoughts on Homemade Glazed Donuts
Now that you have the outline for making your own homemade glazed donuts, I hope you’re feeling inspired to get into the kitchen and whip up a batch! Whether you’re celebrating a special occasion or simply want to treat yourself, there’s nothing quite like a warm, fresh donut.
If you’re looking for more dessert inspirations, check out delicious options like chocolate chip cookies or explore creative variations of donuts for those who want to experiment with flavors. Remember, baking is all about having fun and letting your creativity shine!
So what are you waiting for? Gather your ingredients, summon your inner baker, and enjoy the sweet rewards of your homemade creations!
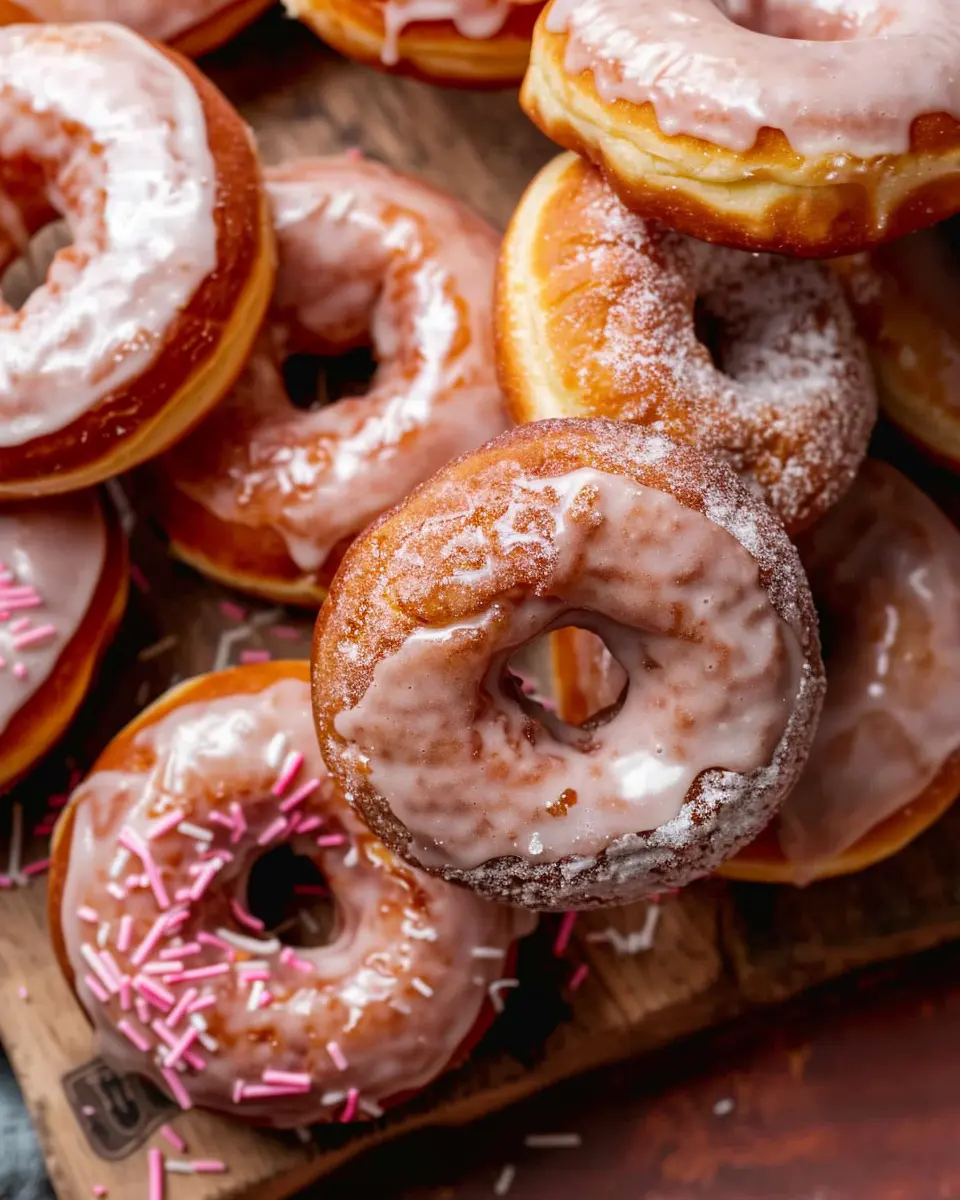
Introduction to Homemade Glazed Donuts
When was the last time you indulged in a warm, fluffy donut that practically melts in your mouth? If you’re a busy young professional like many of us, you probably find yourself reaching for store-bought pastries more often than you’d like. But let’s face it—there’s nothing quite like homemade glazed donuts to elevate your mornings, even when you’re short on time.
Why homemade glazed donuts are a game changer for busy young professionals
Imagine waking up to the enticing aroma of freshly baked donuts wafting through your kitchen. Sounds dreamy, right? With a little prep, you can whip up a batch using milk bread dough, which not only makes the donuts incredibly soft but also cuts down on your prep time. When you make them at home, you control the ingredients, ensuring they’re fresh and tailored to your taste.
Here’s why incorporating homemade glazed donuts into your routine is a game changer:
-
Cost-Effective: Buying donuts from gourmet shops can add up quickly. Making them at home is cheaper and allows you to experiment with flavors and toppings that you love.
-
Health Conscious: You have the power to substitute unhealthy ingredients with healthier alternatives. Love turkey bacon? Toss it into your donuts for a delightful savory twist. What could be better than balancing indulgence with nutrition?
-
Customization: Whether you prefer a classic glaze, something fruity, or a kick of spice, the options are endless. The freedom to customize means you can cater to every craving and dietary need.
-
Quality Time: Cooking can serve as a stress reliever. Why not make a weekend event out of it? Invite friends over and host a donut-decorating party. You could even bond over recipes and tips, making it a fun social activity!
Curious about the magic of homemade recipes? Check out this article for insights into the benefits of cooking at home.
So why not take a little time out of your busy schedule to treat yourself? You’ll be surprised how a simple batch of homemade glazed donuts can brighten your day.
Ingredients for Homemade Glazed Donuts
Essential ingredients for a scrumptious donut
When it comes to whipping up the perfect batch of glazed donuts, having the right ingredients is key. Here’s what you’ll need to get started:
- All-purpose flour: Provides the structure for your donuts.
- Granulated sugar: Adds sweetness and enhances the flavor.
- Milk: This is where the milk bread dough magic happens, giving your donuts a soft texture.
- Butter: For that rich, buttery taste and fluffy consistency.
- Eggs: Essential for binding and adding moisture.
- Yeast: The hero that makes your donuts rise and become delightfully airy.
- Salt: Helps balance the sweetness.
You can also check out resources like King Arthur Baking for more insights on ingredient quality and baking tips.
Optional ingredients for customized flavors
To take your glazed donuts to the next level, consider adding some optional ingredients for customized flavor profiles:
- Vanilla extract: Just a splash can elevate the taste.
- Spices: Cinnamon or nutmeg for a warm, inviting aroma.
- Zest: Lemon or orange zest adds a refreshing twist.
- Chocolate: Incorporate cocoa powder for a rich flavor or chocolate glaze.
- Nuts: Chopped pistachios or almonds for a crunchy contrast.
Feel free to mix and match these ingredients to suit your taste! What flavor combination are you thinking of trying? The possibilities are endless.
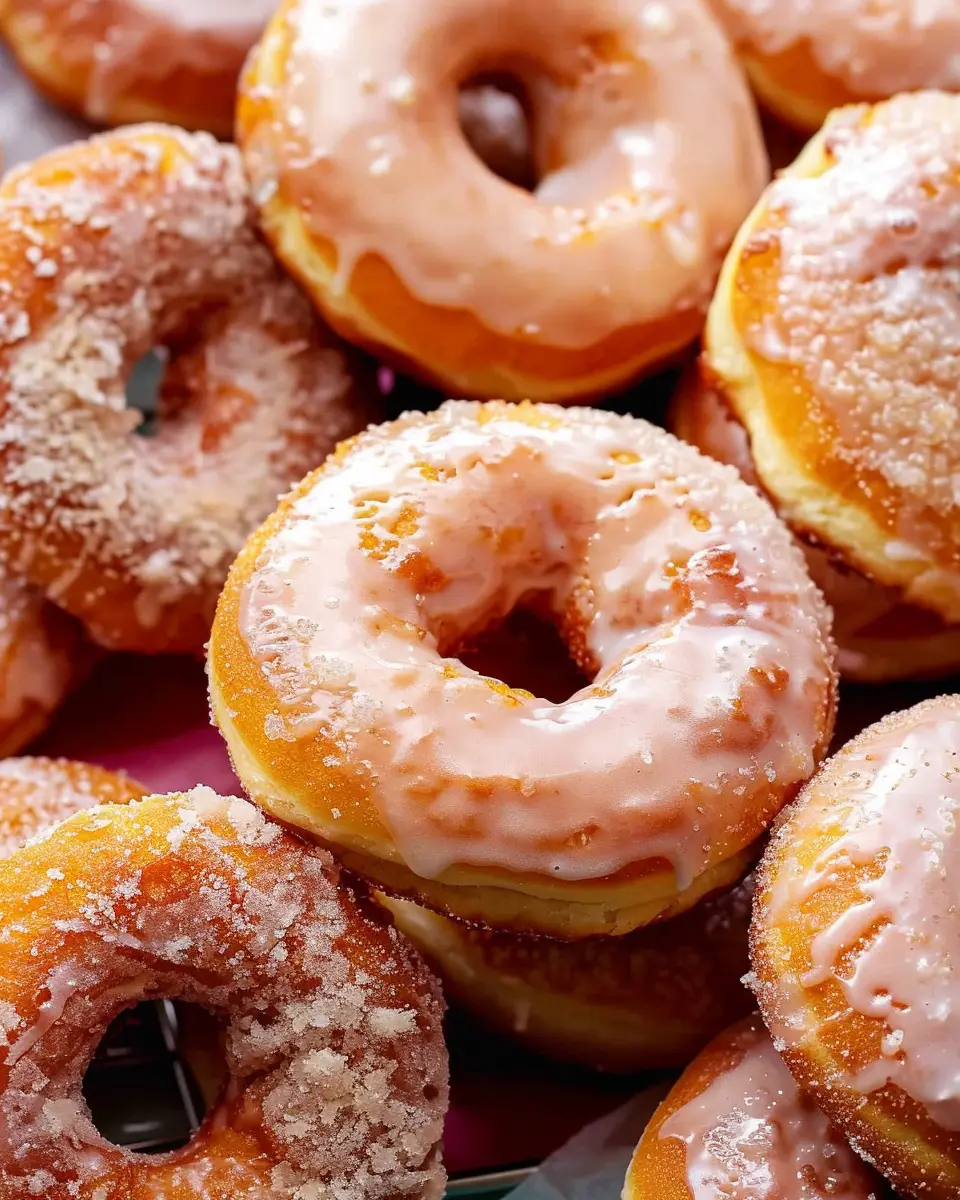
Preparing Homemade Glazed Donuts
There’s something incredibly satisfying about biting into a warm, homemade glazed donut. From the fluffy texture to the sweet glaze, these treats are perfect for any occasion—or even just a guiltless personal indulgence on a Saturday morning. In this section, I’ll guide you through the entire process of preparing your very own glazed donuts using delicious milk bread dough. Trust me, the joy of making these beauties from scratch is immense!
Make the Tangzhong
First up, let’s create our tangzhong, a key ingredient that adds a delightful moisture to our donuts.
- Ingredients for Tangzhong:
- 1/4 cup of bread flour
- 3/4 cup of water
Start by mixing the flour and water in a small saucepan over medium heat. Stir continuously until it thickens and you see some bubbles forming; this usually takes about 3-5 minutes. Once you have a smooth paste, remove it from the heat and let it cool down to room temperature. This step is crucial as it will enhance the softness of your glazed donuts.
Interested in exploring more about tangzhong? Check out this article about the science behind it!
Create the Donut Dough
Next, we need to create our donut dough. Combine the cooled tangzhong with:
- 2 1/4 tsp instant yeast
- 1/2 cup warm milk
- 1/4 cup sugar
- 1/4 cup unsalted butter (melted)
- 2 large eggs
- 1 tsp vanilla extract
- 3 1/2 cups bread flour
- 1/2 tsp salt
Mix all of these ingredients in a large mixing bowl. Start with the wet ingredients before gradually adding the dry ones. This will help to ensure a smooth blend. When it looks like a sticky dough, it’s on its way to being perfect!
Knead the Dough to Perfection
Kneading time! Flour your countertop and dump the dough onto it. Knead for about 8-10 minutes until it’s smooth and elastic. The dough should not stick to your hands; if it does, sprinkle a bit more flour. This is where the workout comes in—think of it as a mini arm workout before indulging in those glazed donuts!
Kneading is not just about getting a workout; it’s also about developing gluten, which will give your donuts that delightful chew.
Shape and Proof the Donuts
Once kneaded, shape your dough into a ball and place it in a greased bowl. Cover it with a damp cloth and let it rise in a warm place. This proofing stage usually takes about 1-1.5 hours, or until it has doubled in size—perfect for planning a coffee break while you wait!
After the first rise, punch down the dough and roll it out on a floured surface to about 1/2 inch thick. Use a donut cutter or two different-sized round cutters to cut out your donuts. Don’t forget to cut the holes; those donut holes are just as tasty!
Fry the Donuts to Golden Perfection
Now comes the fun and slightly messy part—frying!
- For Frying:
- Vegetable oil (enough for your pot)
Heat the oil in a heavy-bottomed pot to 350°F (175°C). Carefully drop the donuts into the hot oil; they should sizzle softly. Fry each side for about 1-2 minutes until golden brown. Remove them with a slotted spoon and place them on paper towels to absorb excess oil.
While they’re still warm, dip them in a simple glaze made from powdered sugar and milk mixed to your desired consistency. Feel free to get creative with toppings, adding sprinkles, or even drizzling some chocolate on top for that extra oomph!
And voilà! You’ve just made delightful glazed donuts from scratch. Inviting friends over or planning a cozy weekend treat? These donuts are sure to impress! Happy frying!
Making the Glaze
Creating the perfect glaze is a crucial step in making glazed donuts that are not only delicious but visually appealing as well. Let’s dive into how to whip up that shiny topping and get the flavors popping!
Whisk together the glaze ingredients
To start, gather your ingredients. You will need:
- 2 cups powdered sugar
- 2-4 tablespoons milk (or use almond milk for a dairy-free alternative)
- 1 teaspoon vanilla extract
Grab a mixing bowl and whisk the powdered sugar with 2 tablespoons of milk and the vanilla extract until smooth. The consistency should be thick yet pourable. If it’s too thick, gradually add more milk, one tablespoon at a time. Remember, the goal here is to achieve a silky glaze that coats the donuts beautifully.
For a little twist, consider adding a hint of citrus zest or a dash of espresso to enhance the flavor profile. Explore more about flavor combinations on Serious Eats for creative inspiration.
Dip the donuts for maximum flavor
Once your glaze is ready, it’s time to bring those glazed donuts to life!
- Fry or bake your donuts until they’re golden brown. Allow them to cool slightly but not completely; this ensures the glaze adheres better.
- Dip the warm donuts directly into the glaze. Make sure they’re fully coated, then set them upside down on a wire rack to let any excess drip off.
Pro Tip: For an extra layer of delight, consider rolling the glazed donuts in sprinkles or crushed nuts before the glaze sets. This not only adds texture but gives a delightful crunch!
So, why is this step so important? The warm donuts absorb the glaze, allowing each bite to be a sweet, flavorful explosion. Plus, who doesn’t love that satisfying glossy finish? Don’t forget to check out The Kitchn for more tips on glazing techniques.
Now that you’ve mastered the art of glazing, your glazed donuts are sure to be the star of any gathering! Enjoy sharing them with friends or savoring them solo — the choice is yours!
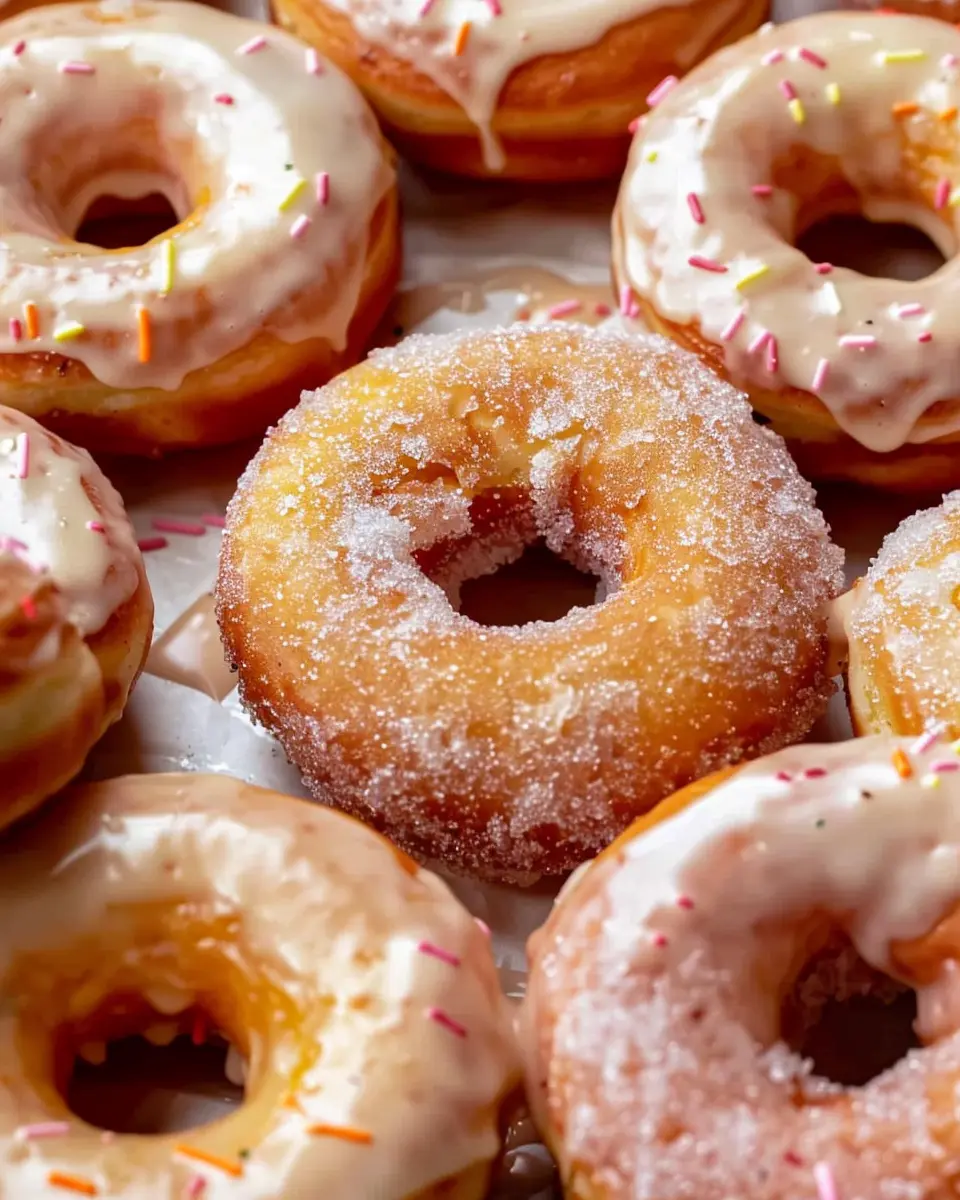
Variations of Homemade Glazed Donuts
Creating glazed donuts at home is not just about following a recipe; it’s about making them your own! Let’s explore some delicious variations that can turn your homemade donuts into something uniquely special.
Indulgent Chocolate Glazed Donuts
If you’re a chocolate lover, why not elevate your glazed donuts by dipping them in a rich chocolate glaze? Simply melt semi-sweet chocolate chips with a splash of cream to get that perfect glossy finish. For extra flair, sprinkle sea salt or add colorful sprinkles right after glazing. Not only will they look stunning, but the flavor will perfectly balance sweet and savory.
Irresistible Maple Turkey Bacon Glazed Donuts
Imagine biting into a glazed donut topped with a maple glaze and crunchy pieces of turkey bacon. It’s a sweet and savory dream come true! Prepare a simple maple glaze by combining powdered sugar, maple syrup, and a dash of milk. Once glazed, sprinkle crumbled cooked turkey bacon on top. This twist makes for a delightful brunch treat that’s sure to impress friends and family. You can read more about creative breakfast ideas here.
Fruity Variations to Brighten Your Day
Feeling frisky? Try adding a fruity twist to your glazed donuts. You can whip up a strawberry or lemon glaze by mixing fresh pureed strawberries or lemon juice with powdered sugar. Not only do these variations add a burst of flavor, but they also make for a perfect spring or summer snack. For an added zing, consider adding lemon zest or finely diced strawberries into the dough before frying.
With just a few tweaks, your glazed donuts can become the highlight of any gathering. What variation will you try first?
Cooking Tips and Notes for Homemade Glazed Donuts
Creating delightful homemade glazed donuts can be a rewarding experience, especially when you pay attention to some crucial details.
Measuring Ingredients Accurately for Best Results
To achieve the perfect texture in your glazed donuts, measuring your ingredients with precision is key. Use a kitchen scale for dry ingredients like flour and sugar—this ensures consistency in your dough. Additionally, liquid ingredients should be measured in a liquid measuring cup to avoid discrepancies that could lead to overly dense or too sticky donuts. Remember, baking is a science, and even minor variations can impact your results!
Importance of Oil Temperature While Frying
The temperature of your frying oil plays a vital role in the outcome of your donuts. If the oil is too cool, your donuts will absorb excess oil and become greasy. Conversely, if it’s too hot, they can brown too quickly on the outside while remaining raw on the inside. Aim for a steady 350°F (175°C) for frying. Invest in a kitchen thermometer for precision, or perform the “drop test” by adding a small piece of dough—if it sizzles and rises to the surface, you’re ready to fry!
Enhancing your kitchen skills with these tips will get you one step closer to donut perfection! For additional baking insights, check out King Arthur Baking or The Kitchn, where you’ll find great resources for all things baking. Happy frying!
Serving Suggestions for Homemade Glazed Donuts
Creative plating ideas for brunch or dessert
Elevate your glazed donuts by presenting them like a work of art! Try stacking two or three donuts on a beautiful ceramic platter, dusted with powdered sugar for that Instagram-ready look. For an even more delightful display, consider using a tiered stand—perfect for a brunch gathering. Add fresh berries and sprigs of mint around the base for a pop of color and freshness. If you’re aiming for a more intimate setting, serve individual donuts on small dessert plates, drizzling a little extra glaze or chocolate sauce on the side.
Pairings that elevate donut enjoyment
To take your glazed donuts to the next level, think about complementary flavors. Pair these sweet treats with a rich coffee, perhaps a French roast or a velvety cappuccino. Or, opt for a refreshing herbal tea for those who prefer something lighter. If you want to balance sweetness, try pairing the donuts with savory options like turkey bacon or chicken ham—they create a delightful contrast! Complete the experience by serving a fresh fruit salad or a scoop of vanilla ice cream to satisfy sweet and savory cravings.
For more brunch ideas, explore this resource on creative brunch pairings.
Whether you’re entertaining friends or treating yourself, these suggestions are sure to make your homemade glazed donuts a hit!
Time Breakdown for Homemade Glazed Donuts
Preparation time
Making homemade glazed donuts begins with a solid plan. You’ll want to set aside about 20 to 30 minutes for preparation. This includes gathering your ingredients, mixing the dough, and letting it rise. Don’t rush this—trust the process!
Cooking time
Once your dough is ready, the cooking time typically runs around 3 to 5 minutes per donut. That’s just enough time to allow your sweet treats to become golden brown and delicious—yum!
Total time
In total, you’re looking at about 1.5 to 2 hours, including rising and cooking time. Although it takes some investment, the reward is undoubtedly worth it! For some tips on timing and dough handling, check out this guide.
— Enjoy the process, and soon you’ll have warm, delectable glazed donuts to share (or keep all to yourself)!
Nutritional Facts for Homemade Glazed Donuts
Estimated calories per donut
Homemade glazed donuts are a delightful treat that can be surprisingly moderate in calories. On average, each donut contains about 250 to 300 calories. However, this can vary based on your ingredients and glaze. For instance, opting for a lighter glaze can reduce the calorie count, making it easier to savor without guilt.
Key nutrients to consider
When enjoying these delicious donuts, it’s important to keep in mind their nutritional content. Here are some key nutrients to consider:
- Carbohydrates: A primary source of energy.
- Fats: Though some are healthy, it’s essential to enjoy in moderation.
- Protein: Homemade donuts can have a bit of protein, especially if you incorporate eggs.
- Vitamins and minerals: Using whole ingredients like milk and eggs can enhance the nutrient profile.
To further your understanding of donut nutrition, consider checking out resources like the USDA FoodData Central for detailed nutritional breakdowns. Enjoying your glazed donuts can also be a part of a balanced diet when approached with mindfulness!
FAQ about Homemade Glazed Donuts
Can I make glazed donuts without frying?
Absolutely! If you’re looking for a healthier take on classic glazed donuts, consider baking them instead. Not only does this method cut down on oil, but it can also give you a lighter, fluffier texture. Many recipes guide you through this process, allowing you to still achieve that delightful glaze without the hassle (or guilt) of frying.
How can I store donuts for freshness?
To ensure your glazed donuts stay fresh and tasty, proper storage is key. Here are a few tips:
- Room Temperature: Keep them in an airtight container at room temperature for up to two days.
- Refrigeration: If you want them to last a bit longer, refrigerate them for up to a week. Just remember, refrigeration can change the texture.
- Freezing: For even longer storage, pop them in the freezer. Wrap each donut in plastic wrap and place them in an airtight bag. They can last up to three months! Just thaw at room temperature when you’re ready to eat.
What are some easy ingredient substitutions for donuts?
Life can be busy, and you might not always have all the ingredients on hand. Fortunately, glazed donuts are quite forgiving! Here are some substitutions:
- Use Greek yogurt instead of buttermilk for a tangy twist.
- Swap out all-purpose flour with whole wheat flour for a healthier option.
- If you’re out of eggs, a flaxseed meal (1 tablespoon of flaxseed mixed with 2.5 tablespoons of water) works well as a binder.
For more tips and tricks on baking, check out resources from culinary experts at sites like King Arthur Baking and The Kitchn. Happy baking!
Conclusion on Homemade Glazed Donuts
Making homemade glazed donuts can be one of the most rewarding kitchen adventures. The process, from kneading the delightful milk bread dough to seeing those donuts rise, is filled with excitement and anticipation. When they come out golden-brown and shiny, the satisfaction is unmatched.
As you take your first bite, the soft, sugary glaze melting in your mouth is truly a moment to savor. Don’t hesitate to get creative with toppings or fillings next time! Remember, these donuts are a canvas for your culinary imagination. For more tips and techniques, feel free to check out Serious Eats for expert insights that can elevate your next batch. Enjoy your baking journey!
PrintGlazed Donuts: Irresistibly Soft Milk Bread Dough Recipe

Delve into the world of glazed donuts made with the delightfully soft milk bread dough that will leave you craving more.
- Prep Time: 30 minutes
- Cook Time: 15 minutes
- Total Time: 1 hour 45 minutes
- Yield: 12 donuts 1x
- Category: Dessert
- Method: Frying
- Cuisine: American
- Diet: Vegetarian
Ingredients
- 2 cups all-purpose flour
- 1/2 cup milk
- 1/4 cup sugar
- 1/4 cup butter
- 1 package active dry yeast
- 2 large eggs
- 1 teaspoon vanilla extract
- 1/2 teaspoon salt
- 1 cup powdered sugar
- 2 tablespoons water
Instructions
- In a bowl, combine warm milk and yeast. Let it sit for about 5 minutes.
- In a large mixing bowl, mix flour, sugar, and salt.
- Add the yeast mixture, melted butter, eggs, and vanilla. Knead until smooth.
- Let the dough rise in a warm place until doubled in size, about 1 hour.
- Roll out the dough and cut into donut shapes.
- Allow the donuts to rise again for 30 minutes.
- Fry the donuts in hot oil until golden brown on both sides.
- Mix powdered sugar with water for glaze, then dip warm donuts in the mixture.
Notes
- Ensure the oil temperature is adequate to avoid greasy donuts.
- Experiment with different flavors by adding cocoa powder or cinnamon to the dough.
Nutrition
- Serving Size: 1 donut
- Calories: 180
- Sugar: 12g
- Sodium: 180mg
- Fat: 7g
- Saturated Fat: 4g
- Unsaturated Fat: 3g
- Trans Fat: 0g
- Carbohydrates: 24g
- Fiber: 1g
- Protein: 3g
- Cholesterol: 40mg
Keywords: Glazed Donuts, Milk Bread Dough, Recipe