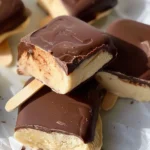
Introduction to Chocolate Covered Banana Ice Cream Bars
When it comes to satisfying that sweet tooth, there’s something incredibly special about homemade treats. Do you remember the first time you whipped up something in your kitchen? The aroma, the excitement, and then the absolute joy of indulging in the final product? Chocolate Covered Banana Ice Cream Bars are an absolute must-try for any dessert lover, and they’re surprisingly easy to make at home.
Why Homemade Treats Are Worth It
Homemade treats like these ice cream bars allow you to have control over the ingredients. This means you can opt for healthier alternatives, such as organic bananas or dairy-free chocolate, tailoring the recipe to fit your dietary needs. Plus, you can skip the artificial additives often found in store-bought versions, making them not just tastier but also a bit healthier. According to a study by the Food and Drug Administration (FDA), homemade desserts often have lower sugar and fewer preservatives, which can lead to a healthier lifestyle.
Ever feel that sense of satisfaction while making something from scratch? That feeling of accomplishment when you present a beautifully crafted dessert to friends and family? It’s incredible how a simple recipe can transform ordinary moments into something special. Whether you’re looking for a cool treat on a hot day or a health-conscious dessert option for a gathering, Chocolate Covered Banana Ice Cream Bars fit the bill perfectly.
The Perfect Balance of Flavor and Fun
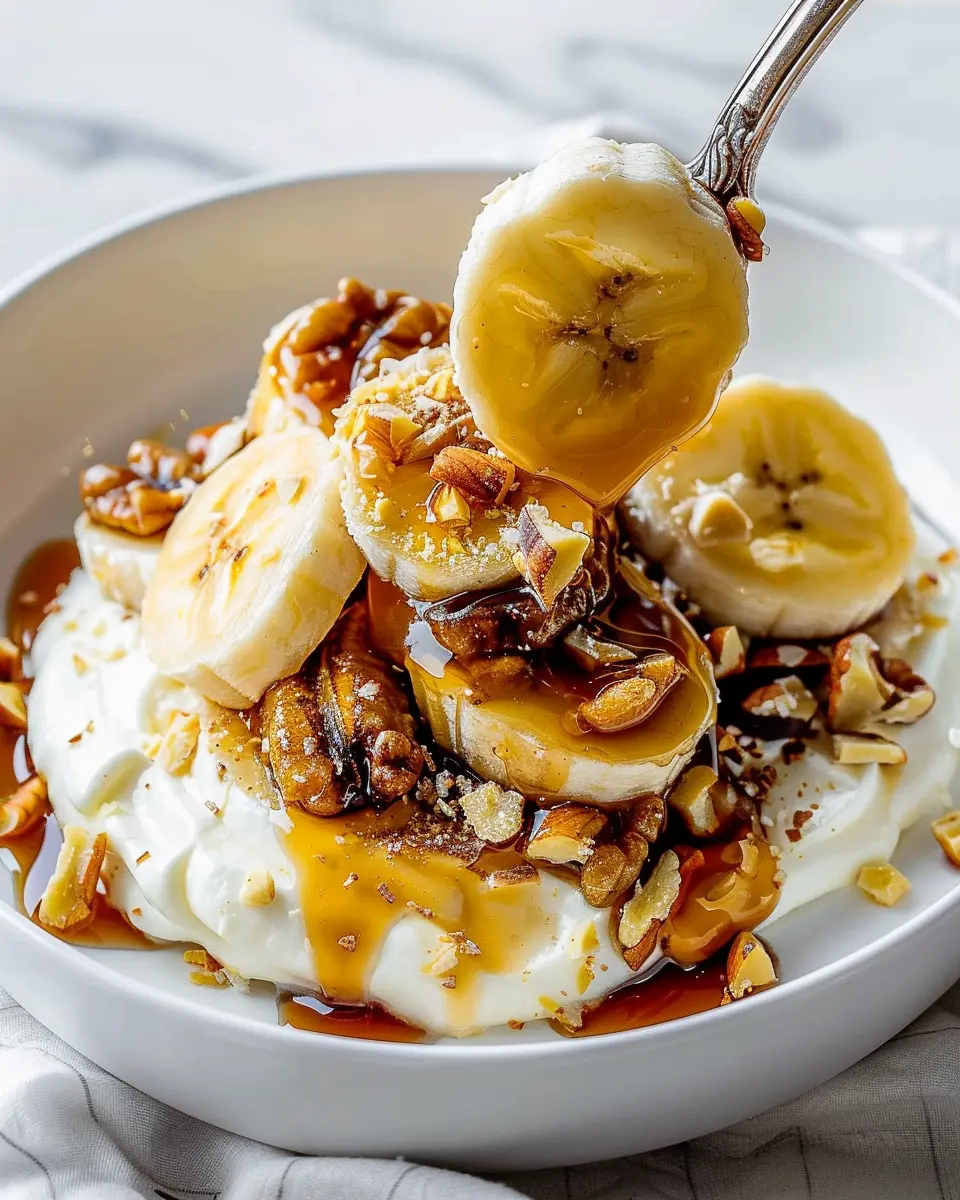
This recipe combines the delightful sweetness of ripe bananas with the rich, indulgent flavor of chocolate. Imagine biting into a creamy, frozen banana center encased in luscious chocolate. It’s not just a treat; it’s a mini celebration with every bite. Plus, you can get creative by adding toppings like chopped nuts or coconut flakes for an extra crunch.
Make sure to check out the full recipe for Chocolate Covered Banana Ice Cream Bars, where I dive deeper into the steps and tips for making these easy-to-create desserts. Whether you’re a beginner or a seasoned pro, I promise this treat will be a hit at any gathering. Enjoy the process, and remember: the best memories often begin in the kitchen!
If you’re looking for other creative dessert ideas, check out The Kitchn or AllRecipes for inspiration.
Ingredients for Chocolate Covered Banana Ice Cream Bars
Creating delightful Chocolate Covered Banana Ice Cream Bars starts with a few essential ingredients for the ice cream filling. You’ll need:
Essential ingredients for the banana ice cream filling
- Ripe bananas: Aim for 3-4 medium-sized ones for that perfect banana flavor.
- Coconut milk: This adds creaminess and a hint of sweetness; opt for full-fat for the best results.
- Honey or maple syrup: Use about a quarter cup for sweetness; adjust according to your taste.
- Vanilla extract: A teaspoon enhances all those lovely flavors.
This is a simple mix that provides a smooth, creamy texture. Feel free to experiment with different types of sweeteners. If you’re curious about the health benefits of bananas, you can check out this article on healthline.com.
Ingredients for the chocolate coating
Now, let’s talk about that irresistible chocolate coating:
- Dark chocolate: You’ll need about 8 ounces. Choose a brand with at least 70% cocoa for a richer taste.
- Coconut oil: About 2 tablespoons will help the chocolate melt smoothly and harden perfectly.
Combining these ingredients might just become your new favorite routine! Whether you’re preparing for a party or indulging in a sweet treat at home, these Chocolate Covered Banana Ice Cream Bars are sure to impress.
Preparing Chocolate Covered Banana Ice Cream Bars
Have you ever craved a dessert that’s not just delicious but also fun to make? Chocolate Covered Banana Ice Cream Bars are the perfect blend of frozen banana goodness and silky chocolate. This delightful treat is easy to prepare, making it an ideal choice for young professionals looking to whip up something special at home. Let’s walk through the steps together, shall we?
Make the banana ice cream filling
To kick off this delicious recipe, we need to create the banana ice cream filling. For this, you’ll need a ripe banana, your choice of milk (almond, regular, or even coconut for that tropical twist), and a touch of maple syrup or honey for sweetness.
Ingredients for filling:
- 2 ripe bananas
- 1 cup milk (or dairy-free alternative)
- 2 tablespoons maple syrup or honey
- 1 teaspoon vanilla extract
Instructions:
- Blend it up: In a blender, combine the ripe bananas, milk, maple syrup or honey, and vanilla extract. Blend until the mixture is smooth and creamy.
- Taste test: Give it a quick taste and adjust the sweetness if needed. After all, it’s your creation!
Pour filling into molds
Once your mixture is blended to perfection, it’s time to prepare for the fun part—pouring it into molds. If you don’t have molds, you can always use paper cups as a substitute!
Steps:
- Fill the molds: Pour the banana ice cream mixture evenly into your chosen molds. If you’re using cups, fill each one about three-quarters full to allow for expansion as they freeze.
- Insert sticks: If you’re using molds with a stick attachment, make sure to insert the sticks according to the manufacturer’s instructions.
Freeze the ice cream bars
Now that your molds are filled with that creamy goodness, it’s time for the most crucial step—freezing.
Tips for freezing:
- Duration: Place the molds in the freezer for at least 4-6 hours or until completely firm.
- Unlocking the secrets: To ensure that your ice cream bars pop out easily, run warm water over the outside of the molds for a few seconds before attempting to release them.
Prepare the chocolate coating
While your banana ice cream bars freeze, let’s prepare the chocolate coating to create that irresistible outer layer. You can go for dark, milk, or even white chocolate based on your preference.
Ingredients for the chocolate coating:
- 1 cup chocolate chips (of choice)
- 1 tablespoon coconut oil (optional, for a smoother finish)
Instructions:
- Melt the chocolate: In a microwave-safe bowl, heat the chocolate chips in 30-second intervals, stirring in between until they are melted and smooth.
- Optional: Stir in the coconut oil for an extra glossy finish.
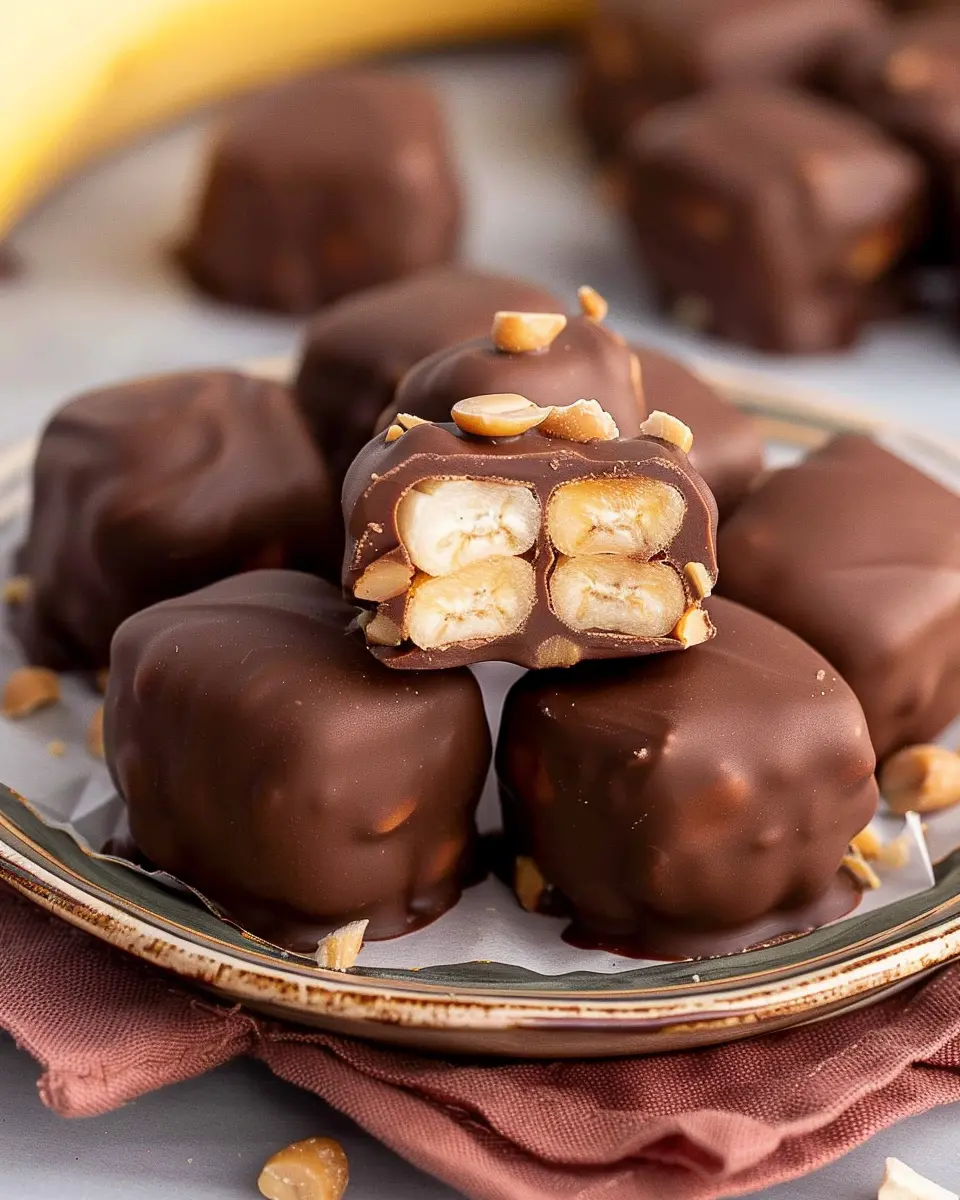
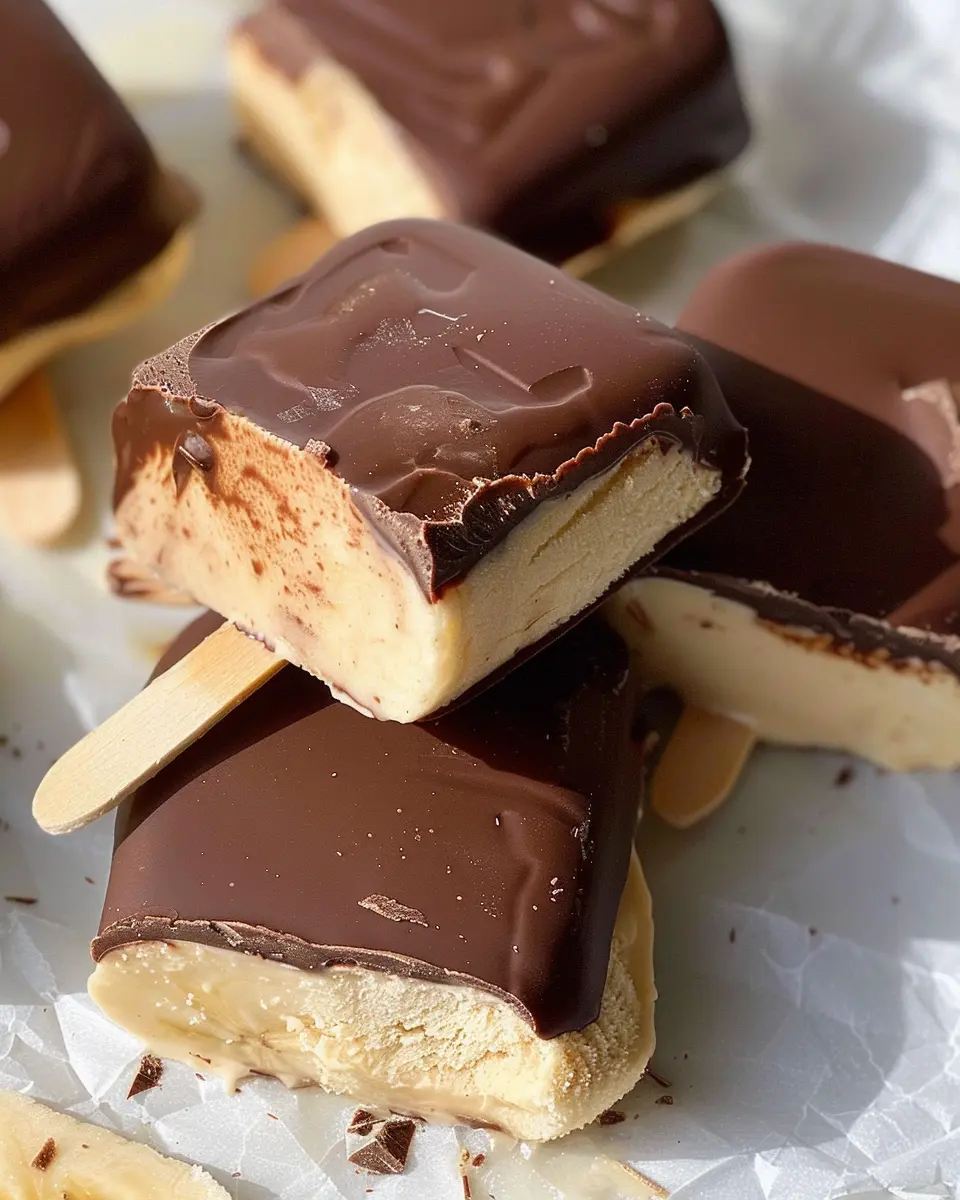
Dip and set the chocolate-covered bars
Now, the moment we’ve all been waiting for—dipping the ice cream bars into the chocolate. This step is not just essential; it’s also incredibly satisfying!
Dipping Instructions:
- Remove bars from the molds: Carefully take your frozen banana bars out of their molds.
- Dip in chocolate: Hold the bar by the stick and dip it into the melted chocolate, ensuring it’s fully coated.
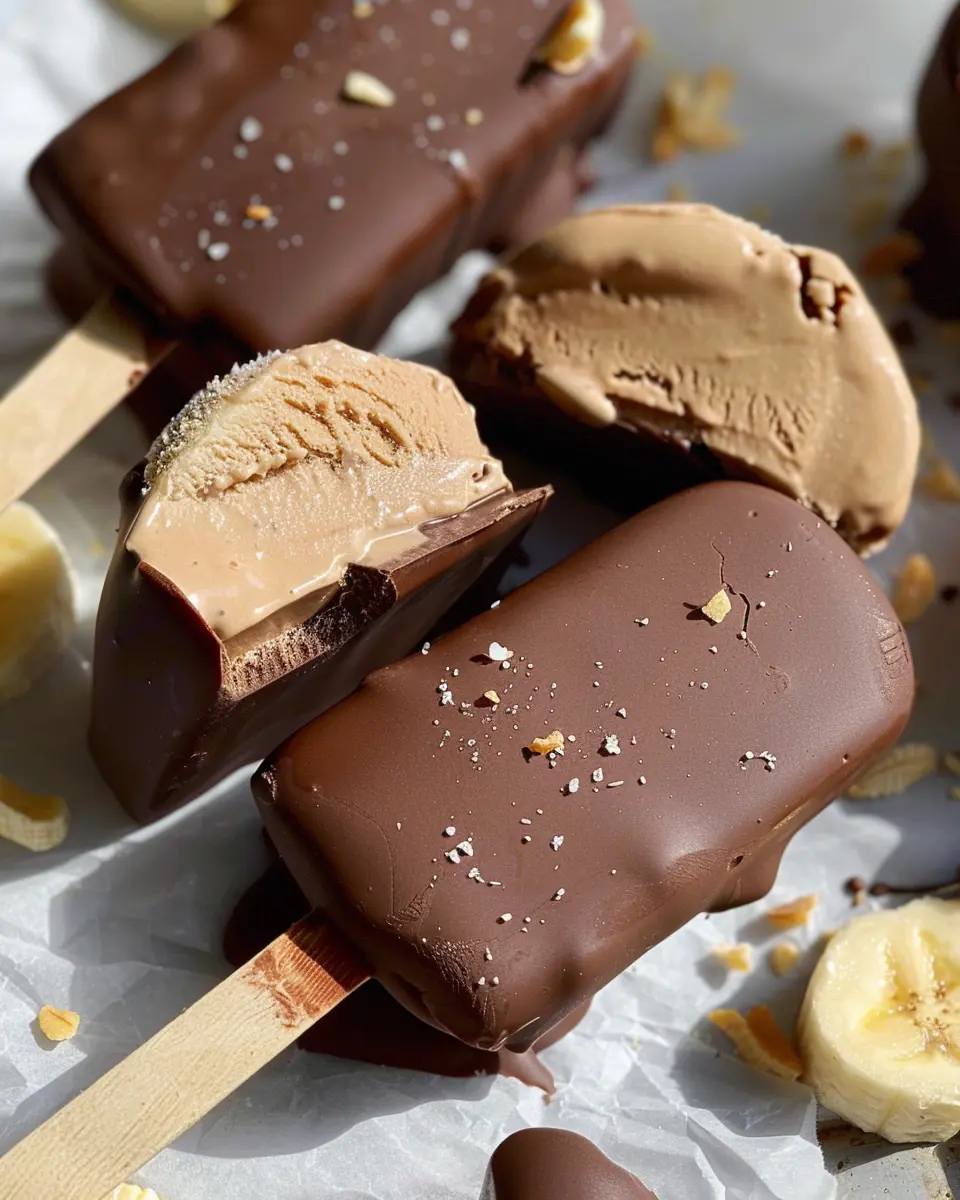
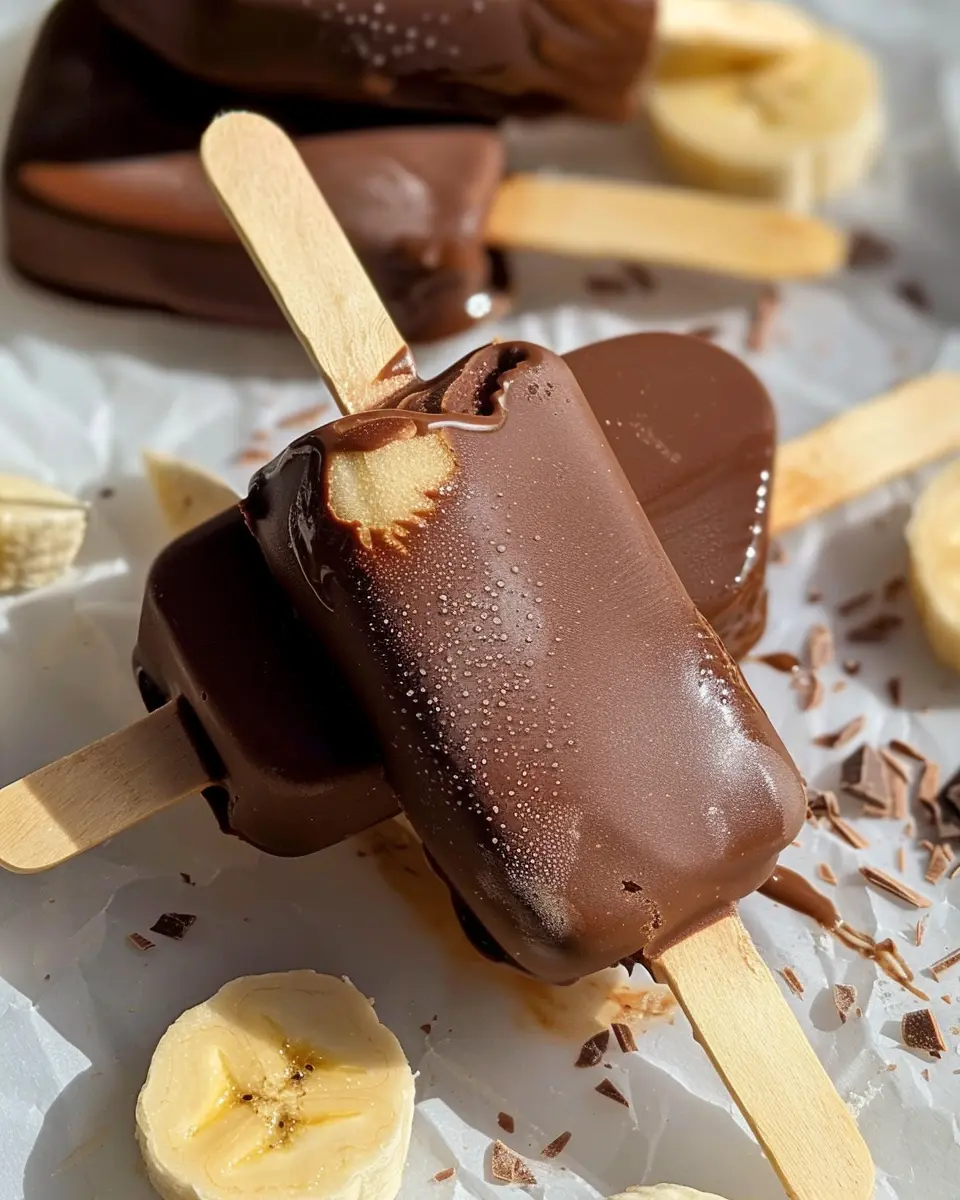
- Set and chill: Place the chocolate-covered bars on a parchment-lined baking sheet. If you want to get creative, sprinkle some crushed nuts or sea salt right after dipping before the chocolate hardens.
Finally, pop them back into the freezer for about 30 minutes to set the chocolate coating.
And there you have it—Chocolate Covered Banana Ice Cream Bars that look and taste incredible! These bars are perfect for summer gatherings, movie nights, or just treating yourself after a long work week. Enjoy every last bite, and don’t forget to share (or keep them all to yourself!).
For a more in-depth exploration of frozen dessert recipes, check out resources like The Kitchn or Bon Appétit for more ideas!
Variations on Chocolate Covered Banana Ice Cream Bars
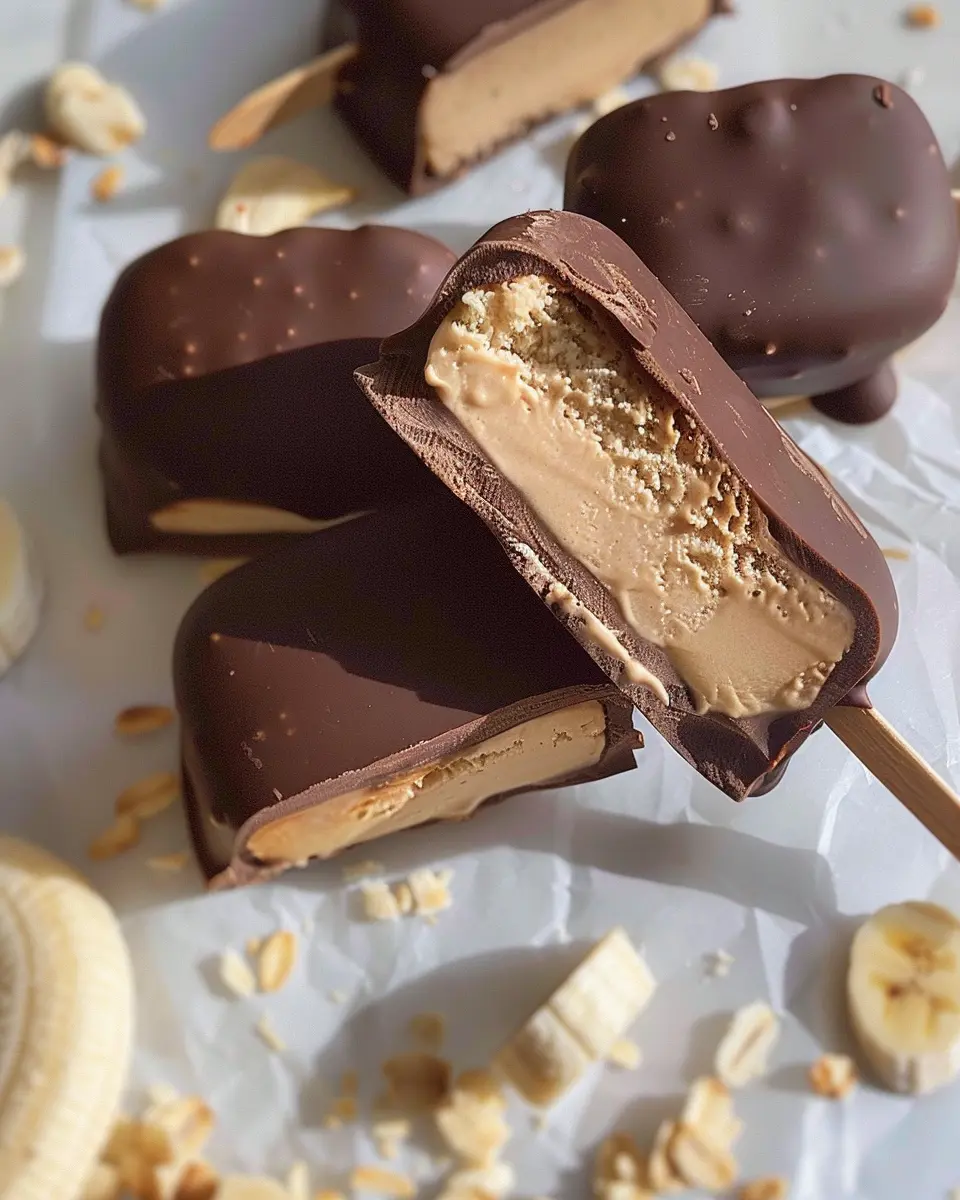
Exploring Nut and Seed Butter Alternatives
One of the joys of making Chocolate Covered Banana Ice Cream Bars is the flexibility you have with ingredients. If you’re not a fan of peanut butter or simply want to try something new, consider these scrumptious alternatives:
- Almond Butter: Smooth and slightly sweet, almond butter complements the banana beautifully.
- Cashew Butter: For a creamy, mild flavor, cashew butter is the way to go. It blends seamlessly with the banana filling.
- Sunflower Seed Butter: If allergies are a concern, sunflower seed butter offers a nut-free option that’s just as delicious.
These alternatives not only bring unique flavors but also enhance the nutritional profile, offering healthy fats and proteins.
Flavoring the Banana Filling
Why stick to just plain banana when you can elevate the flavor? Adding subtle flavoring options can transform your Chocolate Covered Banana Ice Cream Bars into a gourmet delight. Here are some ideas:
- Vanilla Extract: A touch of vanilla takes the filling to the next level, adding warmth and depth.
- Cocoa Powder: For chocolate lovers, mixing in a bit of cocoa powder gives you a chocolaty twist without overpowering the banana flavor.
- Cinnamon or Nutmeg: A sprinkle of spice can create a comforting warmth that pairs well with chilled desserts.
Experimenting with these flavors can turn your basic bars into a crowd-pleaser at parties or a delightful treat for a cozy night in.
Are you ready to get creative? These variations not only amp up the taste but also make each batch a unique adventure! For more unique ideas, check out this nut butter guide for inspiration.
Cooking notes for Chocolate Covered Banana Ice Cream Bars
Tips for blending to the right consistency
When making your Chocolate Covered Banana Ice Cream Bars, it’s essential to achieve a creamy, smooth blend. Start with ripe bananas as they provide the best flavor and sweetness. Peel and chop them into smaller pieces before adding to the blender. Blend on a medium speed initially, and then increase to high until the mixture is velvety. If it’s too thick, a splash of almond milk can help loosen it up. This step ensures your bars will have that delightful, ice cream-like texture!
Storage tips for frozen bars
Once you’ve made your Chocolate Covered Banana Ice Cream Bars, you’ll want to store them properly to maintain their deliciousness. Wrap each bar in parchment paper or foil and place them in an airtight container. This helps avoid freezer burn and keeps them fresh for up to two weeks. For that extra touch of flavor, consider adding chopped nuts or sprinkles on top before freezing—just be sure they’re fully coated in chocolate! If you’re interested in more storage tips, check out The Kitchn.
Enjoy your delicious homemade treats!
Serving suggestions for Chocolate Covered Banana Ice Cream Bars
Ideas for garnishing
When it comes to elevating your Chocolate Covered Banana Ice Cream Bars, a little creativity goes a long way. Consider these fun garnishing ideas to give your bars that extra flair:
- Chopped Nuts: Sprinkle some crushed almonds or walnuts on top for a delightful crunch. Not only do they taste great, but they also add a touch of healthy fats!
- Coconut Flakes: Toasted coconut flakes can introduce a tropical twist, enhancing the banana flavor beautifully.
- Drizzle of Caramel: A light drizzle of caramel sauce can create a luscious sweet contrast to the chocolate coating.
Perfect pairings for enjoying these treats
Pairing your Chocolate Covered Banana Ice Cream Bars with the right beverages can enhance your experience. Consider serving them alongside:
- Freshly Brewed Coffee: A warm cup of coffee complements the chocolate perfectly, making for a satisfying afternoon pick-me-up.
- Herbal Tea: For a lighter option, a soothing herbal tea, like chamomile or mint, can balance the richness of the ice cream.
- Fruit Smoothies: Blend up a refreshing fruit smoothie, such as berry or tropical flavors, for a fruity contrast that enhances the banana taste.
These serving suggestions will help you take your dessert game to the next level! Don’t forget to share your delicious combinations on social media! For quick smoothie recipes, check out EatingWell for inspiration.
Time breakdown for Chocolate Covered Banana Ice Cream Bars
Preparation time
Making your Chocolate Covered Banana Ice Cream Bars is a breeze! The preparation time takes about 10 minutes. This includes slicing the bananas and getting your melting chocolate ready. Easy peasy, right?
Freezing time
Once assembled, it’s time for the magic to happen in the freezer! You’ll want to let these frozen delights chill for at least 2 to 3 hours. This step is crucial to achieving that perfect texture—smooth on the inside and deliciously crunchy on the outside.
Total time
So what does that add up to? Expect a total time commitment of about 2 hours and 10 minutes at a minimum, but don’t worry, much of it is hands-off while they’re freezing. Grab a book or catch up on your favorite podcast; these bars will be worth the wait!
For additional tips on freezing techniques, you might find this guide on food storage from the Academy of Nutrition and Dietetics helpful. Start your sundae evening with something delicious today!
Nutritional Facts for Chocolate Covered Banana Ice Cream Bars
Calories per bar
When indulging in these delightful Chocolate Covered Banana Ice Cream Bars, it’s good to be aware of the caloric content. Each bar contains approximately 150 calories. A perfect treat that balances satisfaction with health-conscious enjoyment, these bars are guilt-free yet rich in flavor.
Key nutrients in the ingredients
These delicious bars are more than just a sweet indulgence; they also pack a nutritional punch:
- Potassium: Bananas are known for their high potassium content, which supports heart health and muscle function.
- Antioxidants: Dark chocolate adds a layer of antioxidants, benefiting your skin and reducing inflammation.
- Fiber: The banana’s natural fiber helps aid digestion and keeps you feeling full longer.
- Healthy Fats: If you opt for a nut-based coating, you’re getting additional protein and healthy fats that can boost satiety.
By combining these nutritious ingredients, Chocolate Covered Banana Ice Cream Bars offer a delectable way to enjoy dessert without derailing your healthy eating goals. For further insights on the health benefits of bananas, check out Healthline. And while treating yourself, remember that moderation is key, especially when savoring those rich chocolate flavors!
FAQs about Chocolate Covered Banana Ice Cream Bars
Can I use frozen bananas for this recipe?
Absolutely! Using frozen bananas is a great idea for making these delicious Chocolate Covered Banana Ice Cream Bars. In fact, frozen bananas can lend a creamier texture to your ice cream bars. Simply cut your bananas into slices and freeze them until solid before blending. The result will be a smoother, richer dessert that’s perfect for warm days.
What if I don’t have popsicle molds?
Don’t worry if you lack popsicle molds! There are plenty of alternatives at your disposal. You can use small cups, like yogurt containers, or even ice cube trays. Just insert a wooden stick or spoon into each portion before freezing. This way, you’ll create your very own homemade ice cream bars without any special equipment. Be sure to check out tips on using kitchen items creatively here.
How long do these ice cream bars last in the freezer?
Once you’ve made your Chocolate Covered Banana Ice Cream Bars, they can last up to two weeks in the freezer if stored properly in an airtight container. This makes them a great option for meal prep or a refreshing treat whenever you’re in the mood! Just remember, the longer they sit in the freezer, the more they might lose their delightful flavor, so try to enjoy them within the first week for the best taste.
Feel free to reach out if you have more questions or need help troubleshooting—let’s make these chocolate-covered delights together!
Conclusion on Chocolate Covered Banana Ice Cream Bars
Final thoughts on indulging in homemade treats
Creating Chocolate Covered Banana Ice Cream Bars at home is not just about satisfying a sweet tooth; it’s a delightful way to unwind and express your creativity. These bars are the perfect blend of creamy banana and rich chocolate, making them an irresistible treat for both you and your guests. By choosing to craft your own desserts, you control the ingredients, ensuring they’re not only delicious but also healthier than store-bought options.
Homemade chocolates often taste better and can be customized to suit your family’s taste preferences. So, why not give it a try? You’ll savor every bite, and the smiles from family and friends will be oh-so-rewarding. For more inspiration, check out this guide on healthy snacking options. Indulging homemade treats can be a delightful habit that brings joy and creativity into your kitchen.
PrintChocolate Covered Banana Ice Cream Bars: The Best Homemade Treat
These Chocolate Covered Banana Ice Cream Bars are a delicious homemade treat that everyone will love!
- Prep Time: 10 minutes
- Cook Time: 0 minutes
- Total Time: 2 hours 10 minutes
- Yield: 10 bars 1x
- Category: Dessert
- Method: Freezing
- Cuisine: American
- Diet: Vegetarian
Ingredients
- 4 ripe bananas
- 2 cups Greek yogurt
- 1 cup dark chocolate chips
- 2 tablespoons coconut oil
- 1 teaspoon vanilla extract
Instructions
- Peel and slice the bananas.
- In a bowl, mix the Greek yogurt and vanilla extract.
- Dip each banana slice into the yogurt mixture and place on a baking sheet.
- Freeze the banana slices for about 2 hours.
- Melt the chocolate chips and coconut oil together.
- Dip the frozen banana slices in the melted chocolate and re-freeze for 30 minutes.
Notes
- Ensure bananas are ripe for better sweetness.
- Optional toppings can include crushed nuts or sprinkles.
Nutrition
- Serving Size: 1 bar
- Calories: 150
- Sugar: 10g
- Sodium: 5mg
- Fat: 9g
- Saturated Fat: 5g
- Unsaturated Fat: 3g
- Trans Fat: 0g
- Carbohydrates: 15g
- Fiber: 2g
- Protein: 3g
- Cholesterol: 0mg
Keywords: Chocolate Covered Banana Ice Cream Bars, homemade ice cream bars, banana ice cream