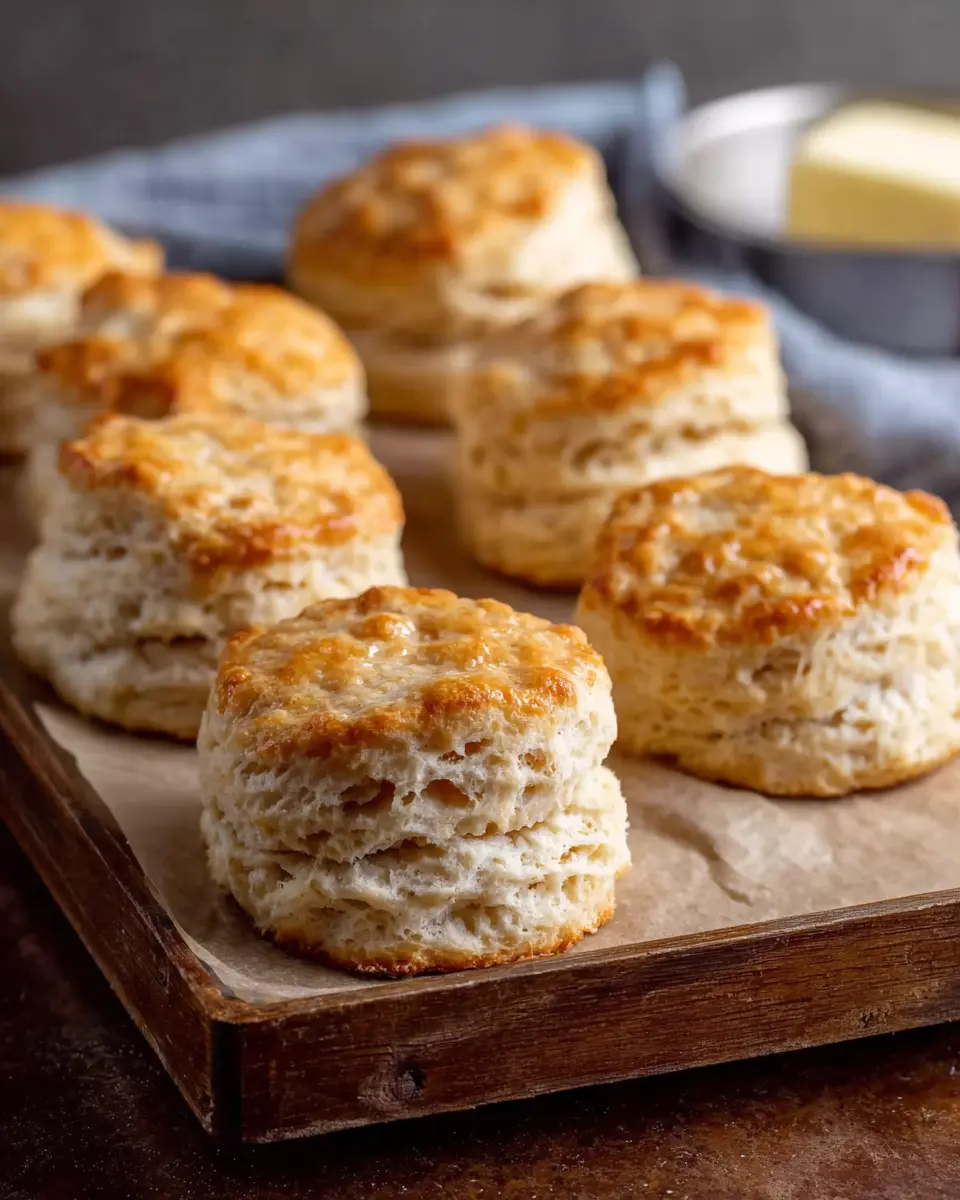
Introduction to Freezer Biscuits
When life gets busy, the last thing you want to do is spend all evening in the kitchen. Here’s where freezer biscuits become a true game-changer for young professionals. Imagine this: after a long day at work, you return home exhausted, but instead of scrambling to cook dinner or settle for takeout, you reach into your freezer and pull out a batch of perfectly prepped biscuits. In just a few minutes, your meal transforms into something warm, comforting, and homemade.
Having a stash of freezer biscuits at hand not only saves you time but also elevates your meals effortlessly. These little gems can be the foundation for a variety of dishes—from quick breakfasts with turkey bacon and eggs to easy dinners featuring chicken ham or a hearty beef stew.
Quick and Convenient
Let’s face it: most of us lead busy lives. Between work commitments, social activities, and personal projects, cooking can often feel like a monumental task. Having freezer biscuits on standby allows you to prepare delicious meals without the hassle. You can whip up everything from biscuits and gravy to biscuit sandwiches in a flash. It’s about enjoying the cooking process without feeling overwhelmed.
Meal Prep Made Simple
Prepping freezer biscuits takes little effort upfront and pays off in the long run. Making a batch on a weekend means having fresh biscuits available when you most need them. You can easily customize your biscuits by adding herbs, cheese, or spices that cater to your taste preferences. Want to know the best part? Many of these biscuits can last for a few months in the freezer while maintaining their deliciousness.
Make Cooking Fun Again
Rather than viewing cooking as a chore, having easy-to-use ingredients like freezer biscuits allows you to make meals that excite your palate and fit your schedule. Why not explore meal prep ideas or follow popular cooking blogs that can inspire you in the kitchen? You’ll find yourself looking forward to dinner instead of dreading it.
So, the next time you’re in the mood for something homemade but don’t want to spend hours in the kitchen, consider reaching for those freezer biscuits. Your future self will thank you!

Ingredients for Freezer Biscuits
Essential ingredients for perfect freezer biscuits
When it comes to crafting freezer biscuits, the right ingredients are crucial. Here’s what you’ll need for a delicious batch that pairs perfectly with a cozy breakfast or a quick snack:
- All-purpose flour: This is your biscuit’s foundation, giving it that perfect rise and fluffy texture.
- Baking powder: A key leavening agent that ensures your biscuits are light and airy.
- Salt: Just a pinch enhances the flavors, making every bite delightful.
- Cold butter: Use unsalted, cut into cubes. Cold butter creates flaky layers that make your biscuits irresistible.
- Milk: Whole or low-fat milk will do! Milk adds moisture and richness.
Optional add-ins for customization
Feel free to get creative! Here are some optional add-ins to make your freezer biscuits uniquely yours:
- Turkey bacon or Chicken ham: Crunchy bits can give your biscuits a savory twist.
- Cheddar cheese: For a cheesy delight, fold in some shredded cheese to the dough.
- Fresh herbs: Chopped chives or parsley add a burst of freshness.
- Sweet ingredients: Want something sweet? Consider adding a touch of honey or cinnamon.
Don’t hesitate to mix and match according to your taste! Customizing your freezer biscuits is half the fun. For more tips on biscuit-making, check out resources from trusted culinary sites like Epicurious or Bon Appétit.
Preparing Freezer Biscuits
Making freezer biscuits is one of the simplest and most rewarding kitchen endeavors you can embark on. Whether you need a quick breakfast solution or a delightful addition to your dinner table, these biscuits deliver reliably. Here’s a step-by-step guide to help you prepare them effortlessly.
Gather Your Ingredients
Before you start mixing, it’s essential to assemble all the necessary ingredients. This not only streamlines the process but also ensures that you won’t need to run back to the pantry in the middle of making dough. Here’s what you’ll need:
- 2 cups all-purpose flour
- 1 tablespoon baking powder
- 1/2 teaspoon salt
- 1/4 cup unsalted butter (cold, cut into small cubes)
- 3/4 cup milk (you can substitute with almond or oat milk if desired)
You might already have some of these staples in your kitchen, but be sure to check the freshness of your baking powder! For some creative alternatives, take a look at this article on easy pantry swaps if you’re missing any key items.
Mix the Dry Ingredients Like a Pro
In a large mixing bowl, combine your dry ingredients: flour, baking powder, and salt. Whisk them together until they’re evenly mixed. This step is crucial for ensuring that your freezer biscuits rise properly. Did you know that improper mixing can lead to uneven baking? So, give those ingredients a thorough blending until any lumps disappear.
Incorporate the Butter for That Flaky Texture
Next, it’s time to add the cold butter. This will give your freezer biscuits that wonderfully flaky texture everyone loves. Add the butter cubes to the flour mixture, and using a pastry cutter or your fingers, work the butter into the flour until the mixture resembles coarse crumbs.
Pro tip: When mixing the butter, be quick! The goal is to keep it cold, which prevents the biscuits from becoming too dense. You want to maintain that light and airy texture.
Bring the Dough Together
Once the butter is incorporated, create a well in the middle of the mixture and pour in the milk. Gently stir the liquid into the dry ingredients. Here’s the catch—don’t over-mix! Overworking the dough can lead to tough biscuits. You’re looking for just enough mixing to combine the ingredients until it forms a cohesive dough.
If you find the dough is a bit too sticky, you can sprinkle a little extra flour—but be cautious! Stickiness is often a sign of perfectly moist biscuits.
Roll and Cut the Biscuits
Now for the fun part! Lightly flour a clean surface and turn out your dough. Gently roll it out to about 1-inch thickness. With a round cutter (or even a glass!), cut out your biscuits. Be sure to push straight down without twisting to keep them from sealing up.
Make sure to place the cut biscuits on a parchment-lined baking sheet, leaving a little space between each one. Who doesn’t love aesthetically pleasing food? You’ll want them to have room to expand beautifully when they bake.
Freeze the Biscuits for Later Use
Once you’ve cut out all your biscuits, it’s time for the freezer! Arrange them on the baking sheet and pop them in the freezer for about one hour. Once frozen, you can transfer them to a resealable freezer bag for longer storage. This simple freezing method keeps them perfect for baking whenever you’re ready to indulge!
When it’s time to bake, there’s no need to thaw. Just bake straight from the freezer and add a few extra minutes to the baking time.
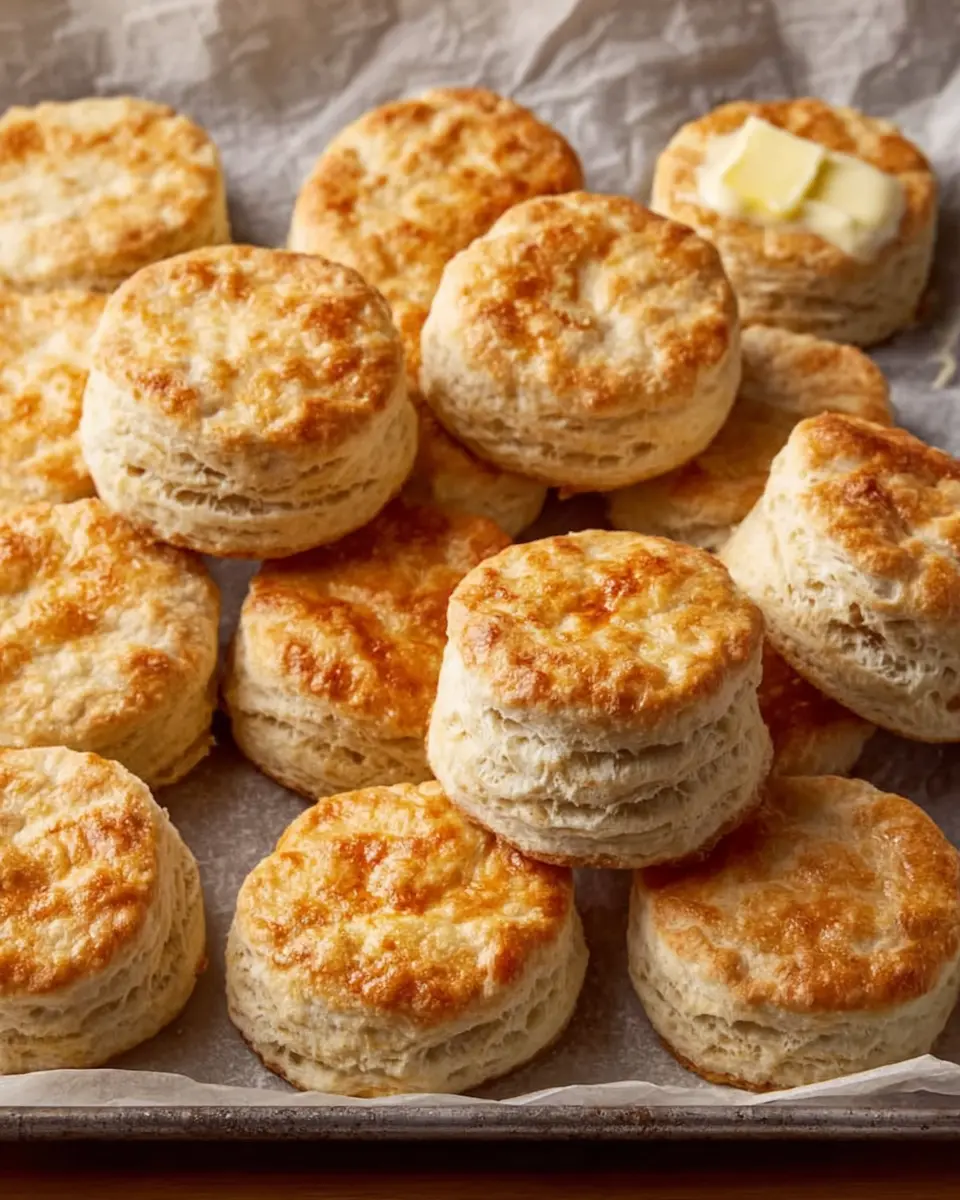
Now you’re all set to enjoy homemade freezer biscuits at your convenience! Whether you pair them with turkey bacon in the morning or serve them alongside a comforting stew, there’s no wrong way to enjoy these delicious treats. Happy baking!

Variations on Freezer Biscuits
Freezer biscuits are a versatile staple that can easily adapt to various flavors and ingredients. Whether you’re in the mood for something savory, herbaceous, or sweet, there’s a freezer biscuit variation perfect for you.
Cheesy Freezer Biscuits
If you love cheese, you’re in for a treat! Adding shredded cheese to your freezer biscuits takes them to a whole new level. Just mix in about a cup of sharp cheddar or your favorite cheese into the dough. The result? Flaky, cheesy goodness that pairs beautifully with soups or makes an excellent stand-alone snack. Consider a blend of different cheeses, such as mozzarella for stretch or parmesan for sharpness, to play with textures and flavors.
Herb-Infused Freezer Biscuits
Elevate your simple freezer biscuits with fresh or dried herbs. A tablespoon of rosemary, thyme, or chives can transform these biscuits into a flavorful accessory for any meal. Think about the dishes you’re serving: buttery herb biscuits can complement a roast chicken or even a vegetarian pasta dish beautifully. A touch of garlic powder will also enhance those savory notes.
Sweet Freezer Biscuits with Fruit
For a sweet twist, incorporate dried or fresh fruits like cranberries, blueberries, or even chunks of peaches. These sweet freezer biscuits are perfect for breakfast or a quick dessert. Drizzle with honey or your favorite syrup for an extra treat. Mix in a little sugar and a hint of cinnamon for a delightful blend. Did you know that incorporating fruit can also add fiber and vitamins to your snack?
Experimenting with these variations lets you customize your freezer biscuits to suit any occasion. For more tips on perfecting your biscuit game, check out King Arthur Baking.
Cooking tips and notes for Freezer Biscuits
Ensuring perfect texture every time
To achieve fluffy and tender freezer biscuits, focus on your mixing technique. When combining the ingredients, resist the urge to over-mix; a few lumps are okay! Use cold ingredients—especially butter and buttermilk—as this helps create that beloved flaky texture. A good practice is to keep your butter in the freezer for a bit before grating it into the dry ingredients. Sprinkling a bit of flour on your workspace while rolling out the dough can help prevent sticking, making the process smoother.
Troubleshooting common biscuit issues
Have you ever faced dense or soggy freezer biscuits? Here’s how to avoid those pitfalls:
- Dense biscuits? Double-check your baking powder’s expiration date; it might be time for a fresh container. A good rule of thumb is to use about 1 tablespoon of baking powder for every cup of flour.
- Soggy bottoms? Ensure your baking sheet is thoroughly preheated before laying down the biscuits. This helps them rise quickly, creating that delightful texture.
By following these tips, you’re sure to impress with your cheerful batch of freezer biscuits! For more handy insights, check out The Kitchn’s guide to biscuit-making.
Serving suggestions for Freezer Biscuits
Pairing Biscuits with Breakfast Dishes
Freezer biscuits are a versatile breakfast option that can elevate your morning routine. Pair them with scrambled eggs for a protein-packed meal or a side of Turkey bacon for that classic breakfast feel. You could also enjoy them slathered with butter and a drizzle of honey, or fill them with your favorite preserve for a quick sweet treat. Combining textures and flavors is key, so don’t shy away from adding fresh fruit or yogurt for a refreshing side.
Creative Ways to Enjoy Biscuits for Lunch or Dinner
Don’t limit your freezer biscuits to just breakfast! These delightful treats can easily be incorporated into your lunch or dinner plans. Use them as a base for a savory sandwich with Chicken ham or your choice of sliced Beef. You can also create a hearty biscuit casserole, layering them with vegetables and cheese, topped with gravy or broth for extra flavor. The beauty of freezer biscuits is their flexibility—experiment with your favorite ingredients and sauces! For more ideas, you might find inspiration from sites like Food Network or Taste of Home.
In every meal, your freezer biscuits can shine and bring comfort food vibes, making your dining experience a little more special.
Time breakdown for Freezer Biscuits
Preparation time
When it comes to whipping up tasty freezer biscuits, you’ll spend about 10 to 15 minutes prepping your ingredients. This includes gathering your flour, baking powder, and whatever savory additions like turkey bacon or chicken ham you choose to include. Enjoy this time by putting on your favorite podcast or playlist to truly make the process enjoyable!
Cooking time
Once you’re ready to bake, set aside 20 to 25 minutes for cooking. The aroma of freshly baked biscuits will fill your kitchen, making it feel warm and inviting. It’s a perfect chance to catch up on an episode of your favorite series while you wait.
Total time
In total, you’re looking at about 30 to 40 minutes from start to delicious finish. This makes freezer biscuits not only quick to prepare but also an easily repeatable recipe perfect for busy young professionals. Plus, these biscuits freeze beautifully! You can learn more about freezing techniques at the USDA Food Safety site.
Nutritional Facts for Freezer Biscuits
When it comes to freezer biscuits, understanding their nutritional profile is essential, especially for busy young professionals seeking convenient yet wholesome meal options.
Calories per Biscuit
Each freezer biscuit contains approximately 150 calories, making it a satisfying yet light addition to your meals. This calorie count ensures you can enjoy a delicious treat without the guilt, perfect for breakfast or as a snack.
Key Nutrients
In addition to low calories, these biscuits pack a nutritional punch:
- Protein: About 4 grams per biscuit, helping to keep you full longer.
- Carbohydrates: Roughly 24 grams, providing a quick source of energy for your day.
- Fiber: A healthy dose of 1 gram, contributing to digestive health.
- Healthy Fats: Contains about 6 grams, thanks to ingredients like butter or coconut oil.
To dive deeper into nutritious eating habits, consider checking out the USDA’s Dietary Guidelines, which can provide more insight into balancing meals.
Whether you’re pairing them with Turkey Bacon or a spread of jam, these freezer biscuits can easily fit into a balanced diet and make meal prep a breeze!
FAQs about Freezer Biscuits
As you embark on your culinary journey of making delicious freezer biscuits, you might have questions. Let’s address a few common ones to make your biscuit experience even smoother.
What is the best way to freeze biscuits?
Freezing your freezer biscuits is a fantastic way to have fresh, warm biscuits at your fingertips anytime! To freeze, first bake the biscuits and allow them to cool completely. Then, place them in a single layer on a baking sheet and pop them in the freezer until solid—this prevents them from sticking together. Once frozen, transfer the biscuits into airtight freezer bags, squeeze out as much air as possible, and label them with the date. For optimal flavor, enjoy them within 2 to 3 months. Interested in a detailed guide? Check out this freezer-friendly tips.
How do I reheat frozen biscuits?
Reheating your freezer biscuits is simple! Preheat your oven to 350°F (175°C). Place the biscuits on a baking sheet and cover them loosely with aluminum foil to prevent them from browning too much. Heat for about 15-20 minutes, or until warmed through. Alternatively, you can use a microwave for a quicker option, heating them on a microwave-safe plate for 30-45 seconds. Just remember, the oven method tends to keep them fluffier!
Can I make gluten-free freezer biscuits?
Absolutely! Gluten-free freezer biscuits can be creamy and delightful. Look for gluten-free baking mixes that suit your palate, or try alternative flours like almond or coconut. Just remember to adjust the liquid slightly, as gluten-free flours often absorb moisture differently. For more tips on gluten-free baking, check out these resources.
Now you’re all set to enjoy some delightful freezer biscuits! Happy baking!
Conclusion on Freezer Biscuits
In our fast-paced world, making and freezing biscuits offers a delightful solution for busy lifestyles. Imagine having a stash of freezer biscuits ready to pop in the oven whenever hunger strikes! It’s a simple way to enjoy homemade goodness without the fuss of preparation every time you crave them.
Key Benefits of Freezer Biscuits
- Time-Saving: Prepare a big batch, freeze, and bake as needed, freeing up time on hectic days.
- Freshness: Enjoy the taste of freshly baked biscuits at any moment.
- Versatility: Customize your biscuits with add-ins like turkey bacon or chicken ham for a tasty twist.
With these benefits in mind, why not start your baking journey today? For more tips on meal prepping and easy recipes, check out AllRecipes or Food Network for inspiration. You’ll never look at biscuit making the same way again!
PrintFreezer Biscuits: Easy, Delicious Recipes for Quick Meals

Learn how to make easy and delicious freezer biscuits that are perfect for quick meals!
- Prep Time: 10 minutes
- Cook Time: 12 minutes
- Total Time: 22 minutes
- Yield: 12 biscuits 1x
- Category: Baking
- Method: Baking
- Cuisine: American
- Diet: Vegetarian
Ingredients
- 2 cups all-purpose flour
- 1 tablespoon baking powder
- 1 teaspoon salt
- 1/4 cup unsalted butter, cold and cubed
- 3/4 cup milk
Instructions
- Preheat your oven to 450°F (230°C).
- In a large bowl, mix together flour, baking powder, and salt.
- Cut in cold butter until the mixture resembles coarse crumbs.
- Add milk and stir until just combined.
- Turn the dough out onto a floured surface and knead gently.
- Roll out the dough to 1-inch thickness and cut with biscuit cutter.
- Place biscuits on a baking sheet and bake for 10-12 minutes or until golden brown.
Notes
- For extra flavor, you can add herbs or cheese to the biscuit mix.
Nutrition
- Serving Size: 1 biscuit
- Calories: 150
- Sugar: 0g
- Sodium: 300mg
- Fat: 6g
- Saturated Fat: 4g
- Unsaturated Fat: 2g
- Trans Fat: 0g
- Carbohydrates: 20g
- Fiber: 0g
- Protein: 3g
- Cholesterol: 15mg
Keywords: Freezer Biscuits