Introduction to Japanese Katsu Bowls
When you’re craving something comforting and delicious, Japanese katsu bowls often come to mind as the perfect solution. These hearty meals center around a crispy, breaded cutlet—usually beef and sometimes topped with an array of fresh vegetables and warm rice. They’re not just tasty; they embody a blend of textures and flavors that make each bite satisfying.
Why are Katsu Bowls a Go-To for Homemade Meals?
One major reason katsu bowls are beloved in home kitchens is their versatility. You can easily switch up ingredients based on your preferences or what you have on hand. Whether you lean towards beef, turkey bacon, or even a vegetarian option like eggplant, the possibilities are endless. This flexibility allows you to experiment and discover what combinations you love most.
Moreover, these bowls are quick and easy to prepare, making them perfect for busy weeknights or weekend meal prep. The usual process of breading and frying the cutlet can be done in under 30 minutes, and once your meat is cooked, you simply assemble your bowl with rice and toppings. What could be easier? For a deeper dive into katsu’s history and its cultural significance, check out this detailed article from Japan Travel.
In terms of nutrition, katsu bowls can be quite balanced. By layering fresh veggies like shredded cabbage, carrots, and even pickled radish, you’re not only adding color but also extra nutrients to your meal. A colorful plate is often an indicator of a nutritious one. You might be surprised that by pairing katsu with brown rice instead of white, you’ll increase the fiber content significantly, making your meal even healthier.
If you’re feeding a crowd or just want to meal prep, katsu bowls provide an excellent base. Consider hosting a “build-your-own katsu bowl” night, where everyone can customize their meals and cater to their tastes. It’s a fun way to enjoy cooking while also embracing the communal aspect that food often brings.
So, why not give Japanese katsu bowls a try? Your taste buds—and your friends or family—will thank you!
Ingredients for Japanese Katsu Bowls
Essential Ingredients for the Perfect Katsu
To create mouthwatering Japanese Katsu bowls, you’ll need a few key ingredients that come together to deliver that delightful crunch and rich flavor. Start with:
- Beef cutlets: Tenderized beef works best—choose sirloin or ribeye for great results.
- Panko breadcrumbs: These Japanese-style breadcrumbs are light and crispy, giving your katsu that signature crunch.
- Flour and eggs: For dredging, use all-purpose flour and large eggs to create a delicious coating.
- Japanese curry sauce: This brings warmth and depth to your bowl. You can find instant curry sauces for convenience.
Optional Add-ins for a Flavor Boost
While the essentials are crucial, don’t hesitate to jazz up your Japanese Katsu bowls with a few optional add-ins:
- Turkey bacon: Crispy, flavorful, and a nice touch to complement your katsu.
- Chicken ham: A lighter protein alternative can enhance both taste and texture.
- Fresh vegetables: Add a mix of steamed broccoli, shredded carrots, or sliced radishes for color and crunch.
Getting these ingredients ready is a great first step—just imagine the delicious aroma filling your kitchen! For more tips on ingredient sourcing, you may want to check out Just One Cookbook, a fantastic resource for authentic Japanese cuisine.
Step-by-step Preparation of Japanese Katsu Bowls
Creating Japanese katsu bowls at home is a delightful culinary adventure. Let’s break it down step-by-step to ensure you achieve that authentic flavor and texture that makes Katsu so beloved!
Prep the Rice for a Fluffy Finish
The foundation of any great katsu bowl is, of course, the rice. For perfectly fluffy Japanese rice:
- Choose the right rice: Use short-grain Japanese rice, known for its sticky texture and subtle sweetness.
- Rinse the rice: Place your rice in a fine mesh strainer and rinse under cold water until the water runs clear. This removes excess starch and prevents the rice from becoming gummy.
- Measure water: Use a water-to-rice ratio of about 1.2:1. So, if you’re cooking one cup of rice, use about 1.2 cups of water. Adjust according to your preference!
- Cook the rice: If you have a rice cooker, use that for a hassle-free cooking experience. If you’re using the stove, bring the water to a boil, then lower the heat and cover. Let it simmer for about 18 minutes, and let it rest covered for another 10 minutes.
Fluffy rice sets the stage for your Japanese katsu bowls, holding up beautifully under the crispy katsu and tangy sauce.
Prepare the Chicken for Frying
Now let’s move on to the star of the show: the chicken (or beef, depending on your preference).
- Choose your cut: For katsu, boneless chicken thighs or chicken breast works great. If you’re feeling adventurous, you can also go for beef.
- Pound the meat: Bring out your inner chef by gently pounding the chicken to an even thickness (about 1/2 inch thick). This helps it cook evenly and gives that delicious tender bite.
- Season generously: Before breading, season both sides with salt and pepper. This is a crucial step for flavor.
Want a tip? Flavor improvement through brining or marinating in a soy sauce mix for a few hours can elevate your katsu to the next level.
Set Up Your Breading Station Like a Pro
Breading can seem a bit tricky, but once you set up a proper station, it’ll feel like a breeze.
- Prepare three bowls: One for flour, one for beaten eggs, and one for panko breadcrumbs. The panko gives you that signature crunch!
- Season each layer: Mix a little salt and pepper into the flour and panko for added flavor.
- Dredging technique: Start by coating the chicken in flour. Shake off excess, then dip it in the egg, and finally cover it in panko, pressing gently to ensure it sticks.
Having everything organized helps you execute this step quickly while keeping a clean workspace.
Frying to Perfection — Achieving the Crispy Coating
Time to fry your katsu to crispy perfection!
- Heat your oil: Use a good amount of vegetable oil in a deep skillet or pot. Aim for around 350°F (175°C) for that ideal frying temperature.
- Fry in batches: Carefully place the breaded chicken in the oil without overcrowding the pan. This ensures even cooking and a crispy texture.
- Cook until golden: Fry for about 4-5 minutes on each side, or until it’s beautifully golden brown. You want that tantalizing crunch that makes you excited for your Japanese katsu bowls!
Using a thermometer can help maintain consistent oil temperature for optimal frying.
Mixing Up the Perfect Sauce
No katsu bowl is complete without a delicious sauce!
- Basic sauce: Combine soy sauce, mirin, and a hint of sugar in a small bowl. When combined, it creates a balance of salty, sweet, and umami flavors!
- Add extras: Feel free to incorporate garlic, ginger, or even a splash of sesame oil for a unique twist.
This sweet and savory sauce ties all the flavors together, making each bite truly irresistible.
Serving it All Together Nicely
Now for the big finish!
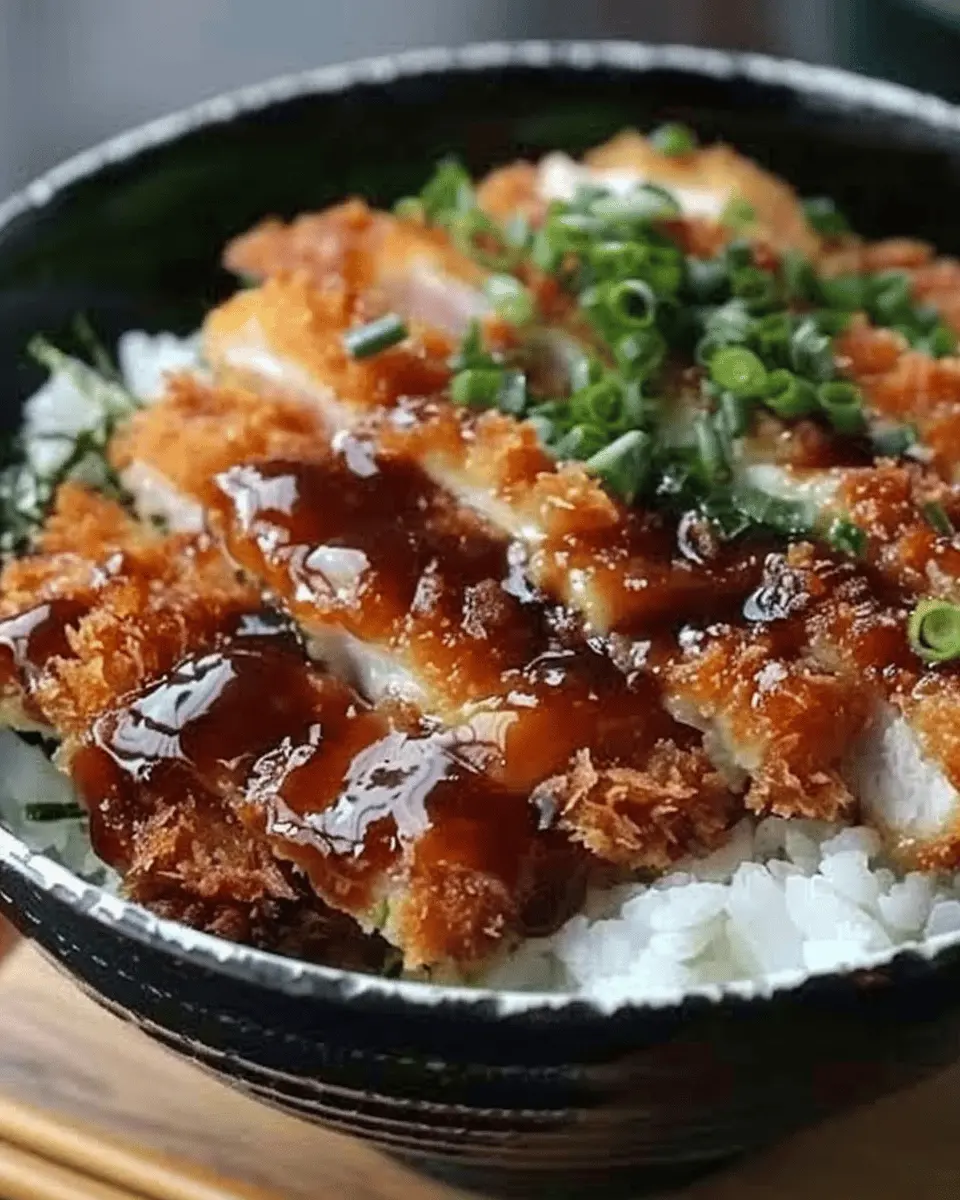
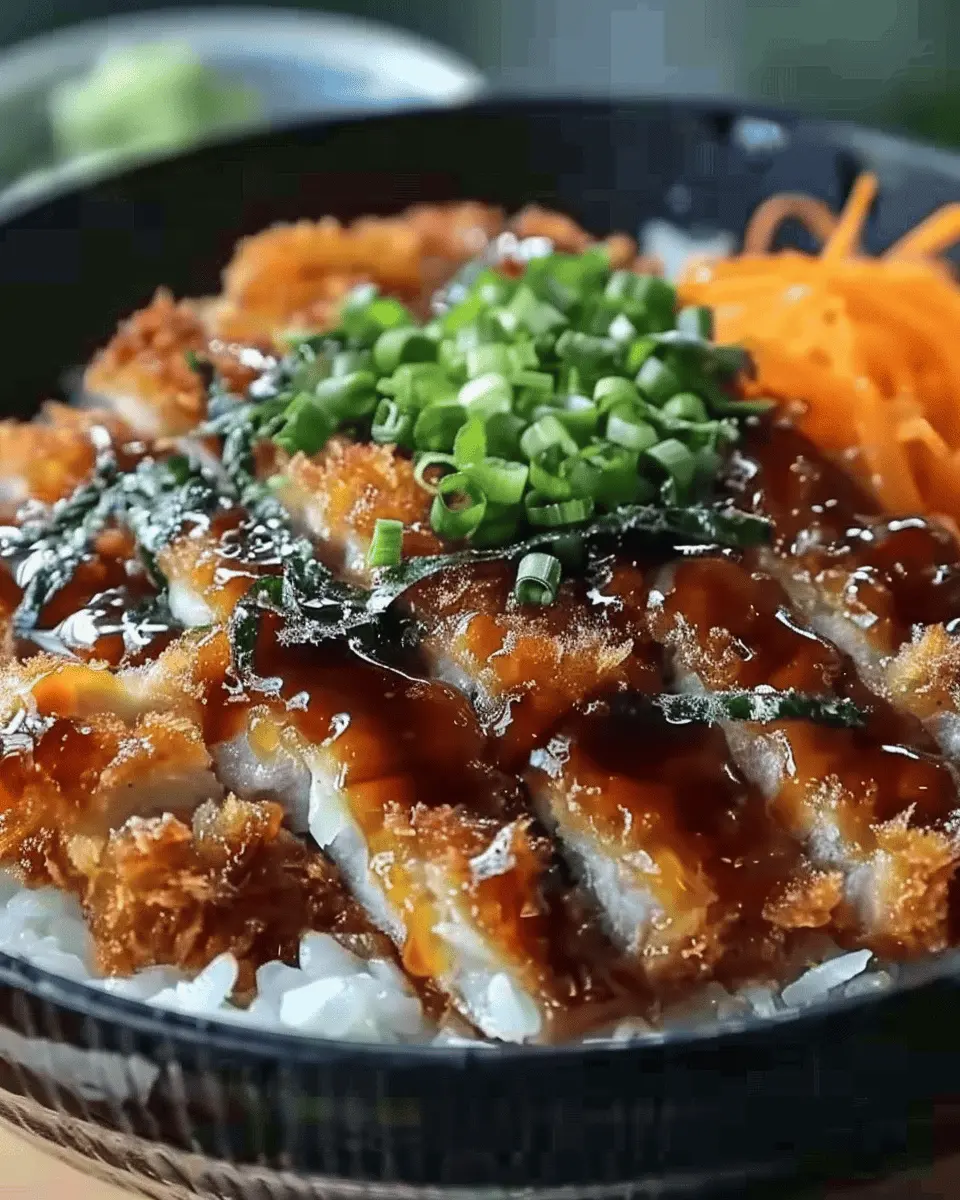
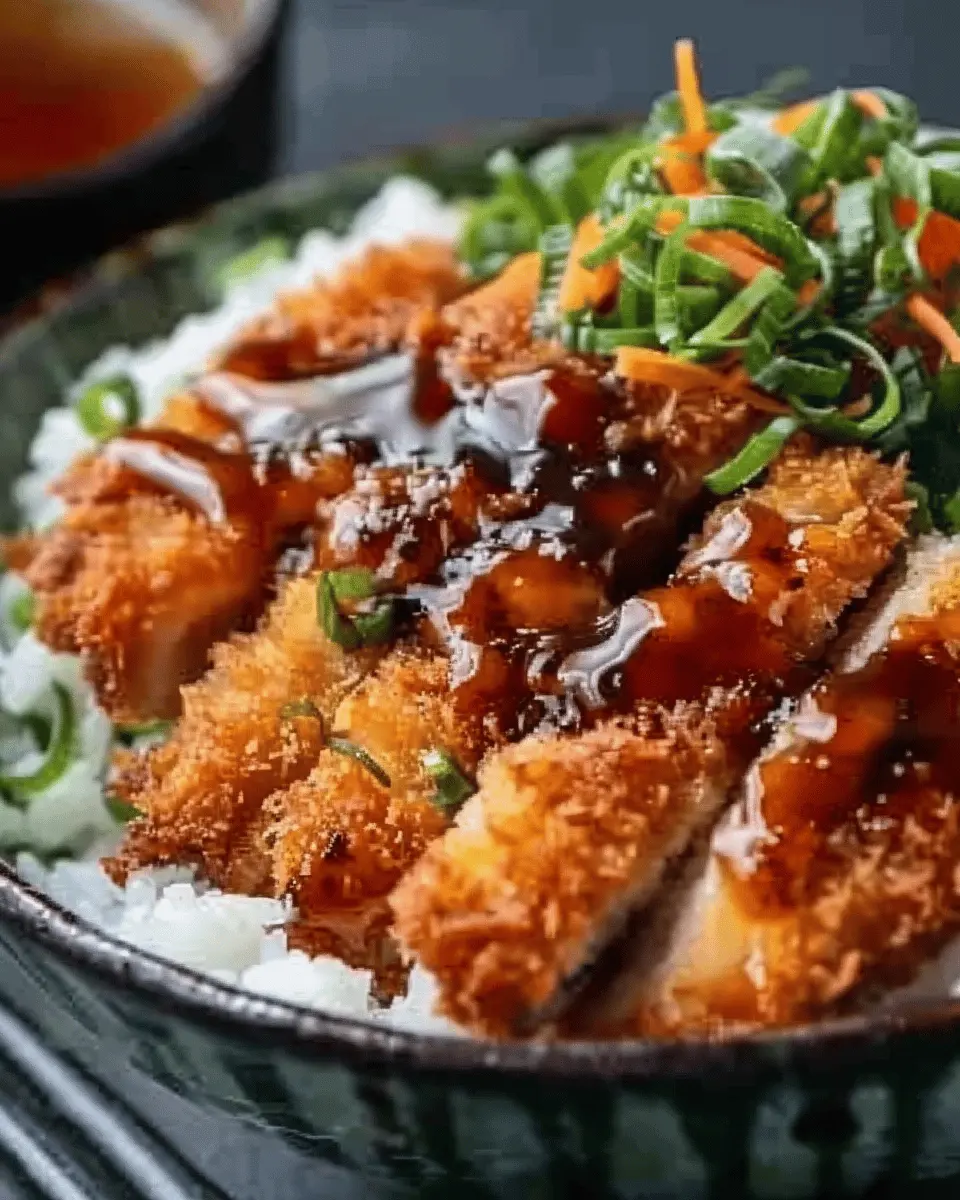
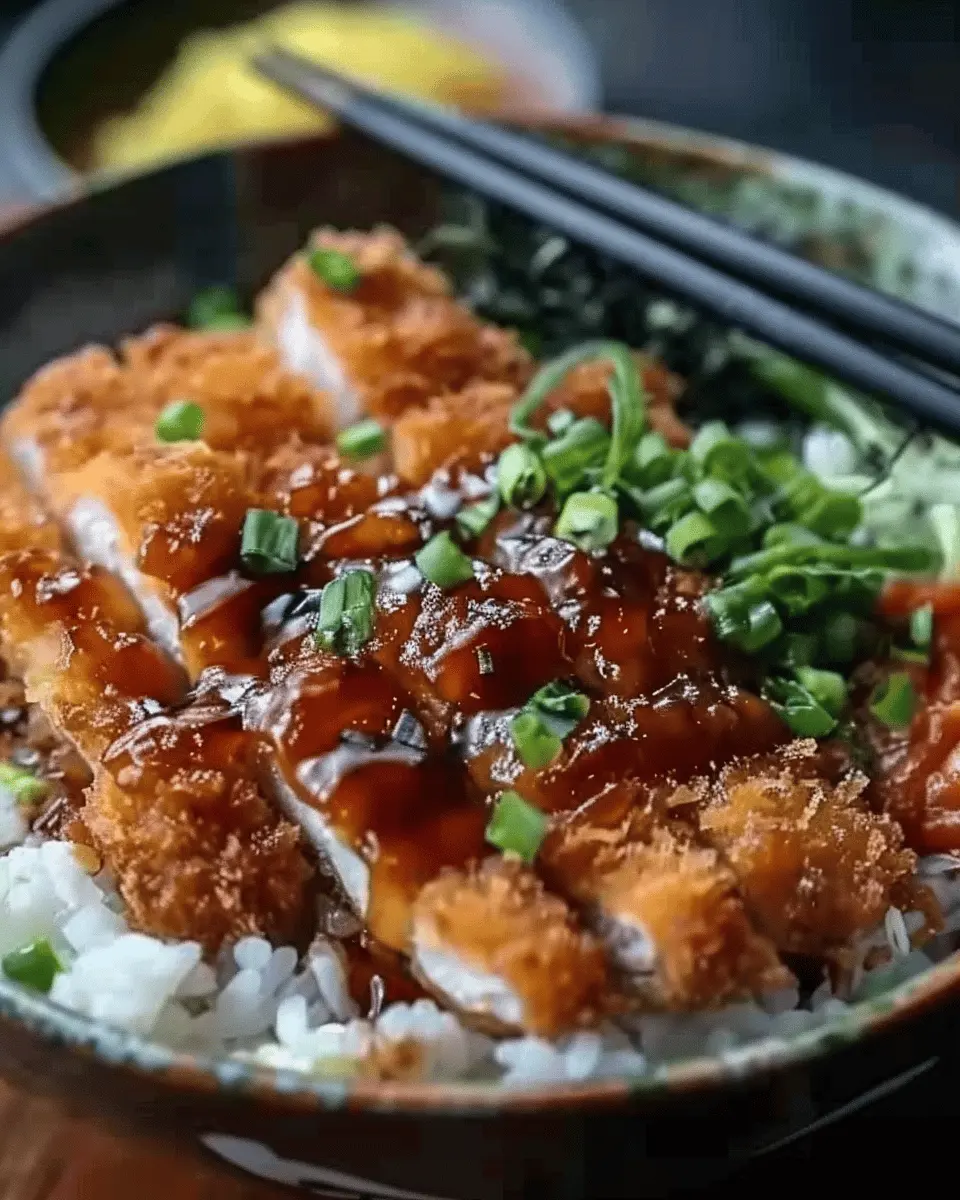
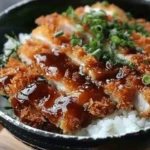
- Assemble your bowls: Start with a generous scoop of rice as your base. Slice the crispy chicken into strips and lay it atop the rice.
- Drizzle with sauce: Generously drizzle your sauce over the katsu and rice.
- Add toppings: Garnish with sliced green onions, sesame seeds, and even a side of shredded cabbage for a crunchy contrast.
Voila! Your homemade Japanese katsu bowls are ready to impress. Whether you’re indulging yourself on a cozy night in or serving friends for a special occasion, this dish will surely delight. So, gather your ingredients, and let’s make some kitchen magic happen! Happy cooking!
For more ideas or variations, check out Just One Cookbook for authentic Japanese recipes that can elevate your culinary skills!
Variations on Japanese Katsu Bowls
Classic Chicken Katsu Bowls
When you think of Japanese katsu bowls, classic chicken katsu often comes to mind. Tender, juicy chicken breast is coated in crispy panko breadcrumbs, then served over a bed of rice with a drizzle of savory tonkatsu sauce. This dish is both comforting and satisfying! Adding some fresh shredded cabbage on the side not only enhances the flavor but also brings a delightful crunch. Don’t hesitate to experiment with sides like pickled vegetables or a soft-boiled egg to truly elevate your bowl.
Beef Katsu Bowls for a Different Flavor
If you’re looking to switch things up, consider using beef instead of chicken. Beef katsu offers a unique twist on the traditional dish, bringing a richer flavor profile. Simply follow the same breading and frying process, but opt for a cut like flank steak or sirloin to achieve that melt-in-your-mouth texture. As a tip, marinate the beef in a bit of soy sauce and ginger beforehand for some added depth. Serve this over rice with a splash of tonkatsu sauce and some sautéed greens for a well-rounded meal.
Vegetarian Katsu Options to Consider
Don’t count out the vegetarian side of Japanese katsu bowls! You can easily substitute chicken or beef for plant-based options like eggplant, zucchini, or tofu. Just slice your chosen veggie thinly, coat it in panko, and fry until golden brown. For extra flavor, try adding a layer of miso paste on your protein before breading. Pair your veggie katsu with rice and a tangy dipping sauce made from soy sauce and sesame oil, and you’ve got a meal that even meat-lovers will crave.
For more ideas and tips on Katsu creation, check out this source on Japanese cuisine.
Get ready to dive into these variations of Japanese katsu bowls, tailoring them to your taste and dietary preferences!
Cooking Tips and Notes for Japanese Katsu Bowls
Ensuring Crispy Texture Every Time
The hallmark of Japanese Katsu Bowls is their irresistibly crispy texture. For perfect results, don’t skip the double breading process! Dredging your beef in flour, dipping it in eggs, and coating it with panko breadcrumbs creates an epic crunch. As a personal tip, make sure your oil is at the right temperature—around 350°F (175°C)—to ensure that the katsu fries evenly without absorbing too much oil. You can easily test this by dropping a small piece of bread in; if it sizzles immediately, you’re good to go!
Ingredient Substitutions For Unique Flavors
Feeling adventurous? Swap out traditional ingredients for exciting twists! If you’re in the mood for something different, replace pork with juicy chicken or even crisp turkey bacon for a lighter option. For a kick, consider adding finely chopped green onions or a touch of garlic to your breadcrumbs. Don’t hesitate to explore sauces too; homemade tonkatsu sauce can easily be spiced up by blending in some chili paste or a splash of soy sauce for extra depth. Check out NHK World for more regional sauce variations and ideas!
By embracing these cooking tips, your Japanese Katsu Bowls will be fresh, fun, and undoubtedly delicious each time!
Serving Suggestions for Japanese Katsu Bowls
Pairing Sides to Enhance Your Katsu Experience
When you think of Japanese katsu bowls, the right sides can elevate your meal to an entirely new level. Consider these tasty accompaniments:
- Steamed Rice: The classic base for any katsu bowl. Perfect for soaking up all that delicious sauce.
- Miso Soup: A warm, comforting side that complements the crispiness of katsu.
- Pickled Vegetables: Add a refreshing crunch and acidity to balance the richness. Try tsukemono (Japanese pickles) for authenticity!
- Salad: A light side salad with a sesame dressing can bring freshness to your plate.
Creative Presentation Ideas for Hosting
When hosting friends, the aesthetics of your Japanese katsu bowls can make all the difference. Here are some fun ideas:
- Layer It Up: Serve your katsu on top of a bed of colorful veggies like shredded cabbage or carrots.
- Garnish Thoughtfully: A sprinkle of sesame seeds or sliced green onions can add a beautiful pop of color.
- Stylish Bowls: Use unique ceramic bowls to enhance the dining experience; consider browsing shops like Etsy for artisanal options.
With these suggestions, your katsu bowls will not only taste great but also impress your guests! For more tips on food presentation, check out this guide on engaging meal setups from Good Housekeeping.
Time Breakdown for Japanese Katsu Bowls
Preparation Time
Making Japanese Katsu Bowls starts with some chopping and marinating—it typically takes about 20 minutes. Use this time to gather your ingredients, slice your beef, and prepare the breading. Prepping ahead can streamline the cooking process, making it enjoyable rather than rushed!
Cooking Time
The actual cooking will take around 15-20 minutes. This includes frying your beef to crispy perfection. Be sure to keep an eye on the temperature for that ideal golden crust that defines a great katsu.
Total Time
Bringing it all together, you’re looking at a total of about 40-45 minutes from start to finish. Perfect for a weeknight dinner! A quick tip: while your katsu is frying, you can whip up some fresh veggies or rice on the side for a complete meal. Interested in more details? Check out this authentic cooking guide for expert insights!
Nutritional Facts for Japanese Katsu Bowls
Caloric Information Per Serving
When enjoying Japanese katsu bowls, it’s good to know what you’re putting on your plate. A typical serving contains around 600-700 calories. This varies depending on the portion size and the specific ingredients used, especially if you’re opting for different proteins like beef or chicken ham.
Key Nutrients to Note
Eating a balanced meal is essential, and katsu bowls can provide a delightful mix of nutrients:
- Protein: Key for muscle repair and growth, with about 30-40g per serving.
- Carbohydrates: Mainly from rice, providing energy and essential fiber.
- Fats: Depending on your choice of breading, expect 20-30g of fat; using lean cuts and careful frying can help in managing this.
Don’t forget to complement your bowl with fresh vegetables for added vitamins and minerals. For detailed nutritional insights, check out Healthline or NutritionData, as they offer great resources on understanding food labels.
Personal Note
As someone who loves to cook, I find that making Japanese katsu bowls at home not only allows me to customize the flavors but also ensures I’m making a nutritious meal that fits my dietary preferences. It’s all about balance—indulging while being mindful of what your body needs!
FAQs about Japanese Katsu Bowls
What can I substitute for panko breadcrumbs?
If you don’t have panko breadcrumbs on hand, fear not! You can still achieve that delightful crunch in your Japanese Katsu Bowls. Here are some substitutes:
- Regular breadcrumbs: If you have these, they work well, though the texture may be slightly different.
- Crushed cornflakes: These add a nice crispness that mimics panko quite well.
- Oat flour: For a healthier twist, grind oats in a blender, but keep in mind this won’t give you the same crunch.
Experiment with these options and see what you prefer!
How do I store leftovers for freshness?
Storing leftovers can be tricky when it comes to maintaining that crispy texture, but here’s the best way to do it:
- Refrigeration: Place your leftover katsu in an airtight container and store it in the fridge. It should last for up to three days.
- Reheating: To revive that crispiness, reheat in the oven at a low temperature or in an air fryer. Avoid microwaving, as it can make the katsu soggy.
Keeping your Japanese Katsu Bowls fresh will ensure they’re just as delicious on round two!
Can I make this dish gluten-free?
Absolutely! You can create a fantastic gluten-free version of Japanese Katsu Bowls by opting for:
- Gluten-free breadcrumbs: Many brands offer these, and they work well as a panko substitute.
- Rice flour or almond flour: These can help with the breading, adding flavor and a unique texture.
This way, everyone can enjoy the deliciousness of katsu, regardless of dietary restrictions. For more details on gluten-free cooking, check out resources from Celiac Disease Foundation for tips and tricks.
By incorporating these simple adaptations, you can feel confident in creating an authentic katsu experience right at home!
Conclusion on Japanese Katsu Bowls
Recap of Why Katsu Bowls Are Great for Home Cooking
In summary, Japanese katsu bowls are a fantastic choice for home cooking, bringing the authentic taste of Japan right to your kitchen. They combine crispy, tender beef cutlets with a savory sauce, served over fluffy rice—comfort food at its finest! Easy to customize with your favorite veggies or proteins, they cater to diverse dietary preferences and make for a satisfying meal any night of the week. Plus, preparing this dish can be a fun, creative project, perfect for sharing with friends or family. If you want to dive deeper into Japanese cuisine, check out resources like Nikkei Cuisine for inspiration and techniques. Embrace the joy of cooking with these delightful bowls!
PrintJapanese Katsu Bowls: An Easy Guide to Authentic Homemade Delight
Discover the art of making authentic Japanese Katsu bowls at home with this easy guide, highlighting key ingredients and simple cooking techniques.
- Prep Time: 15 minutes
- Cook Time: 15 minutes
- Total Time: 30 minutes
- Yield: 4 servings 1x
- Category: Main Dish
- Method: Frying
- Cuisine: Japanese
- Diet: Gluten-Free
Ingredients
- 1 pound boneless chicken thighs
- 1 cup all-purpose flour
- 2 large eggs
- 2 cups panko breadcrumbs
- 1 teaspoon salt
- 1 teaspoon pepper
- 1 cup vegetable oil
- 2 cups cooked rice
- 1/4 cup tonkatsu sauce
Instructions
- Season chicken thighs with salt and pepper.
- Set up a breading station with flour, eggs, and panko.
- Dredge chicken in flour, dip in eggs, and coat with panko.
- Heat oil in a pan over medium heat. Fry chicken until golden brown and cooked through, about 5-7 minutes per side.
- Once cooked, let chicken rest for a few minutes, then slice.
- Serve sliced chicken over a bed of rice, drizzled with tonkatsu sauce.
Notes
- For extra flavor, marinate chicken in soy sauce for an hour before cooking.
Nutrition
- Serving Size: 1 bowl
- Calories: 500
- Sugar: 5g
- Sodium: 1000mg
- Fat: 20g
- Saturated Fat: 3g
- Unsaturated Fat: 15g
- Trans Fat: 0g
- Carbohydrates: 60g
- Fiber: 2g
- Protein: 30g
- Cholesterol: 150mg
Keywords: Japanese Katsu, Katsu Bowls, Homemade Katsu