Outline for Mini Cannoli Cups
Creating mini cannoli cups is not just a feast for the eyes; it’s an experience that whisks you away to the bustling streets of Italy, where the aroma of freshly baked pastries fills the air. Imagine hosting a gathering with friends, transforming a classic dessert into bite-sized delights that are both fun and elegant.
In this outline, we’ll uncover everything you need to know to whip up these delicious treats. From ingredients to preparation, let’s make this journey as enjoyable as indulging in the final product.
Introduction to Mini Cannoli Cups
The allure of mini cannoli cups lies in their versatility and ease of preparation. Unlike traditional cannoli, which can sometimes feel intimidating, these mini versions allow for creativity and personal touches.
- History: Cannoli originate from Italy, traditionally enjoyed during festive times like Carnival. The word “canno” means tube in Italian, referring to the pastry’s shape.
- Modern Interpretation: Today, many enjoy these delightful pastries year-round. With mini cannoli cups, you get all the flavors of this Italian classic in a simpler format.
To dive deeper into the culture behind these treats, you might find this article on Italian Desserts: A Sweet History quite enlightening.
Essential Ingredients for Mini Cannoli Cups
Let’s talk ingredients. The secret to making irresistible mini cannoli cups starts here:
-
For the Pastry Shells:
-
1 cup all-purpose flour
-
2 tablespoons unsweetened cocoa powder (optional for a chocolate twist)
-
2 tablespoons sugar
-
1/4 teaspoon salt
-
1/2 teaspoon baking powder
-
3 tablespoons butter, softened
-
1 egg
-
1 teaspoon vanilla extract
-
For the Filling:
-
1 cup ricotta cheese (the key ingredient!)
-
1/2 cup powdered sugar
-
1 teaspoon vanilla extract
-
Mini chocolate chips or candied fruit for garnish
These ingredients reflect what many experts recommend for a rich and creamy filling, while the shells provide the perfect crunchy contrast.
But why use ricotta? Ricotta cheese is favored for its creamy texture and mild flavor, making it ideal for balancing sweet fillings in desserts. For further reading on types of cheese used in Italian desserts, check out this insightful article from Serious Eats.
Preparing the Mini Cannoli Cups
Now that we have our ingredients ready, let’s get into the heart of making these delightful treats.
Making the Pastry Shells
-
Combine the Dry Ingredients: Start by whisking together flour, cocoa powder, sugar, salt, and baking powder in a bowl.
-
Add the Wet Ingredients: Incorporate the softened butter and mix until crumbly. Then add the egg and vanilla extract, mixing until a dough forms.
-
Chill the Dough: Wrap the dough in plastic wrap and refrigerate for at least 30 minutes. This step is crucial, as it makes the dough easier to roll out!
-
Shape and Bake: Roll the dough into a thin sheet and cut it into circles. Use mini muffin tins to shape them into cups, and bake for about 10-12 minutes at 350°F.
Tip: Keep an eye on the cups as they bake — the last thing you want is for your pastry shells to burn!
Preparing the Filling
While the pastry cups cool, it’s time to whip up the filling:
-
Mix the Ricotta: In a bowl, combine ricotta cheese, powdered sugar, and vanilla. Use a hand mixer to blend until smooth.
-
Add Chocolate Chips: Fold in mini chocolate chips or your choice of garnish for an extra touch of sweetness.
-
Chill: Let the filling chill in the fridge for a bit. It helps in achieving that creamy texture that everyone craves.
Assembling Your Mini Cannoli Cups
Now comes the fun part—assembly!
-
Fill the Shells: Once the pastry shells are completely cool, carefully spoon or pipe the ricotta filling into each shell.
-
Garnish: Top with a sprinkling of mini chocolate chips, pistachios, or even candied orange peel for a pop of color and flavor.
-
Serve with Style: Present these on a beautiful platter, and watch your guests light up at the sight!
This stage is where your creativity can truly shine. Consider personalizing each mini cannoli cup based on your guest’s preferences. What’s better than a dessert tailored just for them?
Tips for Perfect Mini Cannoli Cups
To elevate your mini cannoli cups to the next level, here are some handy tips:
- Experiment with Flavors: Consider adding flavored extracts like almond or orange to the filling for a twist.
- Make Ahead: Both the pastry cups and filling can be made in advance. Just assemble before serving to keep the shells crispy.
- Presentation Counts: Use fresh herbs or edible flowers to decorate the platter, enhancing both taste and aesthetic.
Popular Customizations for Mini Cannoli Cups
While traditional mini cannoli cups hold their charm, don’t hesitate to get adventurous. Here are some ideas:
-
Chocolate-Dipped Shells: Dip the tops of the cooked pastry shells in melted chocolate and let them harden for that extra bit of indulgence.
-
Fruit-Infused Filling: Blend in some fresh berries or citrus zest for a refreshing note, perfect for summer gatherings.
-
Healthier Options: For a lighter filling, consider using Greek yogurt instead of ricotta, along with a sweetener of your choice to reduce sugar.
For more inspiration on customization, visit Food Network’s Cannoli Recipes for guidance from the pros!
The Final Touch: Enjoying Mini Cannoli Cups
Once you’ve assembled your delightful mini cannoli cups, it’s time to celebrate your success. The best part about making desserts at home is sharing them with friends and family.
- Have a taste test and encourage everyone to express their favorites!
- Pair these treats with some coffee or herbal tea. The combination will offer not only great flavor but also a cozy atmosphere.
And who doesn’t love a good dessert while sharing stories and laughter?
Wrapping Up Mini Cannoli Cups
There you have it! Making your own mini cannoli cups is a rewarding experience full of flavors, creativity, and joy. Not only do they taste divine, but they also serve as a wonderful way to connect with your loved ones over delicious food.
Next time you’re considering dessert for a gathering, remember these tips, the recipe, and the art of presentation. Now go ahead, charm your guests, and treat yourself to these delightful creations!
For more culinary adventures and dessert inspirations, don’t hesitate to check out other articles on Epicurious! Happy cooking!

Introduction to Mini Cannoli Cups
What are Mini Cannoli Cups and why you’ll love them?
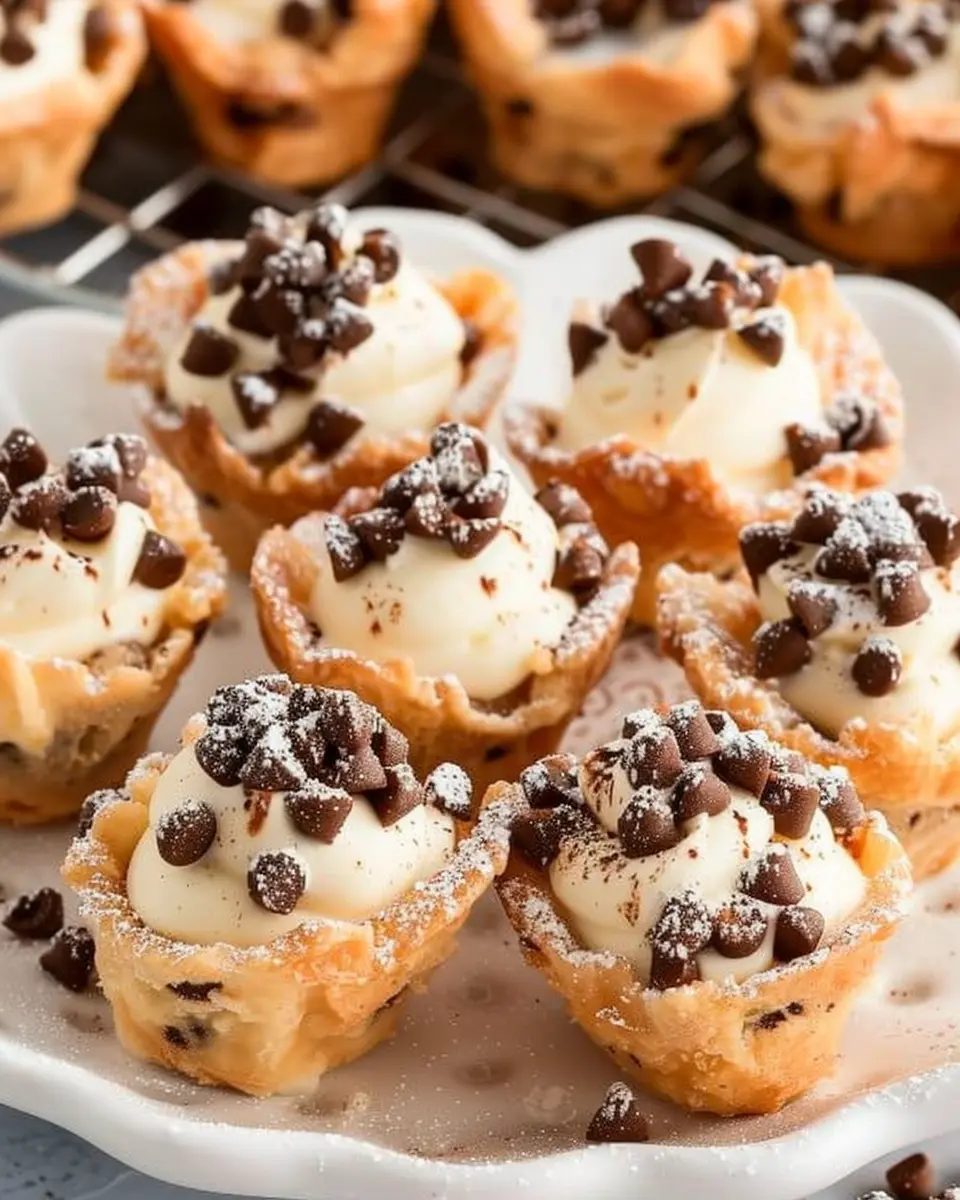
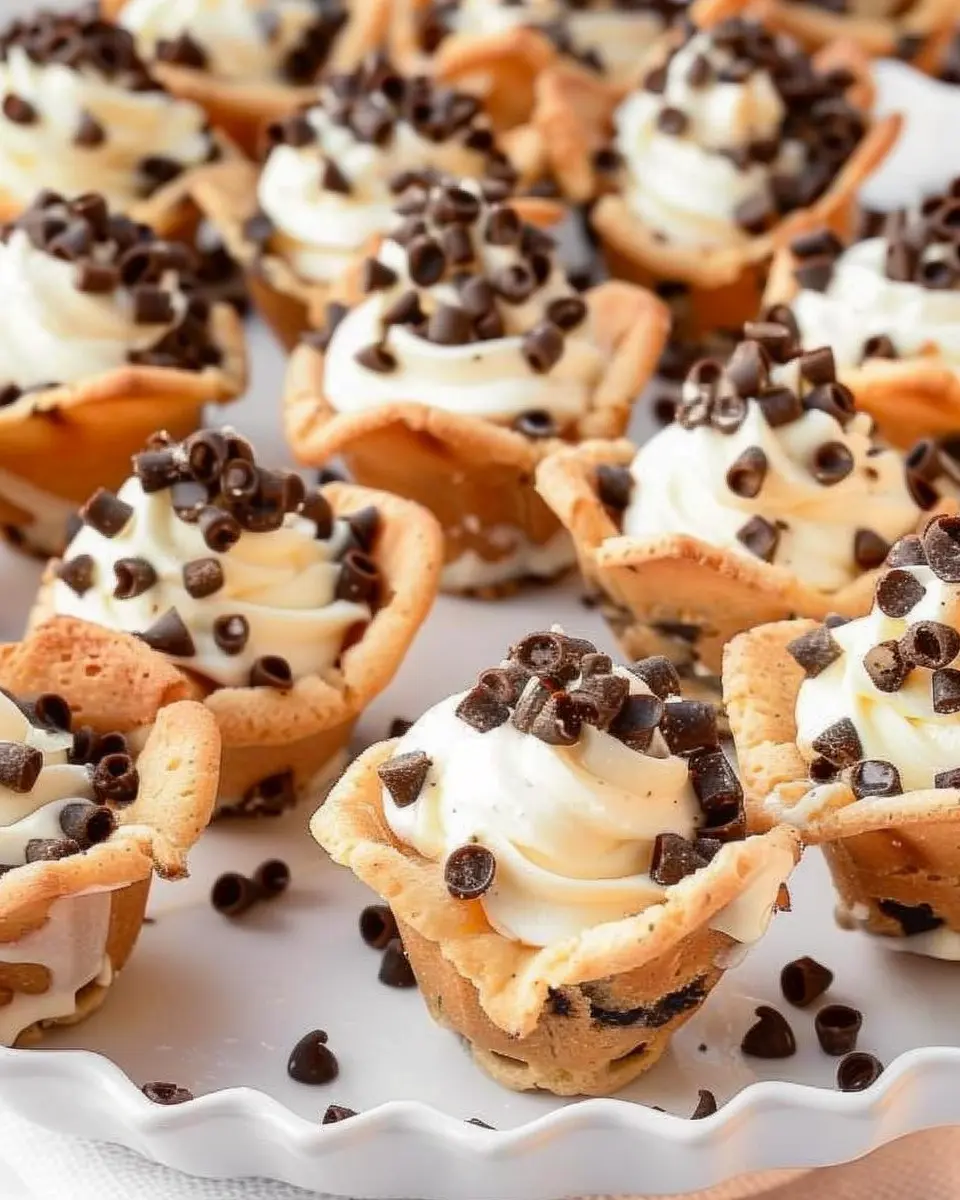
Mini cannoli cups are delightful, bite-sized versions of the classic Italian dessert. Imagine the satisfying crunch of a perfectly fried pastry shell filled with a creamy ricotta cheese mixture, embellished with chocolate chips or zest of citrus! These petite treats pack all the flavor of traditional cannoli but in a more manageable, snackable form.
One of the best things about mini cannoli cups is their versatility. You can customize the filling to suit various tastes. Whether you want to blend in fresh fruits, spices, or even a hint of espresso, the possibilities are endless. They’re perfect for parties, making them a hit with friends, and they even shine at potlucks or casual gatherings.
The rise of homemade desserts in the fast-food era
In today’s fast-paced lifestyle, there seems to be a growing appreciation for homemade desserts. As we rush through life, many are seeking out ways to reconnect with traditional culinary practices. According to a study by Nielsen, 80% of consumers believe that home-baked goods taste better than store-bought, and this has inspired many to take on the challenge of creating desserts like our beloved mini cannoli cups.
Moreover, homemade desserts provide that personal touch that pre-packaged treats simply cannot replicate. When you whip up a batch of these mini cannoli cups, you can take pride in knowing exactly what’s going into each bite. The fresh ingredients and your creative flair ensure every dessert reflects your taste and style.
In a world where convenience often reigns supreme, indulging in homemade treats offers not just deliciousness but also a sense of fulfillment. It allows you to step back, savor the moment, and perhaps even share the joy of dessert-making with loved ones. The result? A sweet escape that’s both delightful and meaningful.
So, grab your apron and let’s dive into the scrumptious world of mini cannoli cups! You might just find the perfect dessert that will impress everyone and keep them coming back for more.
Ingredients for Mini Cannoli Cups
Essential ingredients for the cannoli filling
Creating irresistibly delicious mini cannoli cups begins with a rich filling. You’ll need:
- Ricotta cheese: The star of the show! Choose whole-milk ricotta for a creamy consistency.
- Powdered sugar: This adds just the right sweetness. Adjust to taste!
- Vanilla extract: A splash enhances the flavor beautifully.
- Mini chocolate chips or candied orange peel: These make excellent mix-ins for that delightful traditional touch.
For more about ricotta and its versatility, check out this guide.
The dough: pie crust basics
For the outer shell of your mini cannoli cups, a simple pie crust works wonders. You can either make your own or purchase pre-made dough for convenience. Just ensure it’s rolled thinly enough to achieve that perfect crunch!
Optional garnishes and toppings
To elevate your mini cannoli cups, consider these delightful options:
- Chopped nuts: Almonds or pistachios add a lovely crunch and flavor.
- Whipped cream: A dollop on top is always a hit!
- Dusting of cocoa powder or powdered sugar: For that trendy finish, sprinkle lightly.
Feel free to get creative! Your guests will love the personalized touch.
Preparing Mini Cannoli Cups
Crafting delightful mini cannoli cups can be a fun and rewarding cooking experience. These bite-sized treats are perfect for gatherings, parties, or simply enjoying at home. Let’s dive into the preparation process step by step, ensuring you have everything you need to create these delicious desserts.
Gather Your Equipment
Before you start mixing and baking, it’s crucial to have all your equipment ready. Here’s a quick checklist:
- Mixing Bowl: You’ll need a large bowl for the crust mixture.
- Rolling Pin: A rolling pin is essential for rolling out the dough to the perfect thickness.
- Muffin Tin: Opt for a mini muffin tin, as it will help shape your mini cannoli cups.
- Cookie Cutters: A round cookie cutter will come in handy to cut out the dough.
- Piping Bag: For an elegant touch, use a piping bag to fill your cups with the ricotta mixture.
Having these tools ready will streamline your cooking process, making it as enjoyable as indulging in the end product!
Prepare the Crust
The crust is what gives the mini cannoli cups their unique texture and flavor. Here’s a simple way to prepare it:
- Mix Ingredients: In a mixing bowl, combine 1 cup of all-purpose flour, 2 tablespoons of granulated sugar, and a pinch of salt. Then, add 1 tablespoon of melted butter and mix well.
- Add Liquid: Gradually add 1 egg and a dash of vanilla extract until the dough comes together. If the dough is too sticky, sprinkle in a bit more flour.
- Knead: Turn the dough onto a floured surface and knead for about five minutes until it’s smooth and elastic.
After kneading, wrap the dough in plastic wrap and let it chill in the refrigerator for 30 minutes. This helps develop the flavors and makes it easier to roll out.
Baking the Cannoli Cups
Once your dough has chilled, it’s time to bake those delicious cups that will hold your filling.
- Roll Out the Dough: On a lightly floured surface, roll out your dough to about 1/8 inch thick. Use your cookie cutter to make circular pieces.
- Shape the Cups: Gently press each dough circle into the mini muffin tin. This will create the cup shape for your mini cannoli cups.
- Bake: Preheat your oven to 375°F (190°C). Bake the dough-filled muffin tin for about 10-12 minutes or until golden brown. Let them cool completely before filling.
Baking is vital in giving your cups the right crunch. The contrast between the crispy shell and creamy filling is what makes mini cannoli cups a genius dessert choice!
Making the Filling
Filling your mini cannoli cups with a rich, creamy filling is probably the most exciting part! Here’s how to whip it up:
- Gather Ingredients: You’ll need 15 ounces of ricotta cheese, 1 cup of powdered sugar, 1 teaspoon of vanilla extract, and mini chocolate chips for that extra indulgence.
- Mix: In a large bowl, combine the ricotta cheese, powdered sugar, and vanilla extract. Mix until smooth. Feel free to add a pinch of cinnamon for an additional kick.
- Fold in Chocolate Chips: Gently fold in chocolate chips, ensuring they’re evenly distributed throughout the mixture.
This creamy filling is what makes mini cannoli cups so dreamy and delightful!
Filling the Cups
Now that the shells are cool and the filling is ready, it’s time to assemble your dessert.
- Fill the Piping Bag: Use your piping bag to fill each cup with the ricotta mixture. If you don’t have a bag, a simple spoon can work—though a piping bag gives a neater finish.
- Top It Off: For some extra flair, sprinkle each filled cup with a dusting of cocoa powder or additional chocolate chips for garnish.
And voila! Your mini cannoli cups are ready to impress guests or satisfy your sweet tooth. Enjoy indulging in these delightful treats!
If you’re eager to explore more dessert ideas, consider checking out this expert home baking guide for additional inspiration. Happy baking!
Variations on Mini Cannoli Cups
When it comes to mini cannoli cups, there are countless ways to get creative and take this classic dessert to new heights. Let’s explore a few delightful variations that are sure to impress.
Chocolate-Dipped Cannoli Cups
Elevate your mini cannoli cups by dipping the edges in melted chocolate. This indulgent addition adds both flair and flavor. For a richer experience, consider using dark chocolate or even a white chocolate drizzle. Once dipped, sprinkle some finely chopped nuts or colorful sprinkles on the chocolate before it hardens. This not only looks beautiful but adds a delightful crunch!
Fruit-Infused Cannoli Filling
Why not freshen things up with a fruit-infused filling? Incorporate finely chopped strawberries, raspberries, or even seasonal fruits like mango into your ricotta blend. The fruity notes will provide a refreshing twist, making your mini cannoli cups a delightful burst of flavor. For inspiration, check out this guide on how to choose the best fruits for desserts. Combining fruits not only enhances taste but also adds a pop of color!
Vegan Options for Cannoli Cups
For those who follow a plant-based lifestyle, making vegan mini cannoli cups is easier than you might think! Substitute the traditional ricotta with a mixture of silken tofu and a touch of agave syrup for sweetness. You can also use dairy-free chocolate for the dips and experiment with coconut cream for a creamy texture. Your vegan friends will thank you, and you may convert some traditionalists along the way!
Getting creative with your mini cannoli cups allows you to cater to various tastes and dietary preferences, ensuring everyone has a little something sweet to enjoy. So, experiment away!
Cooking Tips and Notes for Mini Cannoli Cups
Common pitfalls to avoid
Making mini cannoli cups can be a delightful experience, but there are a few pitfalls to watch out for. First, ensure your filling isn’t too runny—excess moisture can cause sogginess. Start by choosing high-quality ricotta cheese; avoid anything packed in water, as this can compromise texture. Additionally, don’t rush the assembly; let each shell cool completely before filling them to maintain that satisfying crunch.
How to properly drain ricotta for the best texture
To achieve that creamy, thick texture essential for your mini cannoli cups, proper drainage of ricotta is crucial. Place the ricotta in a fine-mesh strainer lined with cheesecloth or paper towels. Let it sit for at least an hour, or even overnight in the refrigerator, to allow excess moisture to drain away. This simple step transforms your filling from watery to wonderfully rich. You can find more detailed techniques on draining ricotta from resources like the Food Network.
Incorporate these tips, and your mini cannoli cups will impress friends and family alike!
Serving Suggestions for Mini Cannoli Cups
Perfect occasions for mini cannoli cups
Celebrating milestones with friends or sharing a delightful dessert after dinner? Mini cannoli cups are your go-to treat! These charming bites are perfect for birthdays, baby showers, or even casual gatherings with friends. Their small size makes them easy to serve and perfect for guests who love to sample a bit of everything. Imagine a dessert table adorned with these exquisite little delights, bringing smiles all around!
Pairing ideas with beverages and snacks
To elevate your mini cannoli cups, consider pairing them with complementary beverages and snacks. They go exceptionally well with:
- Coffee: A rich espresso or creamy cappuccino enhances the sweet creaminess of the cannoli filling.
- Tea: Choose herbal or chai options for a cozy afternoon treat.
- Fruit Platter: Fresh berries or a fruit medley can balance the creaminess, providing a refreshing contrast.
For more pairing inspiration, check out this great guide on dessert accompaniments. With their luscious flavors, mini cannoli cups are sure to impress and satisfy!
Time Breakdown for Mini Cannoli Cups
Preparation Time
Making mini cannoli cups is so rewarding, and you’ll only need about 20 minutes to get everything ready. This includes gathering your ingredients, mixing the filling, and prepping your pastry shells. Make sure to measure everything out beforehand to streamline the process!
Cooking Time
The cooking time is a breeze, too! You’ll spend roughly 10 minutes baking those delightful little pastry cups. Keep an eye on them to ensure they’re golden brown and perfectly crisp.
Total Time
All in all, you’re looking at a total time of around 30 minutes from start to finish. That’s pretty quick for such a deliciously indulgent dessert! Perfect for those busy weeknights or last-minute celebrations.
Once you get the hang of it, these mini cannoli cups can easily become a go-to treat for gatherings or a sweet way to unwind after a hectic day. For more tips on making your desserts shine, check out resources from the Baking Association.
Nutritional Facts for Mini Cannoli Cups
Calories per Serving
If you’ve ever craved a little sweetness without going overboard, mini cannoli cups are your answer! Each delightful cup packs in approximately 150 calories. This makes them a perfect treat for satisfying your sweet tooth while keeping your indulgence in check.
Key Nutrients to Note
These charming dessert cups don’t just taste good; they come with some nutrients worth mentioning:
- Calcium: Critical for strong bones and teeth, thanks to the ricotta cheese.
- Protein: Essential for muscle repair, offering around 3 grams per cup.
- Fiber: Although not packed with fiber, including a few nuts or fruits can enhance this aspect.
For a balanced diet, consider balancing these treats with fresh fruit or whole grains. Want to explore more nutritional insights? Check out the USDA Food Data Central, which provides extensive food profiles! Enjoy your sweet treat while staying mindful of your nutrition—it’s all about balance!
FAQs about Mini Cannoli Cups
Can I make these ahead of time?
Absolutely! One of the best things about mini cannoli cups is that they can be prepped in advance. You can create the shells a day or two ahead and store them in an airtight container at room temperature. When you’re ready to serve, fill the cups with your delicious ricotta mixture. Just keep in mind that if you fill them too far in advance, the shells may get a bit soggy. So timing is key!
How to store leftovers effectively?
While leftovers (if there are any!) can be tempting, it’s essential to store them properly. If you’ve filled your mini cannoli cups and have extras, place any remaining filled cups in the fridge and consume them within 1-2 days. To keep the shells crisp, store any unfilled cups separately in a cool, dry place. You can also fill them just before serving to maintain their delightful crunch.
What can I use instead of ricotta?
Not a fan of ricotta or just want to switch things up? You can use various alternatives for the filling in your mini cannoli cups. Mascarpone cheese provides a rich and creamy texture, while Greek yogurt can add a tangy twist. Cottage cheese, blended until smooth, also works as a protein-rich substitute. If you’re looking for something dairy-free, try a vegan cream cheese blend or a tofu-based option!
Feel free to experiment and find what suits your taste buds best. The beauty of mini cannoli cups is their versatility! For more tips on creating delicious fillings, check out resources like Bon Appétit for inspiration.
Conclusion on Mini Cannoli Cups
The simplicity and joy of homemade desserts
There’s something truly special about whipping up your own mini cannoli cups. They not only satisfy your sweet tooth but also provide a delightful canvas for creativity. With just a few simple ingredients, you can elevate your dessert game without any complicated techniques. These charming little treats manage to pack flavor and fun into every bite, making them perfect for gatherings or quiet evenings at home.
Encouragement to try your hand at this delicious recipe
So why not give this delicious recipe a shot? Making mini cannoli cups is rewarding and allows you to put your personal twist on a classic. You could experiment with fillings or toppings that reflect your unique taste! Don’t hesitate; grab your ingredients and enjoy the delightful journey of creating these treats. You might just discover a new favorite dessert for years to come! For those seeking more inspiration, check out Serious Eats for more dessert ideas and tips.
PrintMini Cannoli Cups: Easy Indulgence for Sweet Tooth Lovers

These Mini Cannoli Cups are a delightful twist on the classic Italian dessert, perfect for satisfying any sweet tooth.
- Prep Time: 20 minutes
- Total Time: 20 minutes
- Yield: 12 servings 1x
- Category: Dessert
- Method: No-Bake
- Cuisine: Italian
Ingredients
- 1 cup ricotta cheese
- 1/2 cup powdered sugar
- 1 teaspoon vanilla extract
- 1/2 cup mini chocolate chips
- 12 mini pastry cups
- 1/4 cup chopped pistachios (for garnish)
Instructions
- In a mixing bowl, combine ricotta cheese, powdered sugar, and vanilla extract. Mix until smooth.
- Fold in the mini chocolate chips until evenly distributed.
- Fill each mini pastry cup with the ricotta mixture.
- Top with chopped pistachios for garnish.
- Serve immediately or refrigerate until ready to serve.
Notes
- For a richer flavor, use mascarpone cheese instead of ricotta.
- These can be made a few hours in advance for convenience.
Nutrition
- Serving Size: 1 cup
- Calories: 150
- Sugar: 12g
- Sodium: 50mg
- Fat: 7g
- Saturated Fat: 4g
- Unsaturated Fat: 2g
- Trans Fat: 0g
- Carbohydrates: 20g
- Fiber: 1g
- Protein: 3g
- Cholesterol: 15mg
Keywords: Mini Cannoli Cups, dessert, sweet treats