Introduction to Molten Chocolate Lava Cookies
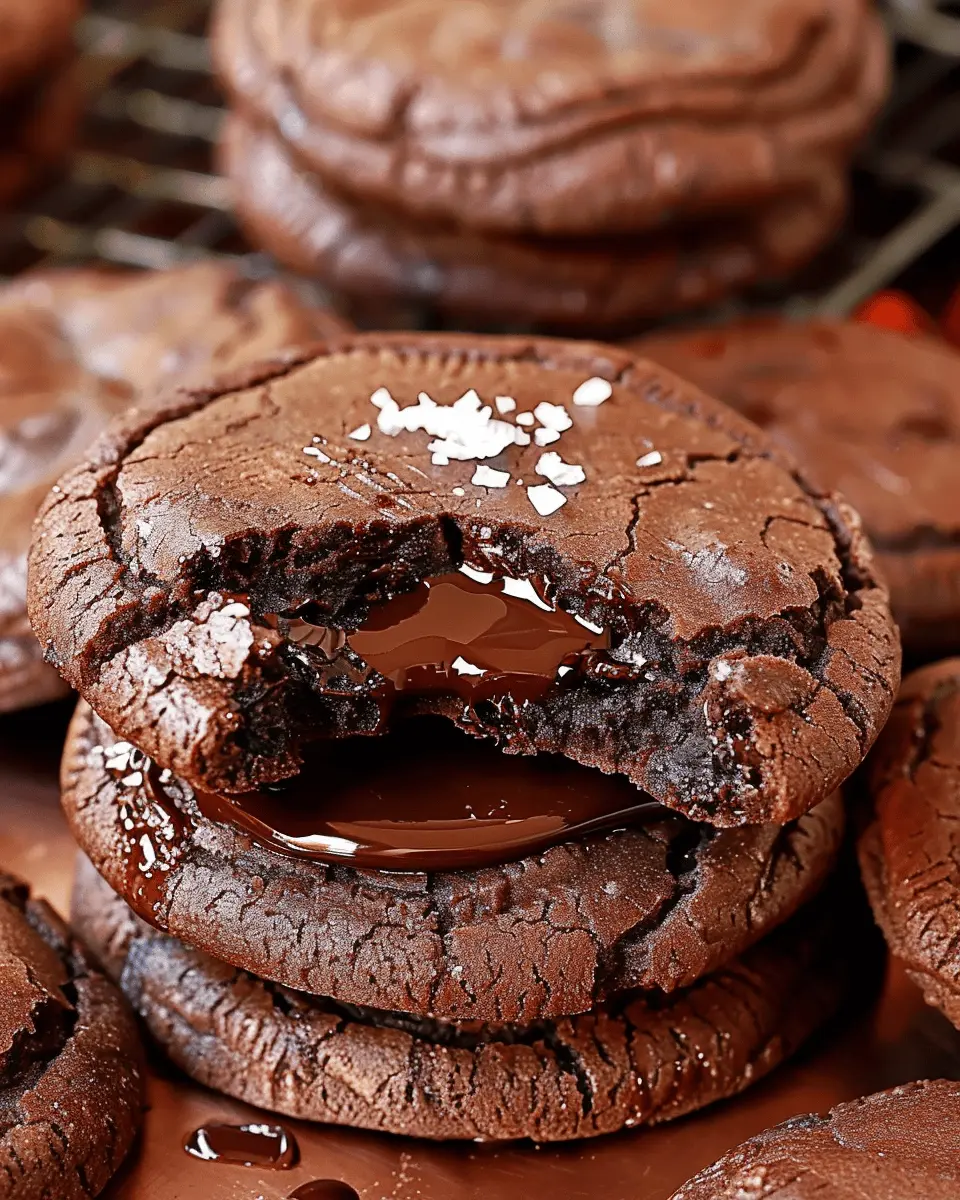
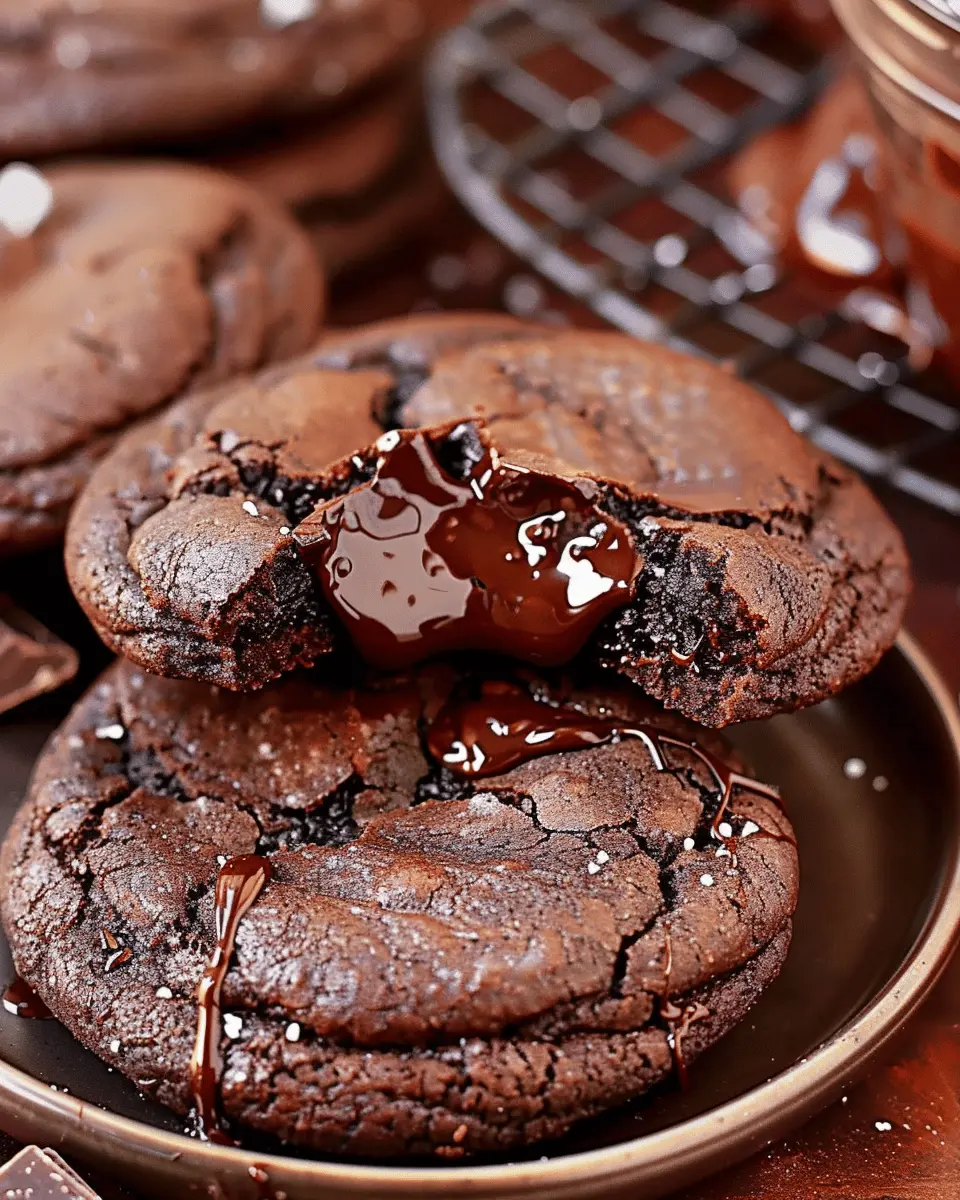
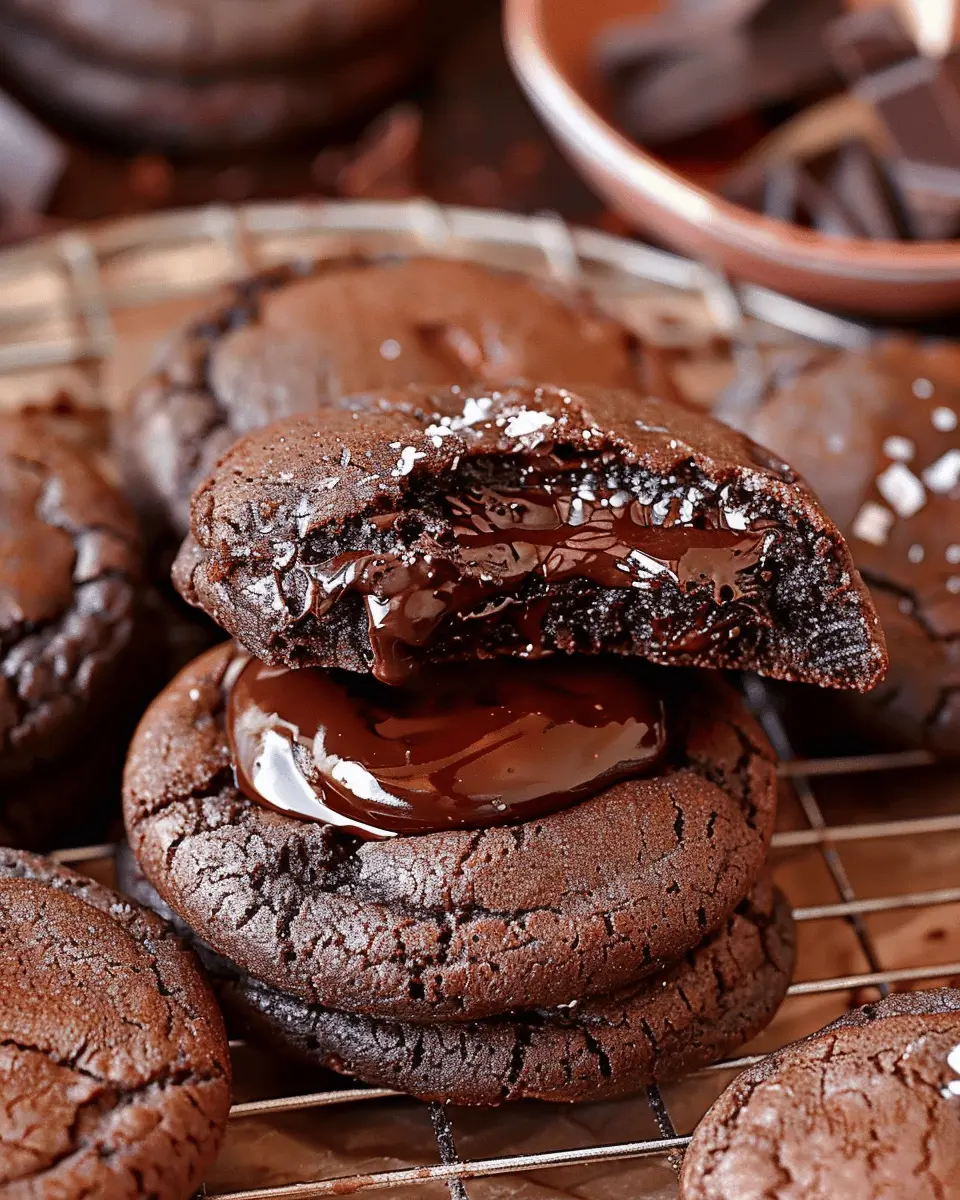
When it comes to homemade desserts, few things can match the sheer joy of indulging in a warm, freshly baked cookie bursting with molten chocolate. Enter the molten chocolate lava cookies, an irresistible treat that takes your classic cookie game to the next level. Imagine biting into a cookie, only to be greeted by a rich, gooey chocolate center that flows out like a mini chocolate river. It’s an experience that pleases both your taste buds and your senses.
Why You’ll Fall in Love with Molten Chocolate Lava Cookies
First off, let’s talk about the texture and flavor harmony. These cookies harmonize a crisp exterior with a soft, indulgent gooey center, making each bite a delightful experience. According to the Institute of Culinary Education, the secret lies in the balance of ingredients that allow the outer shell to form while maintaining a molten heart. An elevated cookie like this gives you the option to impress your friends while also satisfying your own sweet tooth.
Another game-changer is the versatility of the recipe. Molten chocolate lava cookies can be personalized to fit various dietary needs or flavor profiles. Whether you stick with classic chocolate or venture into exciting additions like sea salt or orange zest, the possibilities are endless. Plus, they can be made ahead of time and stored in the freezer, so you’ll always have a delicious, homemade dessert ready to bake for unexpected guests or that late-night craving.
Let’s not forget about the aroma that will fill your kitchen while these cookies are baking. There’s something magical about the smell of chocolate wafting through your home, creating an atmosphere that’s warm and inviting. It’s a reminder of cozy evenings spent with loved ones, laughter, and delectable treats.
Now, you might be wondering, “Are these cookies really as easy to make as they sound?” Absolutely! With just a few simple ingredients and a little bit of time, you’ll unlock the secret to crafting these delightful bites. So, if you’re ready to take on a recipe that’s sure to become a staple in your dessert repertoire, keep reading for all the steps you need to make your very own molten chocolate lava cookies.
Ingredients for Molten Chocolate Lava Cookies
Essential ingredients for the perfect lava cookies
Crafting molten chocolate lava cookies begins with a handful of essential ingredients that will elevate your baking game. Here’s what you’ll need:
- All-purpose flour: Provides the structure for your cookies.
- Granulated sugar: Sweetens and helps achieve the perfect texture.
- Brown sugar: Adds moisture and a deeper flavor.
- Unsweetened cocoa powder: For that rich chocolatey goodness.
- Butter: Use unsalted butter for better control over saltiness; it provides richness.
- Eggs: The binding agent that gives your cookies that classic chewy texture.
- Chocolate (semi-sweet or dark): This is the star of the show – use high-quality chocolate for a more indulgent experience.
Want to dive deeper into the benefits of each ingredient? Check out this resource on baking basics.
Optional ingredients for added flavor
Who doesn’t love a little flexibility in a recipe? To customize your molten chocolate lava cookies, consider adding:
- Sea salt: A sprinkle on top can enhance the chocolate flavor.
- Vanilla extract: A dash goes a long way in enhancing overall taste.
- Espresso powder: The secret ingredient to intensify the chocolate flavor without making it taste like coffee.
- Nuts: Chopped walnuts or pecans can add a delightful crunch.
By playing with these optional ingredients, you can elevate your cookie experience, making each batch uniquely yours!
Preparing Molten Chocolate Lava Cookies
Getting ready to whip up some molten chocolate lava cookies can be an absolute delight. They’re rich, decadent, and the warm chocolate center makes them a true treat for any chocolate lover. Whether you’re planning a cozy night in or trying to impress a date, let’s walk through the steps to prepare these delightful cookies.
Gather and prep your ingredients
Before diving into the baking process, it’s crucial to have all your ingredients ready. This helps streamline the cooking and keeps everything organized. For these cookies, you’ll need:
- 1 cup semi-sweet chocolate chips or chopped chocolate
- 1/2 cup unsalted butter
- 1 cup powdered sugar
- 2 large eggs
- 2 large egg yolks
- 1 teaspoon vanilla extract
- 1/2 cup all-purpose flour
- A pinch of salt
Having your ingredients chopped, measured, and prepped will make the experience smoother. Plus, you can use this time to preheat your oven to 425°F (220°C). Prepping your ingredients isn’t just practical; it adds a touch of enthusiasm to the process, like getting ready for a fun project!
Melt the chocolate and butter
Next, you’ll need to melt the chocolate and butter together. One of the best methods is to use a double boiler. If you don’t have one, you can get creative by placing a heatproof bowl over a pot of simmering water. Be patient as you stir until the chocolate and butter blend into a smooth, luscious ganache.
Be sure to use high-quality chocolate; the richer the chocolate, the better your cookies will taste. As you melt, you can enjoy the heavenly aroma filling your kitchen—truly a moment worth savoring!
Mix the eggs and sugar for that rich texture
In a separate mixing bowl, whisk together the eggs, yolks, and powdered sugar until the mixture is smooth and slightly thickened. This step is essential for achieving a rich texture in your molten chocolate lava cookies. The sugar will dissolve beautifully, creating a glossy surface that adds just the right amount of sweetness.
While whisking, you might find your thoughts wandering—what’s your favorite way to enjoy chocolate? As you beat those eggs and sugar together, remind yourself that these cookies will be a delicious finish to your meal!
Combine the dry ingredients
Now it’s time to mix the dry components. In a separate bowl, combine the flour and a pinch of salt. This simple step helps balance out the sweetness of the chocolate. Sifting the flour can make for a lighter batter, so don’t skip this part if you want that perfect lava center.
If you’re interested in learning more about the importance of flour in baking, you can check out this insightful article on baking basics.
Create the lava cookie batter
With all your ingredients prepped and waiting, fold the melted chocolate mixture into the egg and sugar blend. Then, gently incorporate the dry ingredients until just combined—be careful not to over-mix! The batter should retain a slight sheen, promising that molten center you’re dreaming of biting into.
Prepare the ramekins for baking
Grab your ramekins and lightly grease them to prevent sticking; this will ensure that your cookies release perfectly. If you want an extra touch of decadence, consider dusting the insides with cocoa powder for an added chocolate flavor. You’ll want to fill each ramekin to about two-thirds full with the batter.
Fill with batter and bake to perfection
Now, the moment of truth! Carefully transfer your ramekins to the preheated oven and set the timer for 12-14 minutes. The longer you bake, the less molten they will be, so keep an eye on them. They should look firm but slightly jiggly in the center when you take them out.
Once they’re done, give them a minute or two to rest before digging in. Top them with a scoop of vanilla ice cream or a sprinkle of powdered sugar for that extra special touch.
And there you have it—your molten chocolate lava cookies are ready to impress! Enjoy the wonderful blend of textures and flavors, and your guests will be raving about them long after the last bit is gone. Happy baking!
Variations on Molten Chocolate Lava Cookies
When it comes to molten chocolate lava cookies, the classic recipe is undeniably tempting. But why stop there? Let’s explore some delicious variations that can take your cookie game to a whole new level!
The Classic Molten Chocolate Version
Let’s start with the beloved classic. This version features a rich chocolate center that flows out like molten chocolate goodness. Use high-quality dark chocolate and ensure you don’t overbake. The goal is that gooey center—to achieve this, remove them from the oven just when the edges are set. Trust me, these cookies will be the star of any dessert spread! For more tips on perfecting this classic, check out The Chocolate Lovers’ Guide.
Stuffed Lava Cookies with Peanut Butter
Want to add a little twist? Try stuffing your molten chocolate lava cookies with creamy peanut butter. Simply place a dollop of peanut butter in the center of your cookie dough before baking. As the cookies bake, that peanut butter will melt into a creamy filling, giving you a delightful flavor contrast with the rich chocolate. It’s a perfect duo for any nut lover!
Vegan Molten Chocolate Lava Cookies
For those of you following a plant-based diet, don’t fret! You can still enjoy these melted treats. Substitute traditional ingredients with vegan options—think coconut oil instead of butter, and a flaxseed mixture for the eggs. Use vegan dark chocolate for that rich, decadent center. Your friends might not even notice they’re vegan; just invite them over for a taste test!
Each of these variations brings its unique flair while still delivering the joy of molten chocolate lava cookies. Which one will you try first?
Cooking Tips and Notes for Molten Chocolate Lava Cookies
How to Avoid Overbaking
One of the biggest challenges when making molten chocolate lava cookies is ensuring that they come out just right. Overbaking can turn those delightful centers into chocolate brick. To prevent this:
- Keep an eye on your timer. Start checking your cookies a minute or two before the required time. They should look set on the edges but slightly soft in the center.
- Use a toothpick test. Insert a toothpick into the side of a cookie. If it comes out with a bit of gooey chocolate, you’re golden. If it’s clean, it’s time to accept defeat!
Tips for Achieving the Perfect Gooey Center
To achieve that luscious, flowing center that will impress your friends and family, consider these tips:
- Chill your dough. Allowing the dough to chill for at least 30 minutes can enhance the texture and help maintain the molten core.
- Choose high-quality chocolate. Opt for a mix of dark and semi-sweet chocolate for depth of flavor. Brands like Ghirardelli or Callebaut are excellent choices.
- Experiment with oven temperatures. Every oven behaves differently, so taking notes on your baking temperature can help find your perfect balance.
By following these simple yet effective tips, you’re well on your way to creating molten chocolate lava cookies that are nothing short of spectacular! For more in-depth baking tips, check out Serious Eats or America’s Test Kitchen. Enjoy your baking journey!
Serving Suggestions for Molten Chocolate Lava Cookies
Pairing with Ice Cream or Whipped Cream
To elevate your molten chocolate lava cookies, consider pairing them with a scoop of your favorite ice cream or a dollop of freshly whipped cream. The contrast of the warm, gooey center against the cold cream creates a delightful experience that will have your taste buds singing. Vanilla and salted caramel ice cream are classic choices that enhance the rich chocolate flavor. Alternatively, if you’re feeling adventurous, try pairing with a unique flavor like hazelnut or raspberry, which can add an exciting twist.
Creative Plating Ideas for Serving
Presentation is key when it comes to molten chocolate lava cookies. Here are a few fun ideas to make your dessert stand out:
- Plated with Style: Arrange the cookies on a rustic wooden board for a cozy vibe.
- Drizzle and Garnish: Use a fine-mesh sieve to dust powdered sugar or cocoa powder on top, and drizzle with chocolate or caramel sauce.
- Add Fresh Fruit: A side of strawberries or raspberries not only adds color but provides a refreshing contrast to the rich chocolate.
For more inspiration, you might find this food plating guide helpful.
No matter how you serve them, your molten chocolate lava cookies are sure to impress!
Time Breakdown for Molten Chocolate Lava Cookies
When you’re ready to dive into making these indulgent molten chocolate lava cookies, it’s essential to plan your time wisely. With the right breakdown, you’ll have those sweet treats ready for your friends or a cozy night in in no time!
Preparation Time
Getting everything ready takes about 15–20 minutes. This includes gathering your ingredients, melting the chocolate, and mixing the dough. Pro tip: make sure all your ingredients are at room temperature for the best results!
Baking Time
The actual baking is quick—around 10–12 minutes. Keep a close eye on your cookies; the magic happens when they begin to puff up but are still slightly soft in the center.
Total Time
In just about 30–35 minutes, you can transform simple ingredients into delectable molten chocolate lava cookies. Imagine the delightful smell filling your kitchen while you serve them warm with a side of vanilla ice cream!
Now, if you’re excited to get started, check out our detailed recipe here to ensure your cookies come out perfectly every time!
Nutritional Facts for Molten Chocolate Lava Cookies
When indulging in molten chocolate lava cookies, it’s essential to balance enjoyment with mindfulness about nutrition. Here’s a quick breakdown:
Calories per Serving
Each lava cookie typically packs around 160-200 calories, depending on the recipe variations and portion size. Remember, these are meant to be a dessert indulgence!
Fat Content and Carbohydrates
In terms of fat, expect approximately 8-10 grams per cookie, most of which comes from butter and chocolate. As for carbohydrates, you’re looking at around 20-25 grams, providing a delightful energy boost, perfect after a long day at work.
Protein and Sugar Content
Each cookie contains 2-3 grams of protein, thanks to the flour and eggs used, while sugar content tends to be about 12-15 grams. It’s a sweet treat that can fit into a balanced diet when enjoyed in moderation.
For healthier dessert options, consider visiting Healthline for balanced recipes that can cater to your sweet cravings without compromising on health!
FAQs about Molten Chocolate Lava Cookies
How do I know when my lava cookies are done?
Perfecting your molten chocolate lava cookies can be a bit of an art! Here’s how to know they’re just right:
- Baking Time: Generally, 10-12 minutes in a preheated oven at 350°F should do the trick.
- Visual Cues: The edges should be firm, while the center will still seem soft and jiggly. A toothpick inserted into the edges will come out clean, but when it hits the center, it should be slightly gooey.
- Experience: With practice, you’ll develop a knack for timing. Don’t hesitate to experiment a bit; every oven behaves differently!
Can I prepare the batter ahead of time?
Absolutely! One of the best things about molten chocolate lava cookies is that they are flexible. You can prepare the batter ahead of time and store it in the refrigerator for up to 2 days. Just remember to fill your cookie molds and chill them before baking. This makes for an easy, last-minute dessert option for surprise visitors or a cozy night in.
What’s the best way to store leftover cookies?
If you find yourself with extra cookies (or let’s face it, if you want to save some for later), you can store them in an airtight container at room temperature for up to 3 days. Want to keep them longer? Put them in the fridge, but be aware that they may lose their gooey magic. For optimal taste, reheat them in the microwave for about 10-15 seconds before indulging.
For more tips on cookie storage and proper techniques, check out resources from American Home Baking.
These molten chocolate lava cookies are meant to be enjoyed warm, with a melty center that’ll make your taste buds sing—trust me, it’s worth the effort!
Conclusion on Molten Chocolate Lava Cookies
As you can tell, making molten chocolate lava cookies at home is more than just a fun cooking project; it’s a delightful experience. Why should you give these cookies a try? Well, for starters, nothing beats the joy of biting into a warm, gooey center filled with rich chocolate. It’s an instant mood booster!
You have full control over the ingredients, allowing you to customize the sweetness and quality to your liking. Plus, these cookies are perfect for impressing friends or simply indulging after a long week. So gather your ingredients and give it a go! If you’re looking for more dessert inspiration, check out this chocolate dessert guide. Your taste buds will thank you!
PrintMolten Chocolate Lava Cookies: The Best Indulgent Treats at Home
Enjoy the rich and gooey goodness of Molten Chocolate Lava Cookies, a perfect indulgent treat you can easily make at home.
- Prep Time: 15 minutes
- Cook Time: 15 minutes
- Total Time: 30 minutes
- Yield: 12 Cookies 1x
- Category: Desserts
- Method: Baking
- Cuisine: American
- Diet: Vegetarian
Ingredients
- 1 cup all-purpose flour
- 1/2 cup unsweetened cocoa powder
- 1/2 teaspoon baking soda
- 1/4 teaspoon salt
- 1/2 cup unsalted butter, melted
- 3/4 cup granulated sugar
- 1/4 cup brown sugar
- 2 large eggs
- 1 teaspoon vanilla extract
- 4 ounces semi-sweet chocolate, chopped
- 1/4 cup chocolate chips
Instructions
- Preheat your oven to 375°F (190°C) and prepare a baking sheet with parchment paper.
- In a bowl, whisk together the flour, cocoa powder, baking soda, and salt.
- In another bowl, mix the melted butter with granulated sugar and brown sugar until smooth.
- Add eggs and vanilla extract, then mix until combined.
- Gradually add the dry ingredients into the wet mixture and stir until just combined.
- Fold in chopped chocolate and chocolate chips.
- Drop spoonfuls of dough onto the prepared baking sheet, spacing them apart.
- Bake for 12-15 minutes until the edges are set but the centers are still soft.
- Let them cool for a minute before transferring to a wire rack.
Notes
- For gooey centers, do not overbake the cookies.
- Serve warm for the best experience.
Nutrition
- Serving Size: 1 cookie
- Calories: 200
- Sugar: 15g
- Sodium: 50mg
- Fat: 10g
- Saturated Fat: 6g
- Unsaturated Fat: 3g
- Trans Fat: 0g
- Carbohydrates: 25g
- Fiber: 1g
- Protein: 3g
- Cholesterol: 30mg
Keywords: Molten Chocolate Lava Cookies, cookies, chocolate, desserts