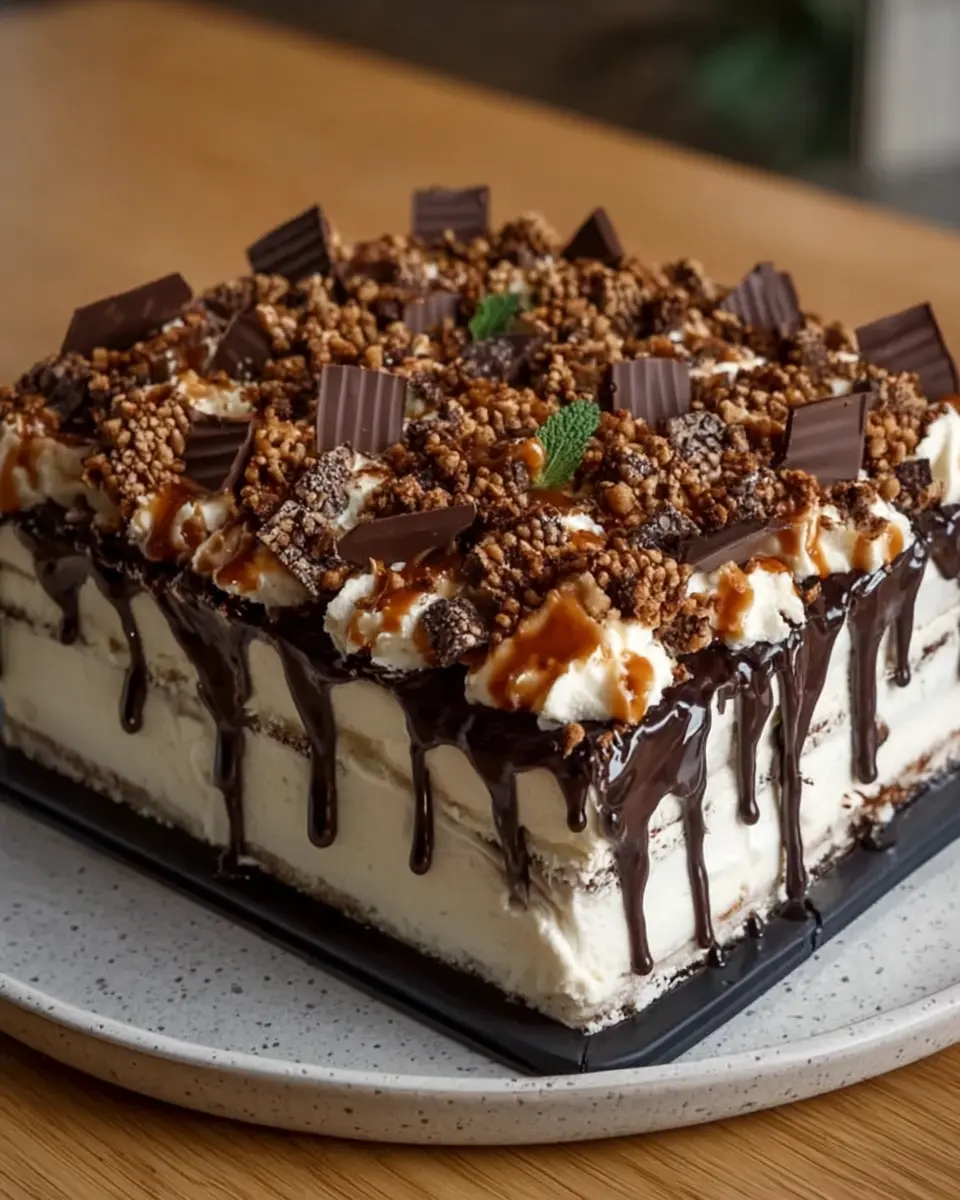
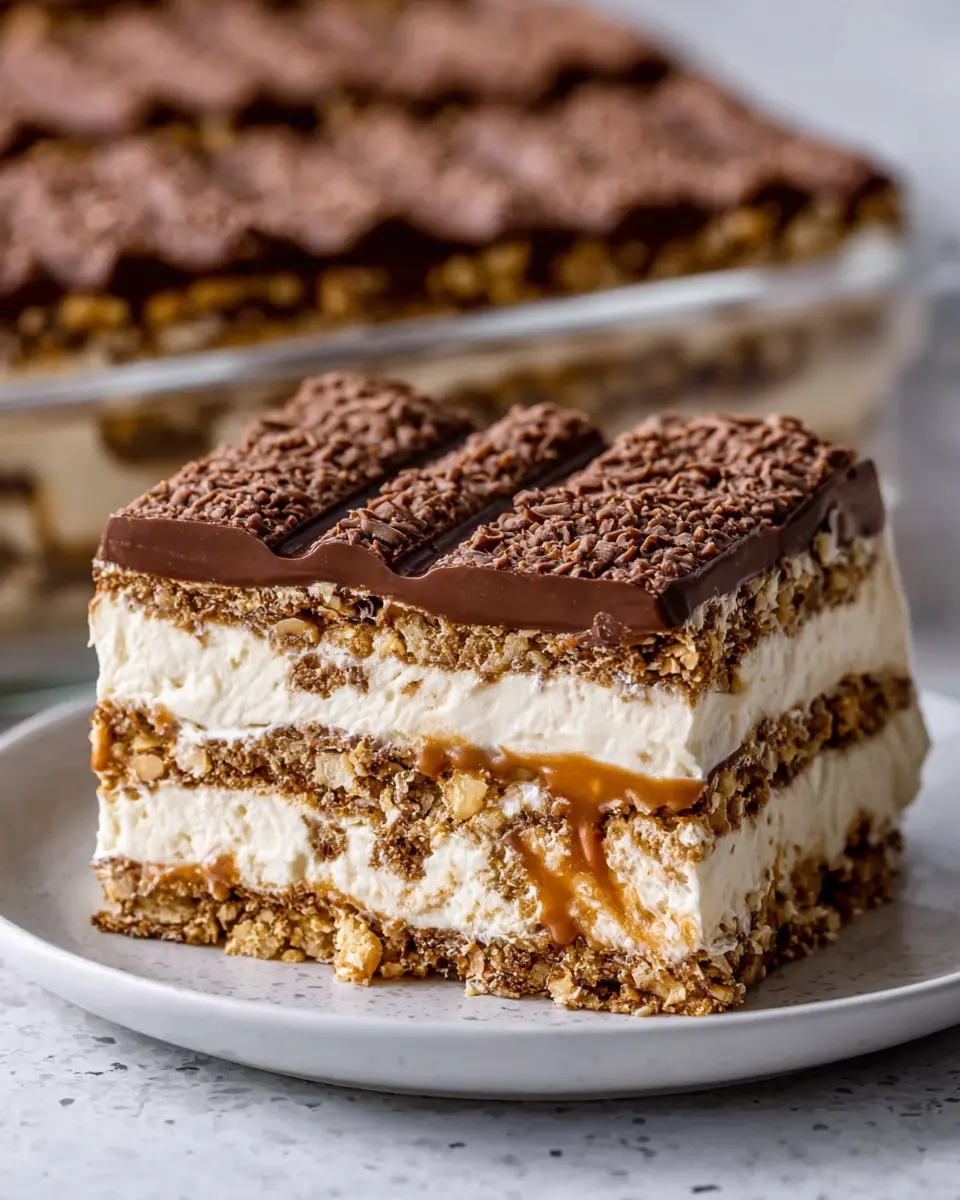
Introduction to No Bake Nutty Buddy Icebox Cake
If you’re a young professional juggling work, social commitments, and perhaps a budding home-cooking hobby, you’ve likely found yourself pressed for time—especially during those busy weeknights. Enter no bake desserts, a fantastic solution for satisfying your sweet tooth without the hassle of turning on the oven. It’s exactly where our no bake nutty buddy icebox cake shines!
Why No Bake Desserts are a Game Changer for Young Professionals
Imagine this: you’re returning home after a long day, trying to unwind, but all you can think about is dessert. The beauty of no bake desserts is their simplicity and quick preparation. With minimal effort, you can whip up something delicious and impressive. For those of us with hectic schedules, this is a total game changer.
-
Time-Saving: Most no bake recipes can be made in under 30 minutes and require little more than some mixing, layering, and chilling. With the no bake nutty buddy icebox cake, you can indulge without spending hours in the kitchen.
-
No Kitchen Equipment Woes: There’s no need for elaborate tools or baking sheets. All you really need are bowls for mixing and a chilled pan for setting—ideal for those who may have compact kitchens or limited access to baking gear.
-
Chill Out and Fill Up: Since this cake requires chilling in the refrigerator, you can make it ahead of time and let it set while you go about your day. This also enhances the flavors, making that first slice even more delightful.
Beyond just convenience, there is a certain joy in creating something delectable without the anxiety of baking mishaps. Have you ever battled with rising bread or an overcooked cake? Those pains are eliminated in no bake desserts!
Plus, the no bake nutty buddy icebox cake taps into classic flavors with its mix of creamy fillings and nutty goodness, making it a hit at modern gatherings. Not only is it stress-free, but it’s also versatile; you can customize it with your favorite ingredients.
For more about the benefits of cooking at home and easy dessert ideas, check out resources from Eatright.org and Food Network. Get ready to impress your friends and family with this delightful, easy-to-prepare dessert!
Ingredients for No Bake Nutty Buddy Icebox Cake
Essential Ingredients You’ll Need
Creating your delicious no bake nutty buddy icebox cake starts with some key components that bring this dessert to life. Here’s what you need:
- Chocolate Cookies: Look for a sturdy chocolate cookie, such as Oreos or similar brands, which provide that satisfying crunch.
- Cream Cheese: For a rich and creamy filling, you’ll want to use softened cream cheese. It’s the heart of the cake!
- Whipped Topping: You can use store-bought whipped topping or whip your own heavy cream for a fresher taste.
- Peanut Butter: Whether creamy or chunky, peanut butter is a must for that nutty flavor.
- Milk: A simple splash of milk helps soften your cookies for that perfect layer.
For more insight into varieties of chocolate cookies, check out this guide.
Optional Ingredients for Customization
Feel free to get creative! Here are some optional additions to make your no bake nutty buddy icebox cake uniquely yours:
- Chopped Nuts: Add crushed peanuts or almond slices for extra crunch and flavor.
- Chocolate Chips: Mix in some mini chocolate chips for an indulgent touch.
- Fruits: Fresh banana slices or strawberries can enhance the flavor and add a pop of color.
Want to elevate your dessert game? Consider pairing it with a homemade caramel sauce or a dollop of your favorite fruit preserves! Each of these options allows you to tailor the recipe to your taste and make it your own.
Try these out, and you might just discover a new favorite twist on this classic dessert!
Step-by-Step Preparation of No Bake Nutty Buddy Icebox Cake
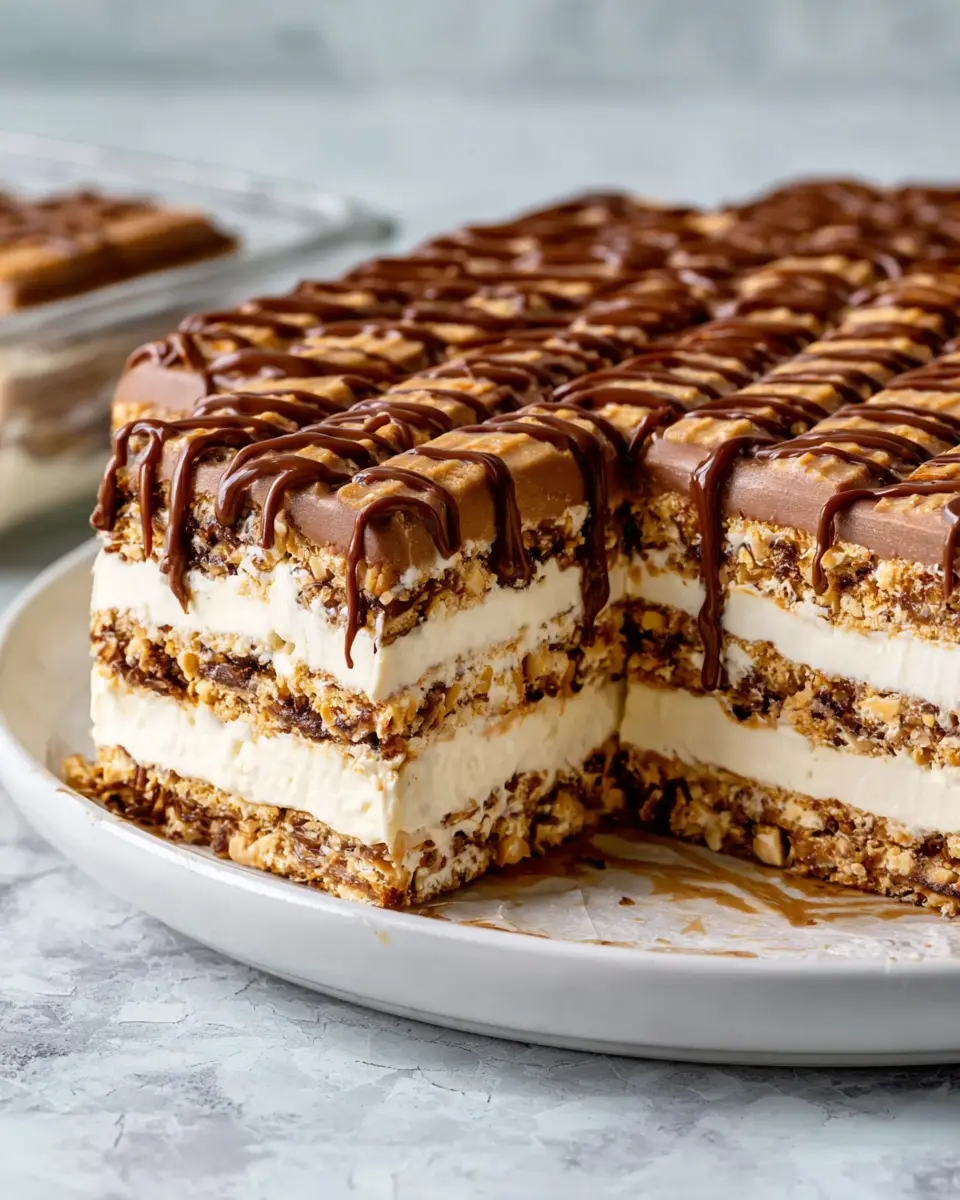
Making a delightful No Bake Nutty Buddy Icebox Cake is easier than you might think! This dessert is perfect for gatherings, especially for those hot summer days when you don’t want to turn on the oven. Let’s walk through each step together so you can whip up this delicious treat with confidence.
Gather Your Materials and Ingredients
Before diving into the recipe, it’s essential to gather all your ingredients and materials. This ensures a smooth and enjoyable cooking experience. Here’s what you need:
Ingredients:
- 1 box of honey wafer bars (about 14 ounces)
- 2 cups of cold milk
- 1 package (3.4 ounces) of instant peanut butter pudding mix
- 1 cup of creamy peanut butter
- 8 ounces of whipped topping (thawed)
- 1/2 cup of crushed peanuts (for garnish)
Materials:
- A mixing bowl
- A whisk or electric mixer
- A baking dish (9×13 inches works well)
- A spatula
Now that you have everything ready, you’re all set to begin!
Create the Creamy Peanut Butter Pudding Mixture
The backbone of your no bake nutty buddy icebox cake is the rich, creamy peanut butter pudding. In a mixing bowl, combine the cold milk and instant pudding mix. Whisk it together until it starts to thicken—this usually takes about 2 minutes.
Next, add the creamy peanut butter to the mixture. For an ultra-smooth texture, use an electric mixer. Blend well until the peanut butter is incorporated and the mixture appears fluffy. Finally, gently fold in the whipped topping. This step is crucial for adding that airy texture you want in your cake.
Layer the Wafer Bars in the Dish
Now comes the fun part! Take your baking dish and start layering the honey wafer bars. Begin by placing a single layer of the wafer bars on the bottom of your dish. Use a square or rectangular arrangement to cover as much space as possible.
As you’re arranging the wafer bars, it might be tempting to snack on them! But remember, they’re vital for your cake. Once the first layer is down, it’s time to add that delicious peanut butter pudding mixture on top.
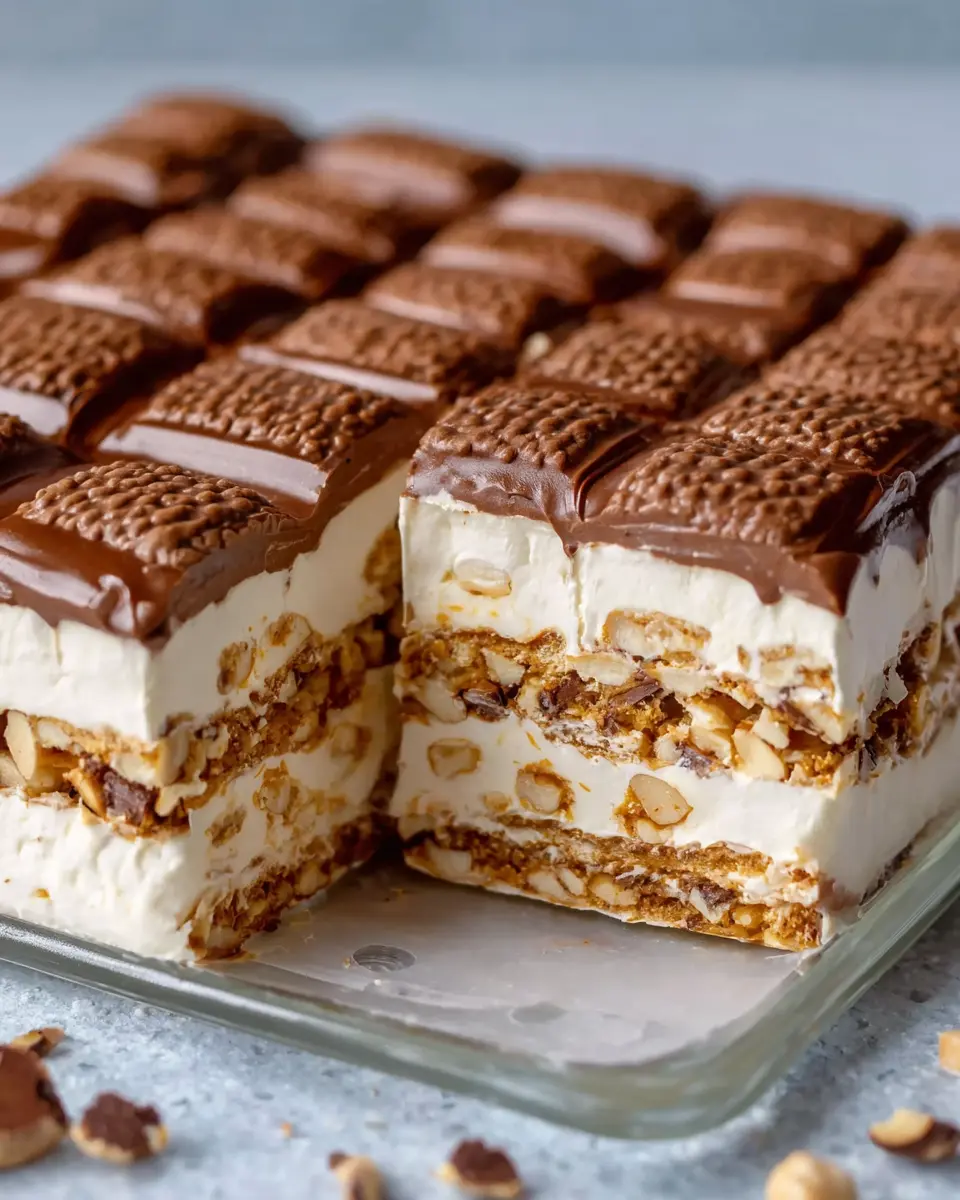
Assemble the Cake
With your first layer ready, it’s time to assemble your no bake nutty buddy icebox cake. Spread half of your peanut butter pudding mixture over the wafer layer. Use a spatula to spread it evenly, ensuring every corner is covered.
Then, add another layer of honey wafer bars followed by the remaining peanut butter pudding mixture. Finally, finish off with one last layer of wafer bars. This layered construction gives the cake its fantastic texture and taste.
Feel free to personalize your cake! Consider adding some chocolate syrup or sliced bananas between the layers for added flavor.
Chill and Set the Cake
The key to a delicious no bake nutty buddy icebox cake is patience! Cover your dish with plastic wrap and refrigerate the cake for at least 4 hours—overnight is even better. This allows the flavors to meld together and the layers to soften, creating a lovely, creamy dessert.
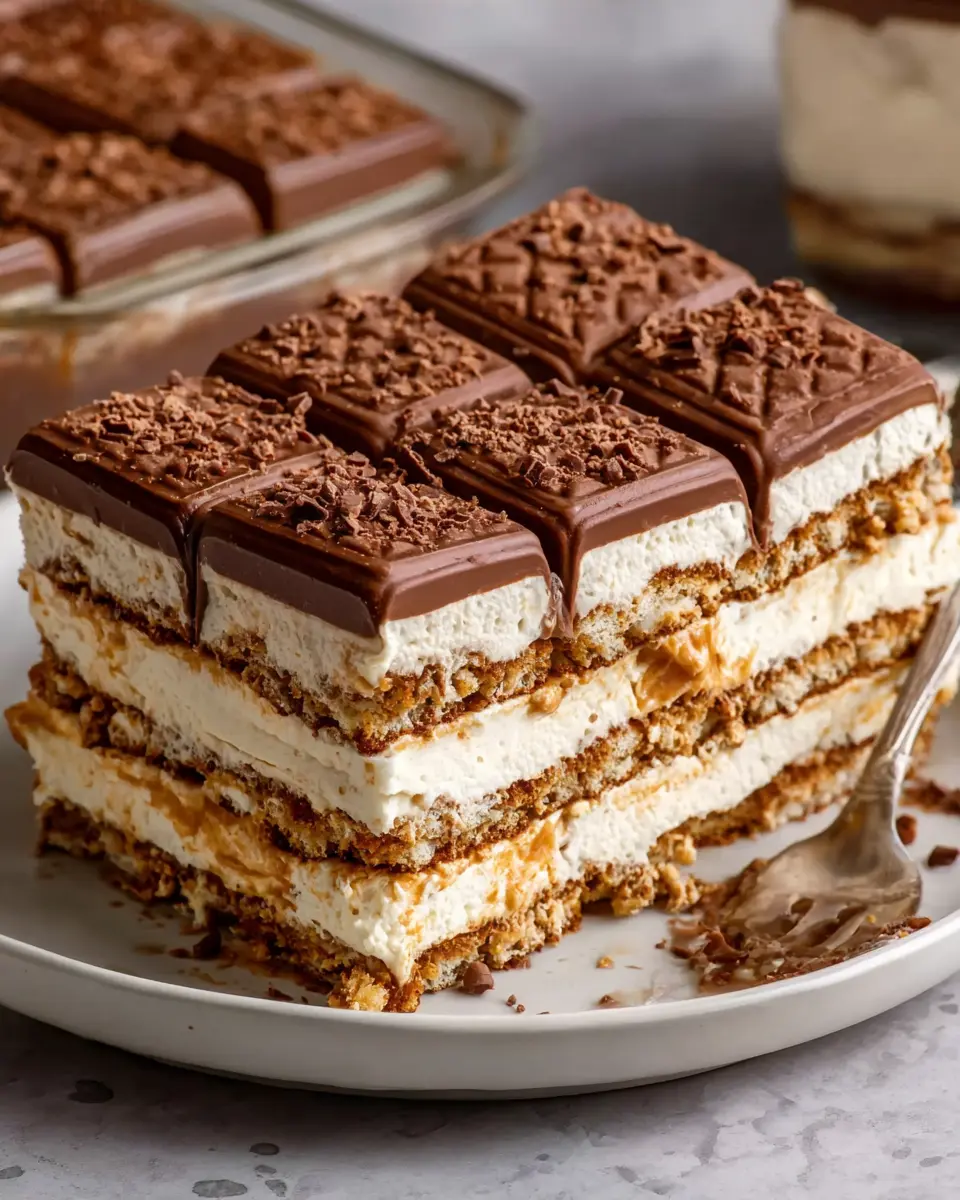
When you’re ready to serve, sprinkle crushed peanuts on top for a bit of crunch. Slice into squares, and enjoy this delightful treat with family and friends!
Conclusion
With this step-by-step guide, you’re now ready to create your own No Bake Nutty Buddy Icebox Cake. The combination of peanut butter, creamy pudding, and crunchy wafers is a surefire way to impress your guests. Give it a try and let the flavors come together for a sweet treat everyone will love! If you’re looking for more no-bake desserts, check out this no-bake cheesecake recipe for more inspiration. Happy baking!
Variations on No Bake Nutty Buddy Icebox Cake
Fun Nutty Buddy Twists: Using Different Flavors
While the classic no bake nutty buddy icebox cake is delish, don’t hesitate to get creative with flavors. Imagine swapping out the regular chocolate for white chocolate or even a rich dark chocolate. Each variation can bring a unique taste profile that makes your cake stand out at any gathering.
- Peanut Butter or Almond Butter: Instead of the traditional frosting, consider a layer of smooth peanut butter or almond butter. This will add both richness and a nutty flavor that pairs perfectly with the cake’s layers.
- Cookie Crunch Variety: Use different cookies like graham crackers, ginger snaps, or even oat biscuits to give your cake a unique texture and flavor, making each bite a delightful surprise.
No Bake Nutty Buddy Icebox Cake with Added Fruits
One of the best things about this cake is how well it plays with fresh fruits. Adding fruits not only enhances its flavor but also gives you a healthy twist.
- Berries: Layer in some strawberries, blueberries, or raspberries to add a refreshing tartness. Berries can lift the dessert with vibrant colors and flavors, making it even more visually appealing.
- Bananas: Try adding banana slices between the layers for a delightful sweetness. Bananas pair wonderfully with both chocolate and nut flavors, creating a creamy and indulgent bite.
Are you feeling inspired yet? Don’t forget to share your creations with friends and family! For more ideas on desserts that complement your healthy lifestyle, you might find inspiration at The Spruce Eats. What unique twist will you put on your no bake nutty buddy icebox cake?
Cooking Tips and Notes for No Bake Nutty Buddy Icebox Cake
Helpful Hints for Perfect Layers
Layering is the heart of your no bake nutty buddy icebox cake. Here are some quick tips to get it just right:
- Use Room Temperature Ingredients: Let your cream cheese or whipped cream warm a bit before mixing. This helps achieve smoother layers.
- Even Spreading: A spatula works wonders for spreading your mixture evenly—don’t rush this! Uneven layers can affect texture and presentation.
- Chill Time is Essential: After assembling, let the cake chill in the fridge for at least 4 hours, or better yet, overnight. This allows the flavors to meld beautifully.
For more tips on cake layering techniques, check out this helpful guide.
Storing Advice for Best Freshness
To keep your no bake nutty buddy icebox cake at its delightful best:
- Cover it!: Always cover your cake with plastic wrap or an airtight container to maintain freshness.
- Lasts Up to 5 Days: Enjoy your cake fresh! It’s best consumed within five days. Keeping it chilled will enhance that creamy flavor.
- Freeze for Longer Storage: If you need to keep it longer, you can freeze individual slices. Wrap them tightly and thaw in the fridge when ready to enjoy.
With these tips, your no bake nutty buddy icebox cake will be a hit at any gathering!
Serving Suggestions for No Bake Nutty Buddy Icebox Cake
Ideal Accompaniments for Your Icebox Cake
When serving your delicious no bake nutty buddy icebox cake, think about enhancing the experience with some tasty accompaniments. A scoop of vanilla bean ice cream or a dollop of whipped cream can add a creamy contrast to the cake’s rich flavors. Fresh berries, such as strawberries or blueberries, bring a burst of color and a refreshing tartness that beautifully balances the sweetness of the cake. If you want to elevate the moment, a drizzle of chocolate or caramel sauce on top will impress your guests while adding an extra layer of indulgence.
Presentation Tips to Wow Your Guests
First impressions matter, especially when it comes to dessert! To present your no bake nutty buddy icebox cake beautifully, consider layering it in a transparent trifle dish. This not only showcases its delightful textures but also makes it easy for guests to scoop out their portions. Garnishing with crushed nuts or a sprinkle of cocoa powder on top adds an inviting touch. As a final flourish, pop a few mint leaves beside the slice for a splash of color that makes it visually pop!
For more ideas on dessert presentation, check out this helpful guide. These tips will ensure your delicious creation not only tastes amazing but looks incredible too!
Time Breakdown for No Bake Nutty Buddy Icebox Cake
Preparation Time
Getting ready to whip up your no bake nutty buddy icebox cake is a breeze! You’ll need about 15 minutes to gather ingredients, mix your filling, and layer the cake. It’s a quick process, perfect for a spontaneous dessert craving or last-minute gathering.
Chilling Time
Now, this is where the magic happens. You’ll want your cake to chill in the fridge for about 4 hours, allowing all those delicious flavors to meld together beautifully. If you can, let it sit overnight for the best results—it makes a world of difference!
Total Time
In total, you’re looking at around 4 hours and 15 minutes from start to finish. Easy-peasy, right? You get a fabulously indulgent dessert without spending all day in the kitchen! If you’re keen on making it healthier, consider whipping up a lighter version with Greek yogurt instead of cream. Check out Healthline for some great yogurt options to mix it up!
Nutritional Facts for No Bake Nutty Buddy Icebox Cake
Calories Per Serving
When indulging in a no bake nutty buddy icebox cake, it’s good to know what’s on your plate. Each serving typically contains around 250-300 calories, making it a rich yet enjoyable treat to satisfy your sweet cravings without going completely overboard.
Protein and Fat Content
This delightful dessert packs a decent amount of protein, thanks to ingredients like peanut butter or almonds. You can expect about 6-8 grams of protein per serving, along with approximately 15 grams of fat. Most of the fat comes from heart-healthy sources, but be mindful of portion sizes!
Alternatives for Health-Conscious Eaters
If you’re looking to lighten up your no bake nutty buddy icebox cake, consider these alternatives:
- Use Greek yogurt in place of heavy cream for a protein boost.
- Opt for sugar-free pudding mix to reduce overall sugar content.
- Incorporate crushed nuts for added fiber and nutrients.
These simple swaps can make a significant difference while keeping the delightful essence of this dessert intact. For more information on healthy baking substitutes, check out Healthline for excellent resources.
By being mindful of ingredients and portions, you can savor this delicious cake without any guilt!
FAQ about No Bake Nutty Buddy Icebox Cake
Can I make this cake gluten-free?
Absolutely! If you’re looking to enjoy this no bake nutty buddy icebox cake while keeping it gluten-free, simply opt for gluten-free cookies. Many brands offer delicious gluten-free options that can easily replace traditional biscuits in the recipe. Just be sure to double-check the labels to avoid any hidden gluten. Your cake will still turn out just as delightful!
How long can I store leftovers?
Leftovers? If only! But if you do have some left after serving, you can store your no bake nutty buddy icebox cake in an airtight container in the fridge. It will keep well for about 3 to 5 days. Keep in mind that the texture might change a bit, as the layers can become softer over time.
Can I substitute ingredients for dietary needs?
Definitely! The beauty of the no bake nutty buddy icebox cake is its versatility. Here are a few substitutions to consider:
- Dairy-Free: Use coconut cream or a cashew-based cream instead of regular whipped cream.
- Nut-Free: Swap out nut butter for sun butter or a soy-based alternative if you have nut allergies.
- Sweeteners: If you prefer a sugar alternative, honey, maple syrup, or agave nectar can work well in moderation.
Whatever your dietary needs may be, get creative and adapt the recipe. Cooking should be fun and inclusive! For more tips on ingredient substitution, you can check out healthline.com.
Feel free to reach out with any more questions or share your experiences with this delicious cake. Baking (or no-baking) is all about enjoying the process and making it your own!
Conclusion on No Bake Nutty Buddy Icebox Cake
Final Thoughts on Homemade Desserts
Creating a no bake nutty buddy icebox cake is not just about enjoying a delightful treat; it’s also about the joy of crafting something special without the fuss. This dessert exemplifies how easy homemade sweets can be, especially when you’re juggling a busy lifestyle. It’s perfect for impressing friends or just indulging yourself after a long day.
Have you ever considered the joy homemade desserts can bring? They nurture creativity, elevate gatherings, and often carry the warmth of memories. Remember, even though this cake is simple to make, it’s loaded with flavor and love. So, gather your ingredients, give it a go, and enjoy every delicious bite! If you’re eager for more easy dessert ideas, check out Food Network’s dessert section for inspiration.
PrintNo Bake Nutty Buddy Icebox Cake: An Easy Indulgence for Everyone
A delicious and simple no-bake dessert that everyone will enjoy!
- Prep Time: 20 minutes
- Total Time: 4 hours 20 minutes
- Yield: 8 servings 1x
- Category: Dessert
- Method: No Bake
- Cuisine: American
Ingredients
- 1 package chocolate wafer cookies
- 2 cups heavy whipping cream
- 1 cup creamy peanut butter
- 1 cup powdered sugar
- 1 teaspoon vanilla extract
- 1/2 cup chopped nuts
Instructions
- In a large bowl, beat the heavy whipping cream until stiff peaks form.
- In another bowl, mix together the peanut butter, powdered sugar, and vanilla extract until smooth.
- Gently fold the whipped cream into the peanut butter mixture until well combined.
- Layer the chocolate wafer cookies and peanut butter mixture in a baking dish, starting and ending with the cookies.
- Sprinkle chopped nuts on top.
- Cover and refrigerate for at least 4 hours, or overnight for best results.
Notes
- For extra chocolate flavor, drizzle melted chocolate on top before serving.
- Try adding layers of sliced bananas or strawberries for added flavor.
Nutrition
- Serving Size: 1 slice
- Calories: 300
- Sugar: 15g
- Sodium: 150mg
- Fat: 20g
- Saturated Fat: 10g
- Unsaturated Fat: 8g
- Trans Fat: 0g
- Carbohydrates: 25g
- Fiber: 2g
- Protein: 5g
- Cholesterol: 30mg
Keywords: No Bake Nutty Buddy Icebox Cake, easy dessert, no-bake cake