Outline for Truly Crispy Buttermilk Oven Fried Chicken
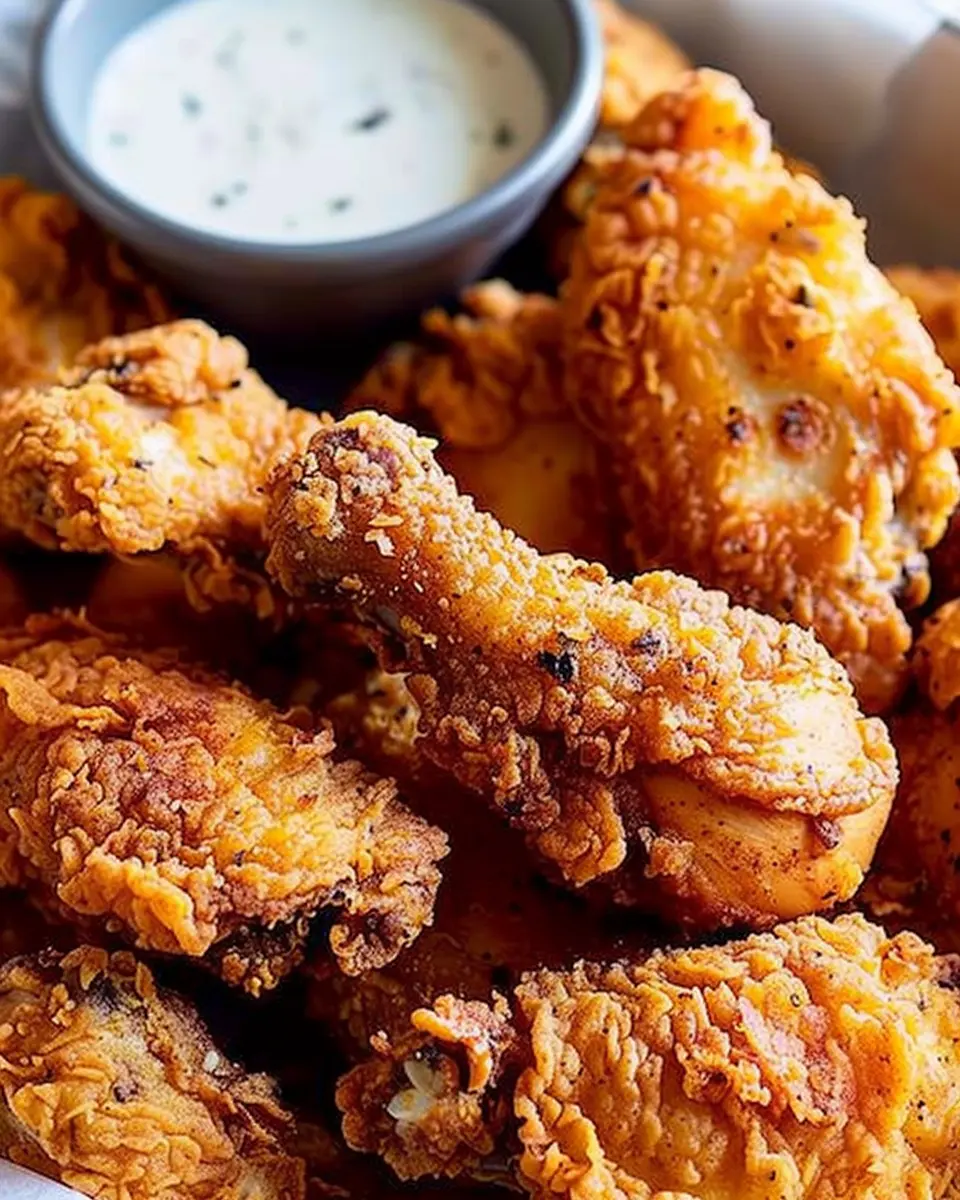
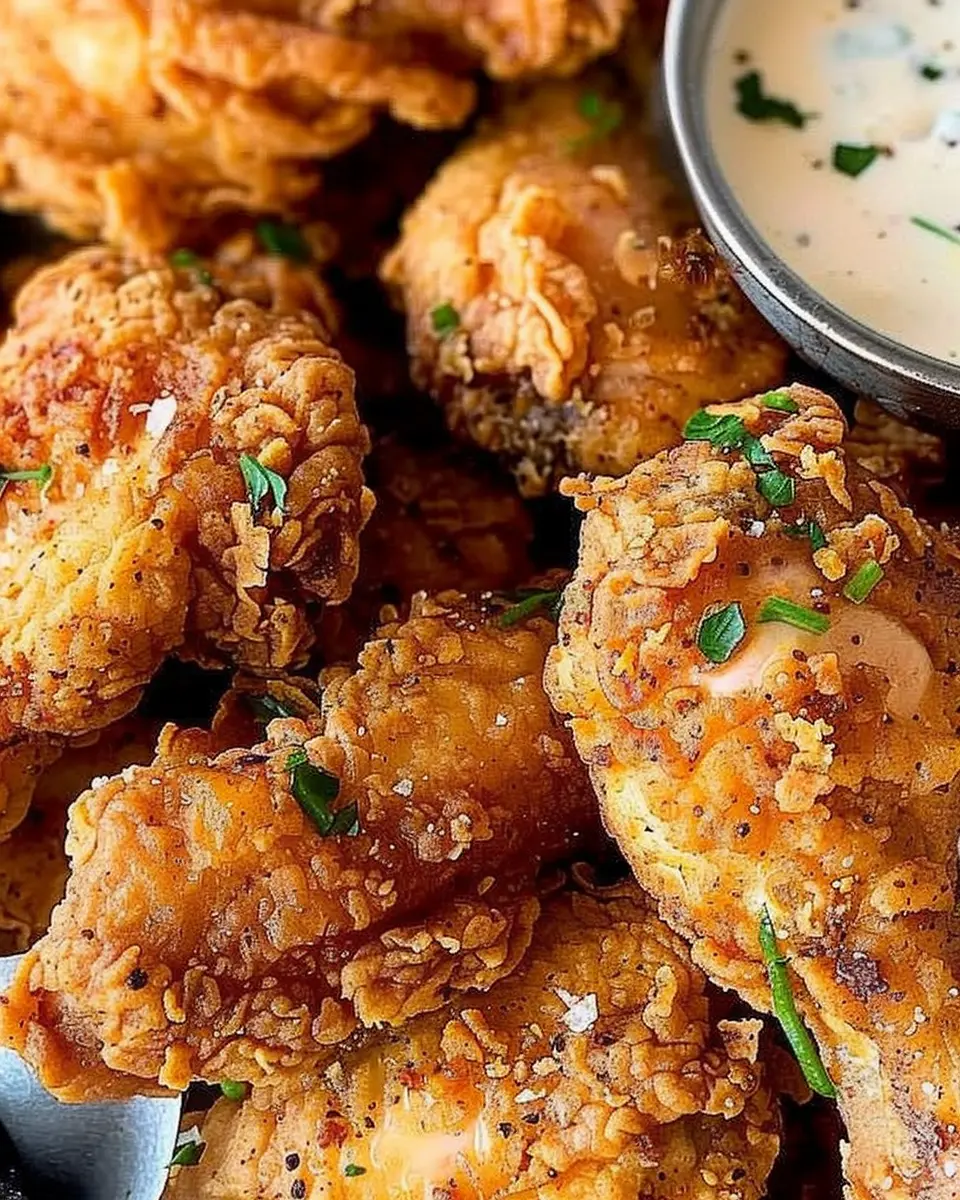
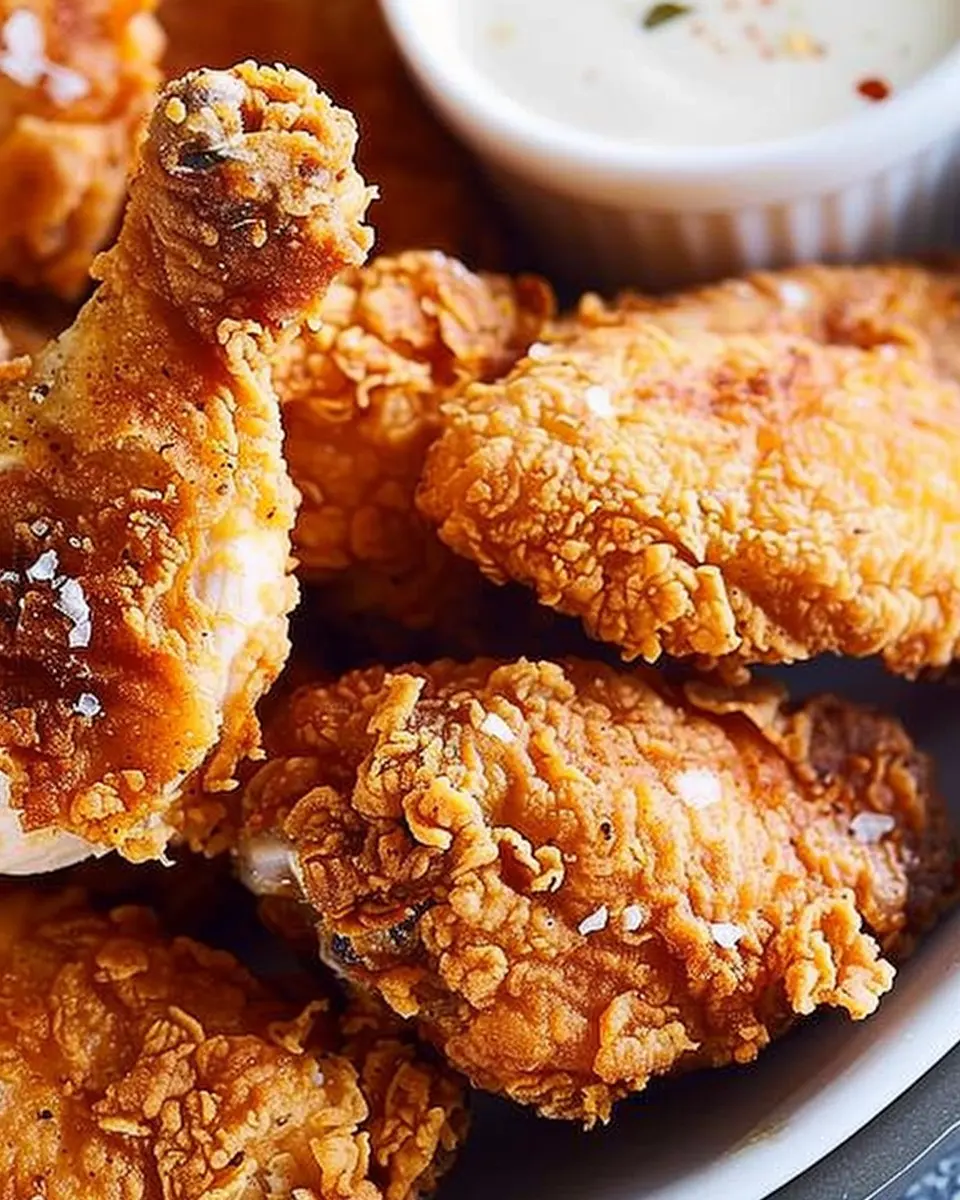
When you think of comfort foods, what springs to mind? For many, it’s the crispy, tender goodness of fried chicken. But how do you achieve that truly crispy buttermilk oven fried chicken without the hassle of deep frying? Good news: you’ve landed in the right place! This section will give you a comprehensive outline to help you craft the perfect oven-fried chicken that’s both delicious and healthier than its traditional counterpart. Let’s get started!
Understanding the Basics: Why Buttermilk?
Before diving into the recipe itself, it’s vital to understand why buttermilk reigns supreme in fried chicken recipes. So, what’s the deal?
- Tenderizing Power: Buttermilk is slightly acidic, meaning it can tenderize chicken effectively. This not only leads to juicy meat but also allows flavors to penetrate deep into the chicken.
- Flavor Booster: The tanginess of buttermilk helps enhance the overall flavor profile of the chicken. You won’t just taste the crust; you’ll experience a delightful harmony of spices and buttermilk.
For a deeper understanding of the chemical reactions involved, check out this Harvard article on cooking science.
Selecting the Right Ingredients
The magic of truly crispy buttermilk oven fried chicken comes from high-quality ingredients. Here’s a rundown of what you’ll need:
- Chicken: Opt for bone-in, skin-on pieces like thighs and drumsticks. They not only cook evenly but also retain moisture.
- Buttermilk: If you don’t have buttermilk, you can easily make a substitute using milk and either vinegar or lemon juice.
- Flour: Use all-purpose flour as your coating base. It’s versatile and gives a fantastic crunch.
- Spices: Common spices include paprika, garlic powder, salt, and black pepper. Don’t shy away from experimenting with cayenne for a kick!
The Marination Process
Marinating your chicken is where the magic begins. Here’s how to do it right:
- Mix Buttermilk & Spices: Combine buttermilk with your favorite spices in a large bowl or zip-lock bag.
- Submerge Chicken: Make sure every piece of chicken is fully submerged. A thorough coating will ensure that the flavors meld into the meat.
- Refrigerate: Marinate the chicken for at least 4 hours, but overnight is best. This allows the buttermilk to work its magic!
Preparing the Coating
The next step is a crucial one: preparing your coating. Here’s a quick and easy method:
- Combine Dry Ingredients: In a separate bowl, mix flour with salt and spices until uniformly combined. A simple ratio is 2 cups of flour to 1 tablespoon of salt and 1 tablespoon of your preferred spices.
- Texture Matters: For added crunch, consider adding panko breadcrumbs into the mix!
Dredging in Style
Now that your chicken is marinated, it’s time for the dredging process:
- Remove from Marinade: Take the chicken out of the buttermilk, allowing excess liquid to drip off.
- Coat in Flour Mixture: Dredge each piece in the flour blend, ensuring every nook and cranny is covered. This step is essential for achieving that desired crunch.
- Rest Before Baking: Let the coated chicken sit for about 10-15 minutes before baking. This helps the coating adhere better.
Baking Your Chicken to Perfection
Now we get to the part where the oven works its magic! Preheat your oven to 425°F (220°C).
- Use a Cooling Rack: Placing the chicken pieces on a rack over a baking sheet allows for even heat circulation. This helps make the chicken crispy on all sides.
- Drizzle for Flavor: A light drizzle of oil over the coated chicken can elevate the crispiness while preventing them from being too dry.
Timing is Key
How long should you bake your truly crispy buttermilk oven fried chicken? Here’s a guideline:
- Bake Time: Chicken pieces should take around 35-45 minutes, depending on size. Use a meat thermometer to check for doneness; it should read 165°F (75°C) internally.
- Broil for Finish: If you want an extra crispy finish, turn on the broiler for the last 5 minutes. Keep an eye on it, as this can go from perfectly crispy to burnt in seconds!
Enjoying Your Creation
Once the chicken has rested for a few minutes after baking, it’s time to dive in. Here are some ideas for serving your meal:
- Pairing Suggestions: Serve your chicken with sides like creamy coleslaw, mashed potatoes, or even a refreshing garden salad.
- Leftover Meals: The chicken can be transformed into sandwiches or wraps for lunch the next day!
Tips for the Ultimate Experience
Finally, here are some tips and tricks for achieving the best results every time:
- Use Fresh Seasonings: Fresh spices and herbs can elevate the taste drastically. Consider using fresh rosemary or thyme.
- Experiment with Flavors: Don’t be afraid to mix up your spice blend to suit your tastes—think garlic powder, onion powder, or even some herbs de Provence!
- Check for Even Cooking: Rotate your baking sheet halfway through for even cooking.
Wrapping Up
Now that you have a detailed outline for achieving the truly crispy buttermilk oven fried chicken, it’s time to roll up your sleeves and get cooking! With a little patience and some good-quality ingredients, you’ll impress your friends and family with a dish that’s just as good—if not better—than the deep-fried counterpart.
For additional insights, check out this resource on chicken preparation. Happy cooking!
Introduction to Truly Crispy Buttermilk Oven Fried Chicken
What’s the appeal of homemade fried chicken?
There’s something profoundly comforting about homemade fried chicken. Whether it’s the enticing aroma wafting through your kitchen or the satisfying crunch as you take that first bite, homemade fried chicken is a dish that brings people together. Making it yourself means you can control every aspect, from seasoning to cooking time, ensuring each piece is just right. Not to mention, it’s often healthier than takeout options! Baking instead of frying significantly reduces the amount of oil absorbed while still delivering the crispy texture you crave.
Why buttermilk makes a difference
Now, let’s talk about why buttermilk is a superstar in fried chicken recipes. When chicken soaks in buttermilk, its acidity tenderizes the meat while infusing incredible flavor. The result? Juicy, succulent chicken that pairs beautifully with a crisp, well-seasoned crust. The science behind it is simple—lactic acid helps break down proteins, making the chicken not just more tender but also flavorful. Add in a hint of spices, and you’ve got magic!
For those interested in diving deeper into the benefits of buttermilk, check out this insightful article from America’s Test Kitchen.
A personal story about fried chicken
I still remember my first attempt at making fried chicken in college. Armed with a cookbooks’ worth of enthusiasm but little experience, I envisioned a family feast. Without a clue about marinating, I just went straight to the breading. The kitchen looked like a scene from a cooking show gone wrong—bread crumbs everywhere! But when I pulled that sizzling chicken from the oven, and my friends gathered around the table, all the chaos melted away. Each crunchy bite was met with delighted smiles, proving that sometimes, even the simplest meals are the most memorable.
So, why not create your own wave of joy with truly crispy buttermilk oven fried chicken? Dive into this recipe, and I can guarantee it will be a hit at your next gathering!
Ingredients for Truly Crispy Buttermilk Oven Fried Chicken
Creating truly crispy buttermilk oven fried chicken requires a few key ingredients and some handy kitchen tools. Let’s dive into what you’ll need for this mouthwatering meal!
Essential ingredients for the marinade
To achieve that juicy, tender flavor, you’ll want to start with:
- Buttermilk: It’s rich in lactic acid, which not only makes the chicken tender but also adds a nice tang.
- Spices: Think paprika, garlic powder, onion powder, and a hint of cayenne for a subtle kick.
- Herbs: Fresh or dried thyme and parsley can elevate the flavor to new heights.
Key components for the dry and wet coatings
For the ultimate crunch, gather these components:
- Flour: Use all-purpose flour for your dry coating to give that perfect, crisp crust.
- Cornstarch: A touch of cornstarch in your flour mix can improve crunchiness.
- Seasoning: Salt and pepper are essential, but feel free to experiment with your favorite seasoning blends.
Recommended equipment for best results
You’ll want a few kitchen helpers to ensure your chicken comes out just right:
- Baking Sheet: A rimmed baking sheet works best to catch any drippings.
- Cooling Rack: Place it on the sheet to allow air circulation—this helps achieve extra crispiness!
- Meat Thermometer: Ensure your chicken is cooked to perfection, reaching an internal temperature of 165°F.
Ready to make this truly crispy buttermilk oven fried chicken? With the right ingredients and tools, you’ll impress everyone at the dinner table! Check out this guide for tips on achieving the perfect texture.
Step-by-Step Preparation of Truly Crispy Buttermilk Oven Fried Chicken
Making truly crispy buttermilk oven fried chicken at home is easier than you might think! With a few simple steps, you can whip up a dish that’s as crispy as it is flavorful. You’ll find that the secret lies not only in the ingredients but in the preparation process. Let’s roll up our sleeves and get started!
Marinate the chicken for maximum flavor
The first step is all about infusing your chicken with flavor. Marinating in buttermilk is a game changer.
- Ingredients for the marinade:
- 1 quart buttermilk
- 2 tablespoons hot sauce (optional, for a little kick)
- Salt and pepper to taste
Combine the buttermilk and hot sauce in a large bowl or resealable bag, then season with salt and pepper. Add your chicken pieces—make sure they’re fully submerged. For an ideal flavor, let them marinate for at least 4 hours, or overnight if you can (this allows the flavors to penetrate more deeply).
Why buttermilk? The acidity in buttermilk helps to tenderize the chicken, resulting in juicy meat wrapped in a crispy shell. If you’re curious about the science behind it, check out this insightful article on how marination works.
Preheat your oven and prepare your pan
While your chicken is basking in that flavorful buttermilk bath, it’s time to prepare your oven and baking pan.
- Preheat your oven to 425°F (220°C).
- Line a baking sheet with foil for easy cleanup and place a wire rack on top. This allows air to circulate around the chicken, ensuring it cooks evenly and becomes crisp-tacular.
Create the dry coating mixture
Now, let’s talk crunch! The dry coating is key to achieving that desired crispy texture.
- Dry coating ingredients:
- 1 cup all-purpose flour
- 1 tablespoon paprika
- 1 teaspoon garlic powder
- 1 teaspoon onion powder
- Salt and pepper to taste
In a shallow dish, whisk together the flour, paprika, garlic powder, onion powder, salt, and pepper. Feel free to customize this mix—adding herbs like thyme or oregano can elevate your dish even further!
Prepare the wet coating
As we gear up to transform our marinated chicken into truly crispy buttermilk oven fried chicken, we also need a wet coating for that extra stick.
- Wet coating ingredients:
- 2 large eggs
- 1 tablespoon mustard (think spicy or Dijon for an extra flavor boost)
In another bowl, whisk together the eggs and mustard until smooth. This sticky mixture is essential for adhering the dry coating to the chicken.
Coat the chicken pieces evenly
Now comes the fun part! Retrieve your marinated chicken and begin the coating process.
- Coating steps:
- Remove each piece of chicken from the buttermilk marinade, letting the excess drip off.
- Dip each piece into the wet coating, ensuring it’s well covered.
- Next, transfer it to the dry coating mixture. Press lightly to help the coating adhere firmly.
This double-dipping process is the secret to locking in all that crunch! Place each coated piece on the prepared wire rack.
Bake and achieve that crispy perfection
It’s almost time to dig in!
- Bake the coated chicken in the preheated oven for 35-45 minutes, or until the internal temperature reaches 165°F (75°C) and the coating is golden brown and crispy. Flip the pieces halfway through to ensure even cooking.
Once done, allow your chicken to rest for a few minutes. This will help keep it juicy—because nobody likes dry chicken!
In summary, with a simple marinade, a crispy coating, and the magic of baking, you can create an irresistible dish of truly crispy buttermilk oven fried chicken that’s sure to impress. Pair it with some homemade coleslaw or a refreshing salad for a complete meal! Happy cooking, and don’t forget to share your delicious results!
Variations on Truly Crispy Buttermilk Oven Fried Chicken
Spicy Variations with Added Heat
If you’re a fan of a little heat, you can easily transform your truly crispy buttermilk oven fried chicken into a spicy sensation. Try adding cayenne pepper, chili powder, or even a dash of hot sauce to your buttermilk marinade. For those who love a deeper heat, consider incorporating minced jalapeños or diced habaneros into the coating for an extra kick. These subtle changes can elevate the flavor profile from classic to crave-worthy, ensuring that every bite has that fiery punch.
Alternative Coatings for Different Textures
Why not experiment with various coatings to achieve uniquely crispy textures? For a gluten-free option, consider using almond flour or crushed cornflakes for a delightful crunch. If you want to tap into a bit of southern charm, try using crushed, seasoned crackers or panko breadcrumbs. Each alternative adds its own flair—if you’re feeling adventurous, why not mix different coatings together? This is a great way to discover your new favorite crunch!
Making it Healthier with Leaner Chicken Cuts
Looking to enjoy the deliciousness without the guilt? Opt for leaner chicken cuts like chicken breast or thigh. These options retain moisture while allowing the truly crispy buttermilk oven fried chicken experience without the richness of dark meat. Pair your chicken with a side of fresh veggies or a light salad, and you’ve got a balanced meal that doesn’t skimp on flavor.
For more ideas on healthy cooking and meal prep, check out Healthline’s collection of tips.
By exploring these variations, you not only keep your cooking fresh but also ensure that your truly crispy buttermilk oven fried chicken remains a go-to family favorite. Happy cooking!
Cooking Tips and Notes for Truly Crispy Buttermilk Oven Fried Chicken
Crafting the perfect truly crispy buttermilk oven fried chicken is an art, and timing plays a crucial role in that masterpiece. Allowing your chicken to marinate in the buttermilk overnight can enhance its flavor and moisture retention. This extra time lets the acids in the buttermilk tenderize the meat, ensuring that it cooks evenly and remains juicy.
Achieving a Crispy Coating
For that coveted crunch, opt for panko breadcrumbs instead of traditional breadcrumbs. They absorb less oil and create a lighter, crispier texture. Additionally, keep your oven at the right temperature—around 425°F. Using a wire rack on your baking sheet allows air to circulate around the chicken, helping achieve that golden brown finish.
Ensuring Juicy Chicken
Don’t rush the cooking process. Let the chicken rest for a few minutes post-cooking; this helps redistribute the juices and prevents dried-out meat. A meat thermometer can also be your best friend: aim for an internal temperature of 165°F to ensure it’s perfectly cooked.
For more cooking tips, explore resources like Serious Eats and America’s Test Kitchen for expert advice. Enjoy your culinary adventure!
Serving Suggestions for Truly Crispy Buttermilk Oven Fried Chicken
Delicious sides to complement the chicken
When diving into truly crispy buttermilk oven fried chicken, consider pairing it with sides that balance its rich flavor. Here are some favorites:
- Creamy Coleslaw: The crunch and tanginess perfectly contrast the chicken’s crispy texture.
- Garlic Mashed Potatoes: Smooth and buttery, they offer a comforting touch.
- Roasted Vegetables: Carrots, bell peppers, and Brussels sprouts drizzled with olive oil make a colorful, nutritious accompaniment.
Creative dips to elevate your meal
Elevate each bite of your chicken with tantalizing dips! Here are some options that can tickle your taste buds:
- Honey Mustard Sauce: A sweet and tangy blend that complements the savory notes of the chicken.
- Spicy Sriracha Mayo: If you enjoy a kick, this creamy concoction will add a spicy twist.
- Garlic Aioli: A classic that brings a creamy, garlicky essence to every bite.
Ideas for a complete homemade feast
For a delightful gathering, create a spread that leaves everyone satisfied:
- Start with a fresh garden salad topped with vinaigrette for a light touch.
- Serve your truly crispy buttermilk oven fried chicken alongside Turkey Bacon-wrapped asparagus for a deliciously smoky twist.
- Finish with homemade lemon bars or a fruit crisp to balance out the meal’s richness.
Crafting a well-rounded menu not only enhances the chicken but creates an unforgettable dining experience! For more delicious side recipes, consider checking out EatingWell or Food Network.
Time Breakdown for Truly Crispy Buttermilk Oven Fried Chicken
Preparation Time
Getting started on your truly crispy buttermilk oven fried chicken doesn’t have to be a chore. You’ll need about 15 minutes for prep work. This includes mixing up the buttermilk marinade, seasoning your chicken, and getting everything arranged. It’s all about efficiency, so make sure your ingredients are prepped and ready to go!
Cooking Time
Once your chicken is marinated and you’re ready to cook, the baking time will take around 45 to 50 minutes. This allows the chicken to develop that golden crust while baking to perfection. Baking compared to frying not only makes it healthier but also less daunting!
Total Time Including Marinating
When you factor in marination—which ideally should be at least 4 hours (or overnight for the best flavor)—you’re looking at a total time investment of about 4 hours and 50 minutes. But don’t let the time scare you! Most of this is hands-off, and you’ll be left with delectable, crispy chicken that’s bound to impress.
For more on meal prepping and marinating, check out resources from The Kitchn or Serious Eats.
Nutritional Facts for Truly Crispy Buttermilk Oven Fried Chicken
When it comes to making truly crispy buttermilk oven fried chicken, it’s important to understand the nutritional benefits. Each serving holds roughly 300 calories, with a balanced macronutrient breakdown including:
- Protein: Approximately 30 grams, essential for muscle repair and growth.
- Fat: About 12 grams, primarily from the buttermilk and seasoning oil, offering a satisfying taste.
- Carbohydrates: Around 15 grams, mainly from light breading.
Health Benefits of Key Ingredients
Buttermilk is not just for flavor; it’s packed with probiotics that promote gut health. The chicken provides lean protein, vital for a healthy diet. Plus, using spices like paprika and garlic powder not only enhances flavor but also offers antioxidants.
For more insights on the health benefits of chicken, check out Healthline to see how it fits into a balanced diet. By choosing truly crispy buttermilk oven fried chicken, you enjoy a delicious meal that’s not only comforting but also nutritious!
FAQs about Truly Crispy Buttermilk Oven Fried Chicken
Can I make this recipe gluten-free?
Absolutely! To make your truly crispy buttermilk oven fried chicken gluten-free, simply substitute regular flour with a gluten-free all-purpose flour blend. Many brands offer great options that mimic the texture of traditional flour. Additionally, look for gluten-free breadcrumbs or panko for that irresistible crunch. Just ensure all other ingredients, like the buttermilk and spices, are gluten-free as well. Check out this guide on gluten-free cooking for more tips on swapping ingredients.
What’s the best way to store leftovers?
Storing leftovers of your truly crispy buttermilk oven fried chicken is fairly easy. Once cooled to room temperature, place the chicken pieces in an airtight container, separating layers with parchment paper to prevent sticking. Refrigerate them, and they should stay good for up to 3-4 days. If you want to enjoy that crispiness later, consider reheating in the oven rather than the microwave to maintain texture — simply pop them back in at 375°F for about 10-15 minutes.
How do I ensure the coating stays crispy?
To achieve the ultimate crunch with your truly crispy buttermilk oven fried chicken, there are a few key techniques you can employ:
- Drying Time: After coating the chicken, let it sit for about 15-20 minutes before baking. This helps the coating adhere better.
- Baking Rack: Use a wire rack on top of your baking sheet to allow air circulation around the chicken, preventing steam from making the bottom soggy.
- Oil Spray: A light spray of oil before baking can enhance crispiness. Look for high-temperature oils like avocado oil for the best results.
With these tips, you’ll be serving up perfect truly crispy buttermilk oven fried chicken that rivals any fried version!
Conclusion on Truly Crispy Buttermilk Oven Fried Chicken
There’s nothing quite like the joy of whipping up homemade fried chicken in your kitchen. The aroma that fills your home, the crispy goodness, and the satisfaction of sharing hearty meals with loved ones create unforgettable memories. Why not elevate your weekend with this recipe for truly crispy buttermilk oven fried chicken? It’s an enjoyable and healthier take on a classic favorite!
We’d love to hear your personal experiences and any tips you might have while preparing this dish. What makes your version unique? Feel free to share in the comments or connect with us on social media. Your insights could inspire someone else to try making their own irresistible fried chicken!
PrintTruly Crispy Buttermilk Oven Fried Chicken You’ll Love to Make

A delicious and healthier take on fried chicken!
- Prep Time: 15 minutes
- Cook Time: 30 minutes
- Total Time: 2 hours 45 minutes
- Yield: 4 servings 1x
- Category: Main Course
- Method: Oven
- Cuisine: American
- Diet: Gluten-Free
Ingredients
- 1 cup buttermilk
- 2 pounds chicken pieces
- 1 cup all-purpose flour
- 1 teaspoon paprika
- 1 teaspoon garlic powder
- 1 teaspoon onion powder
- 1/2 teaspoon cayenne pepper
- 1 teaspoon salt
- 1/2 teaspoon black pepper
Instructions
- Marinate the chicken in buttermilk for at least 2 hours.
- Preheat the oven to 425°F (220°C).
- In a bowl, mix flour and spices.
- Coat the chicken pieces in the flour mixture.
- Place the coated chicken on a baking sheet.
- Bake for 25-30 minutes until crispy.
Notes
- Let the chicken rest before serving for maximum crispiness.
- Use a meat thermometer to ensure chicken is cooked to 165°F (75°C).
Nutrition
- Serving Size: 1 piece
- Calories: 400
- Sugar: 1g
- Sodium: 800mg
- Fat: 20g
- Saturated Fat: 5g
- Unsaturated Fat: 10g
- Trans Fat: 0g
- Carbohydrates: 30g
- Fiber: 1g
- Protein: 30g
- Cholesterol: 100mg
Keywords: buttermilk, crispy chicken, oven fried