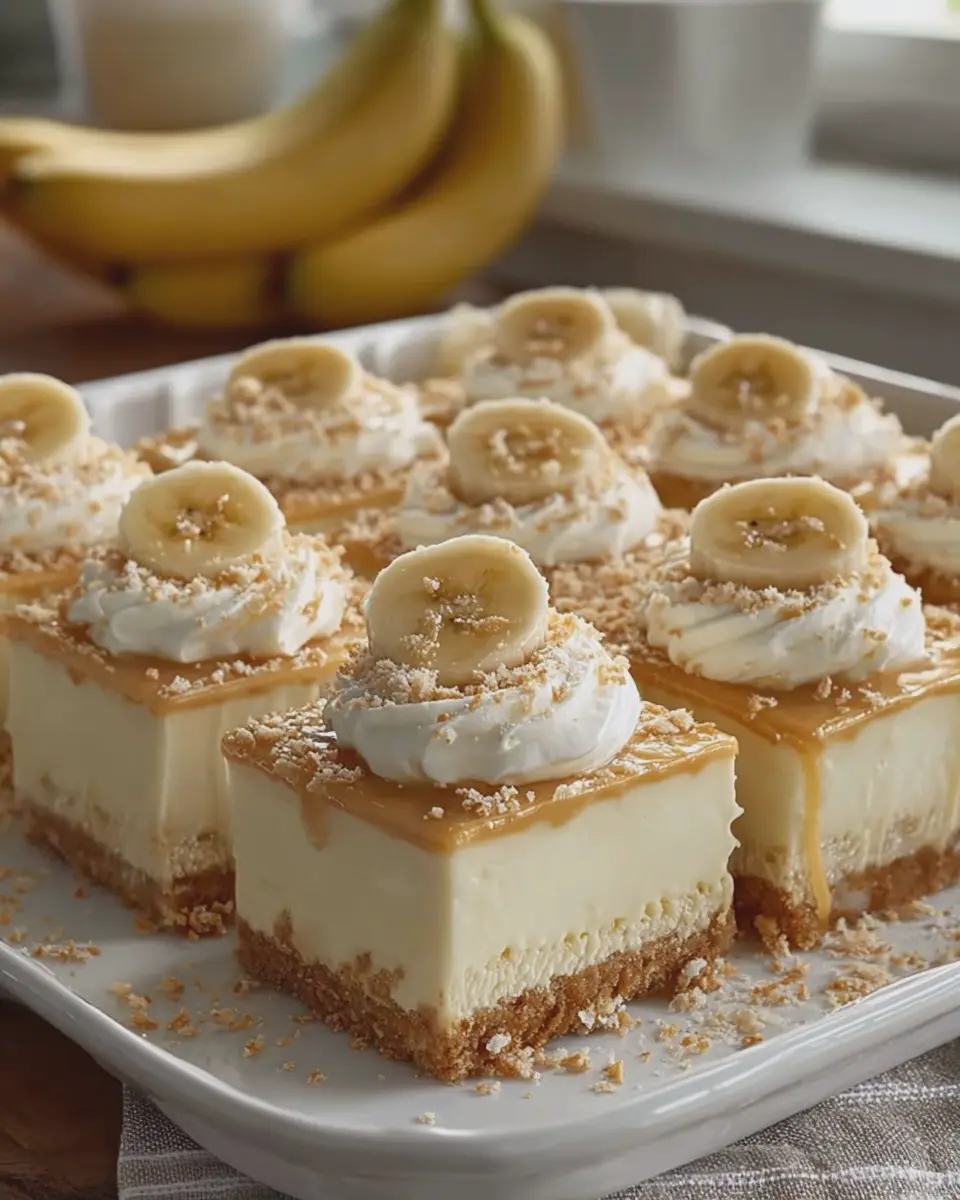
Introduction to Banana Pudding Dessert Bars
Why Banana Pudding Dessert Bars Are Perfect for You
If you’re looking for a dessert that’s both comforting and crowd-pleasing, banana pudding dessert bars are a fantastic choice. These bars combine the beloved flavors of classic banana pudding with the convenience of a portable treat. Whether you’re hosting a casual get-together or just want to indulge yourself, these sweet, creamy bars are sure to deliver smiles.
Think about how easy they are to make! You can whip them up in advance, slice them into manageable squares, and they’re perfect for sharing or meal prepping. Plus, they’re a great way to use up those overly ripe bananas lounging around on your countertop!
A Brief History of Banana Pudding in American Cuisine
Banana pudding has an interesting history in American cuisine. The origins of pudding can be traced back to the 17th century, but banana pudding, in particular, took off during the post-World War II era when community cookbooks started featuring sweet dishes that could be prepared easily with pantry staples like condensed milk.
Interestingly, if you’ve ever wondered about the origins of the classic banana pudding, you’ll find that it truly became an American staple in the South. According to the National Banana Pudding Festival, the first recorded banana pudding recipe appeared in 1889 in The Boston Cooking School Magazine. Bananas, which became widely available due to increased imports, made their way into homes across the nation, becoming a popular ingredient in desserts.
Have you ever tasted a traditional banana pudding layered with vanilla wafers? It’s no wonder that the flavors merged well into a bar format. The simplicity of the bar allows for easy customization—think chocolate swirls or even peanut butter drizzles—making them a versatile dessert that appeals to a wide range of tastes.
Whether you prefer the classic approach or a modern twist, banana pudding dessert bars pay homage to a beloved dessert while offering a fresh way to enjoy those classic flavors. So, are you ready to dive into making your own? You won’t regret it!
For more tips and inspiration, check out sources like Southern Living or The Food Network to explore variations of this delicious treat.
Ingredients for Banana Pudding Dessert Bars
Key Components You’ll Need
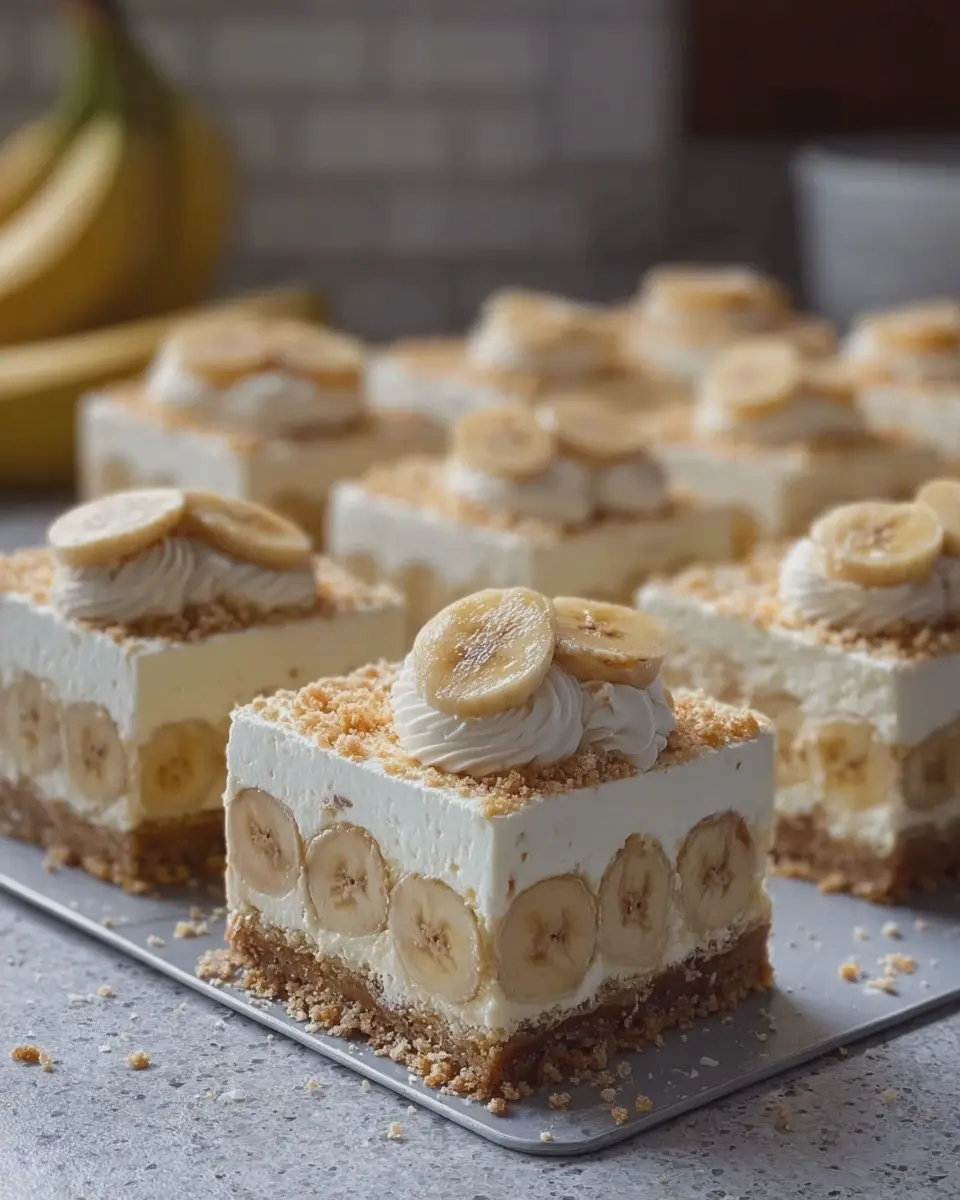
When diving into the world of banana pudding dessert bars, it’s essential to gather the right ingredients for that perfect blend of creamy, sweet goodness. Here’s what you’ll need:
- Ripe Bananas: The star of the show! Choose ones that are speckled for optimal sweetness.
- Graham Crackers: For a crunchy crust that perfectly contrasts the creamy filling.
- Pudding Mix: Instant vanilla is classic, but feel free to explore other flavors!
- Milk: The creamy base for your pudding — whole milk works best.
- Cream Cheese: This adds a rich texture and helps bind your filling.
- Whipped Topping: A light, fluffy finish that makes every bite heavenly.
These ingredients come together harmoniously, creating a dessert that will have your friends asking for seconds!
Optional Ingredients for Extra Flavor
Want to take your banana pudding dessert bars to the next level? Here are some optional ingredients that can add a delightful twist:
- Cinnamon or Nutmeg: A dash of spice can elevate the banana flavor beautifully.
- Chocolate Chips: Go decadent! They add a nice contrast to the bananas.
- Chopped Nuts: Walnuts or pecans can add a lovely crunch and earthy flavor.
- Caramel Sauce: Drizzle some on top for an indulgent finish.
With these additions, your dessert bars can be both unique and personal. It’s all about experimenting and finding what delights your palate! For more kitchen inspiration, check out Food Network’s dessert tips.
Now, let’s get those ingredients ready and bring some joy to your taste buds!
Step-by-Step Preparation of Banana Pudding Dessert Bars
Banana pudding has always held a special place in my heart, reminiscent of family gatherings and summer barbecues. Today, I’m here to share a delightful recipe for banana pudding dessert bars that combines that classic flavor into a convenient, portable treat. So, grab those ripe bananas, and let’s dive into this step-by-step preparation!
Prepare the Nilla Wafer Crust
The first step to these banana pudding dessert bars is the crust, and you won’t believe how easy it is. Here’s what you’ll need:
- 2 cups Nilla Wafers, crushed
- 1/2 cup unsalted butter, melted
- 2 tablespoons sugar
- Crush the Wafer Cookies: You can place the Nilla Wafers in a ziplock bag and use a rolling pin to crush them, or you can pulse them in a food processor. Either way works well!
- Mix with Butter and Sugar: In a mixing bowl, combine the crushed cookies with melted butter and sugar until fully blended.
- Press into the Pan: Firmly pack this mixture into the bottom of a greased 9×13 inch baking dish. Browning the crust slightly in the oven will give it an extra crunch, so consider baking it at 350°F for about 10 minutes.
Slice the Fresh Bananas
While your crust cools, let’s get those bananas ready.
- Use about 3 ripe bananas for a rich flavor.
- Peel and Slice: Peel the bananas and slice them into thin rounds, about 1/4 inch thick.
Layering the bananas evenly over the crust later adds a beautiful touch to your dessert bars. Plus, fresh bananas are a great source of potassium and bring natural sweetness that you’ll love!
Beat the Cream Cheese Mixture
The creamy filling is what makes these banana pudding dessert bars truly indulgent.
- You’ll need:
- 8 ounces cream cheese, softened
- 1 cup powdered sugar
- 2 cups whipped topping (like Cool Whip) or homemade whipped cream
- Combine Ingredients: In a mixing bowl, beat the softened cream cheese until smooth. Gradually add the powdered sugar until completely combined.
- Fold in Whipped Topping: Gently fold the whipped topping into the cream cheese mixture. This keeps the filling light and airy.
Mix the Filling Ingredients
Now, let’s add an additional layer of flavor!
- You can integrate a bit of vanilla pudding mix here for extra creaminess.
- Pudding Mixture: If you’re using a box of pudding mix, prepare it according to the package instructions and add it to your cream cheese mixture for that delicious pudding taste.
Layer the Ingredients in Your Baking Dish
It’s time for the fun part!
- Begin layering your ingredients:
- Spread the Creamy Mixture: Spoon the cream cheese mixture over the crust, smoothing it evenly.
- Add Banana Slices: Layer your sliced bananas on top. Don’t be shy—this is where the banana flavor really comes to life!
- Top with Whipped Cream: If you have leftover whipped topping, use it to finish off the layers.
Chill and Set the Bars
Patience is key here.
- Cover your baking dish with plastic wrap and place it in the fridge for at least 4 hours.
This allows the flavors to meld beautifully and helps the bars set up.
Serve the Dessert Bars
Finally, the moment you’ve waited for!
- Once chilled, remove your banana pudding dessert bars from the fridge.
- Cut into Squares: Use a sharp knife to cut the dessert into squares.
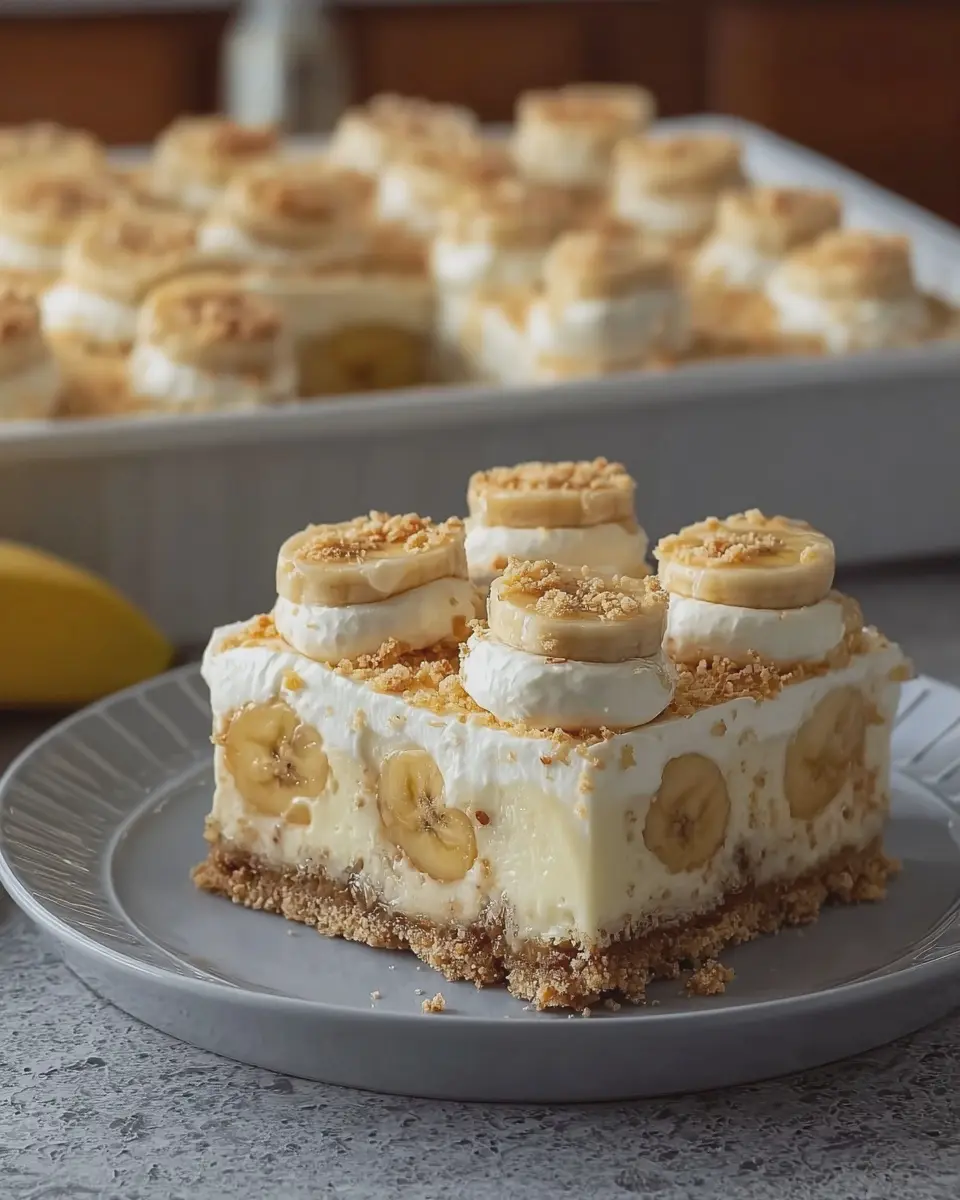
- Garnish: Consider a sprinkle of crushed Nilla Wafers on top for added texture and a fresh banana slice as a garnish.
These delicious bars are perfect for potlucks, parties, or just as a sweet treat at home. Enjoy every bite of nostalgia – your friends and family will adore them!
Ready to whip up these scrumptious banana pudding dessert bars? Let me know how yours turn out!
Variations on Banana Pudding Dessert Bars
Vegan Banana Pudding Bars
Who says you need dairy to enjoy banana pudding dessert bars? If you’re following a vegan lifestyle, simply swap the traditional pudding mix for a plant-based version. Silken tofu can also create a creamy texture—just blend it with ripe bananas and almond milk for rich flavor. For the crust, opt for graham crackers made from whole grains or even a nut-based crust. The result? Decadent bars that even your non-vegan friends will love!
Gluten-Free Banana Pudding Dessert Bars
If gluten is a no-go for you, don’t fret! Making banana pudding dessert bars gluten-free is a breeze. Look for gluten-free graham crackers or substitute crushed nuts and oats for a unique twist. Additionally, ensure that your pudding mix is certified gluten-free. With just a few adjustments, you can indulge in that creamy delight without any worries. Just like with vegan options, the flavor remains rich and satisfying!
Adding Extra Layers of Flavor with Nuts or Chocolate
Want to elevate your banana pudding dessert bars to new heights? Consider adding in some crunchy elements! Walnuts or pecans not only provide texture but also a delightful nuttiness. You could also toss in some dark chocolate chips for a sweet contrast against the creamy layers. A drizzle of nut butter or a sprinkle of sea salt can create an irresistible balance of flavors.
These tweaks not only customize your dessert but also impress your friends at gatherings. After all, a little creativity goes a long way in the kitchen! Looking for inspiration for more variations? Check out sites like Serious Eats and Minimalist Baker for ideas and recipes that keep the deliciousness flowing. Happy baking!
Cooking Tips and Notes for Banana Pudding Dessert Bars
How to Achieve the Perfect Crust
Getting that ideal crust for your banana pudding dessert bars is all about balance. Here are a few friendly tips to help you nail it:
- Use parchment paper: Line your baking pan with parchment to make removal a breeze.
- Press firmly: When prepping the crust, use the back of a measuring cup to press it down evenly. This ensures a solid base that won’t crumble when sliced.
- Don’t skip pre-baking: Give your crust a quick bake before adding the filling. This will give it a nice golden color and prevent it from becoming soggy.
Tips for Slicing Without Messing Up the Presentation
We’ve all been there—after putting in all that effort, the presentation can fall flat when slicing. Here’s how to keep your banana pudding dessert bars looking pristine:
- Use a sharp knife: Always use a clean, sharp knife to cut your bars. Wipe the knife with a damp cloth between cuts to ensure neat edges.
- Chill in the fridge: Allow the bars to chill completely in the refrigerator for at least a couple of hours. This sets the filling and makes slicing easier.
- Cut with precision: Start by cutting straight down and then pull the knife back out with a clean motion. This minimizes dragging and maintains those gorgeous layers.
For more tips on achieving baked perfection, consider checking out resources from the Food Network or America’s Test Kitchen. Happy baking!
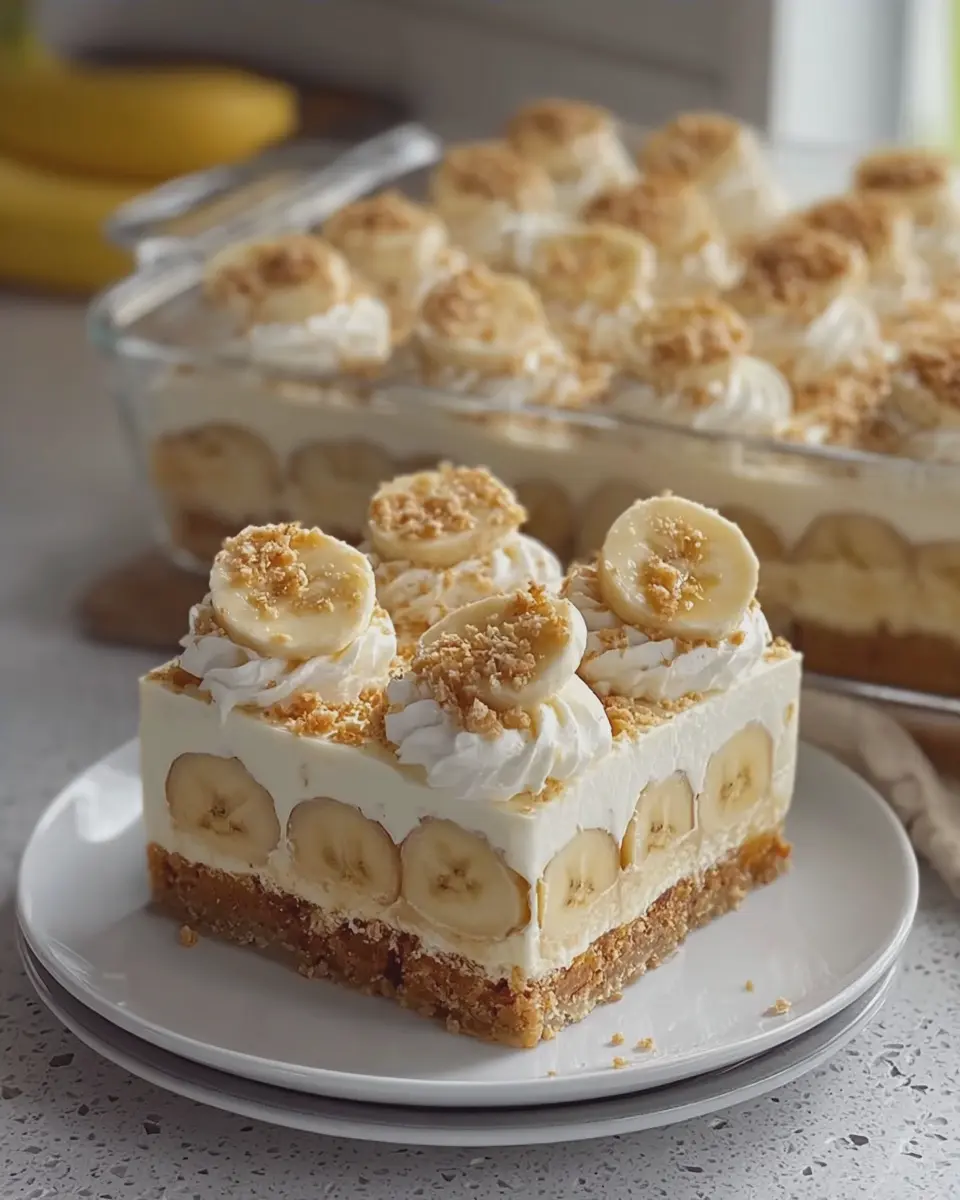
Serving Suggestions for Banana Pudding Dessert Bars
Creative Ways to Serve Your Dessert Bars
When it comes to presenting your banana pudding dessert bars, a little creativity can go a long way! Consider cutting them into fun shapes using cookie cutters for a playful twist, especially if you’re hosting a gathering. You can also layer the bars in individual cups with whipped cream and banana slices to create a delightful dessert parfait that looks as good as it tastes.
For a touch of elegance, sprinkle some crushed vanilla wafers on top just before serving or drizzle with a homemade caramel sauce. These simple ideas not only up the visual ante but also enhance the overall flavor experience.
Pairing Options to Accompany Your Bars
Looking for the perfect companion to your banana pudding dessert bars? Here are some delicious options:
- Coffee or Tea: A rich cup of coffee or a light herbal tea can beautifully complement the sweetness of the bars.
- Fresh Fruit: Serve alongside a fruit platter featuring seasonal fruits for a refreshing balance.
- Turkey Bacon or Chicken Ham: The savory notes of these protein choices can create a delightful contrast to the sweetness.
For more pairing ideas that enhance your dessert experience, check out Food Network for their expert insights!
Time Breakdown for Banana Pudding Dessert Bars
When tackling the delicious journey of making banana pudding dessert bars, clear timing is crucial. Here’s a quick guide to help you plan your baking adventure.
Preparation Time
Get ready to roll up your sleeves! You’ll spend about 15 minutes gathering your ingredients and mixing everything together. It’s a straightforward process, so you’ll be ready to move on to the next step in no time.
Cooking Time
Baking those delightful bars will take approximately 25-30 minutes. Keep an eye on them to ensure they don’t overbake. A toothpick test is a great way to check if they’re perfectly set.
Total Time
In just under 45-50 minutes, you’ll have banana pudding dessert bars that will have everyone asking for seconds!
This timing is perfect if you’re planning for a gathering or simply looking to treat yourself after a long day. With minimal effort, you can whip up a dessert that feels truly indulgent. For more tips on dessert timing, check out Baking Basics for extra insights!
Nutritional Facts for Banana Pudding Dessert Bars
Calories per Serving
If you’re curious about indulgence without the guilt, banana pudding dessert bars are a delicious option. Each serving comes in at approximately 220 calories, making them a sweet treat that won’t derail your day. Just enough to satisfy your cravings without overwhelming your calorie count!
Breakdown of Key Nutrients
Understanding the nutritional components of these bars makes them even more tempting. Here’s a quick look at what you’re indulging in:
- Carbohydrates: About 30g, mostly from wholesome bananas and a bit of sugar.
- Protein: Roughly 3g, thanks to the inclusion of ingredients like Greek yogurt or vanilla pudding.
- Fat: Approximately 7g, with healthy fats from sources like nuts or butter used in the crust.
- Fiber: A nice boost at around 1g, courtesy of the bananas.
For more details on health benefits and balanced diets, check out resources like the American Heart Association or Nutritional Guidelines. This is an irresistible dessert you can enjoy within a balanced meal plan!
FAQs About Banana Pudding Dessert Bars
How long do these dessert bars last in the fridge?
Once you’ve whipped up your delicious banana pudding dessert bars, you’ll want to savor every last bite. They should stay fresh in the fridge for about 3 to 5 days. Just be sure to store them in an airtight container to maintain their creamy texture and prevent them from absorbing any other fridge odors. If you’re not planning to finish them within that time frame, you might want to consider freezing them instead (more on that below!).
Can I freeze Banana Pudding Dessert Bars?
Absolutely! Freezing is a fantastic option if you’ve made a big batch or want to save some for later. Wrap the bars tightly in plastic wrap and then place them in an airtight container. They can last up to 3 months in the freezer. When you’re ready to indulge, simply let them thaw in the refrigerator overnight for the best taste and texture.
What can I use instead of Nilla Wafers?
While Nilla Wafers give banana pudding its classic flavor, feel free to get creative! Here are some great alternatives:
- Graham crackers for a sweet crunch.
- Shortbread cookies for a buttery flavor that pairs well with the pudding.
- Vanilla wafers from another brand if you’re looking to switch things up.
- Homemade cookies for a personal touch!
Want more tips on ingredient substitutions? Check out Serious Eats for various baking hacks that could inspire your next culinary adventure!
Conclusion on Banana Pudding Dessert Bars
Encourage Yourself to Create Your Own Treats
Banana pudding dessert bars are more than just a sweet treat; they’re a canvas for your culinary creativity! Making your own bars allows you to customize flavors and textures to suit your own taste. Imagine the delightful combination of creamy banana pudding layered over a buttery crust—pure bliss!
Have you ever thought about how rewarding it can be to bake from scratch? Engaging in this simple process not only brings joy to your kitchen but also impresses friends and family. So why not give it a go? You can even experiment with different toppings or flavors to make them uniquely yours.
For inspiration and tips, check out resources like The Kitchn or Serious Eats. Happy baking!
PrintBanana Pudding Dessert Bars: The Best Indulgent Treat to Savor
Indulge in the creamy, dreamy flavors of Banana Pudding Dessert Bars, a delightful treat perfect for any sweet tooth.
- Prep Time: 15 minutes
- Cook Time: 30 minutes
- Total Time: 45 minutes
- Yield: 12 servings 1x
- Category: Dessert
- Method: Baking
- Cuisine: American
- Diet: Vegetarian
Ingredients
- 1 cup all-purpose flour
- 1/2 cup unsalted butter, softened
- 1 cup sugar
- 2 large eggs
- 1 teaspoon vanilla extract
- 1 cup mashed ripe bananas
- 1 teaspoon baking powder
- 1/2 teaspoon salt
- 1 cup whipped cream for topping
- 1/2 cup banana slices for garnish
Instructions
- Preheat your oven to 350°F (175°C).
- In a mixing bowl, cream together the softened butter and sugar.
- Add in the eggs one at a time, followed by the vanilla extract and mashed bananas.
- In a separate bowl, mix together the flour, baking powder, and salt.
- Gradually add the dry ingredients to the wet mixture.
- Pour the batter into a greased baking dish.
- Bake for 25-30 minutes or until a toothpick comes out clean.
- Allow to cool before topping with whipped cream and banana slices.
Notes
- For extra flavor, consider adding a dash of cinnamon to the batter.
- These bars can be made a day in advance to allow the flavors to meld.
Nutrition
- Serving Size: 1 bar
- Calories: 210
- Sugar: 15g
- Sodium: 120mg
- Fat: 9g
- Saturated Fat: 5g
- Unsaturated Fat: 3g
- Trans Fat: 0g
- Carbohydrates: 31g
- Fiber: 1g
- Protein: 3g
- Cholesterol: 40mg
Keywords: Banana Pudding Dessert Bars, dessert, treats, banana recipes