Introduction to No-Bake Bounty Bars
What are No-Bake Bounty Bars?
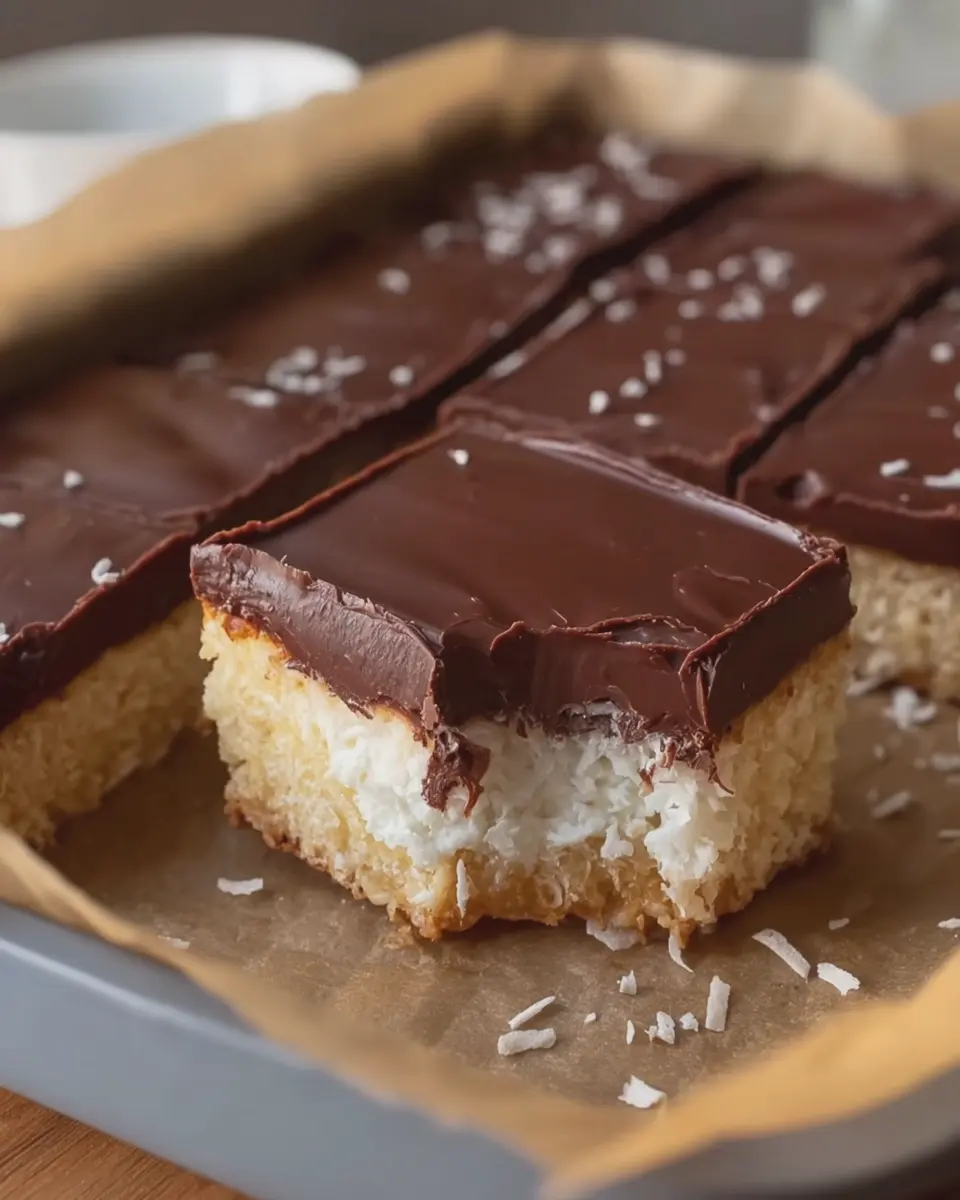
If you’re on the lookout for a quick, indulgent treat that requires zero cooking, no-bake bounty bars might just become your new favorite snack! These delightful bars capture the essence of a classic candy bar, combining a luscious coconut filling with a rich, chocolate coating. Best of all? They come together in a matter of minutes, making them a perfect choice for busy professionals who crave something sweet without the hassle of turning on the oven.
These bars echo the flavors of the island-inspired bounty bars we all know and love, but they take it a step further. Imagine creamy, shredded coconut mixed with a bit of sweetened condensed milk, pressed into a tray, and then generously coated in smooth dark chocolate. Sound divine? It really is. In fact, coconut is often celebrated for its health benefits, providing fiber and healthy fats that can boost your energy throughout the day.
Beyond their deliciousness, what makes these no-bake bounty bars stand out is their versatility. You can easily customize the recipe to suit your dietary preferences—whether you want to make them vegan using plant-based alternatives or swap in different types of chocolate for those who prefer a sweeter flavor profile. Inspiration on this flexibility can be found on sites like BBC Good Food or Minimalist Baker for variations.
So why are no-bake bounty bars perfect for your busy lifestyle? Not only do they save you from enduring the heat of an oven, making them perfect for hot days, but they also require minimal cleanup. Just mix, shape, chill, and enjoy. Imagine coming home after a long day, with no energy left to whip up a dessert, only to find these sweet treasures waiting for you in the fridge!
In this article, you’ll find an easy-to-follow recipe that will make your kitchen smell heavenly. We’re all about convenience and satisfaction here, so let’s dive right into creating the tastiest no-bake bounty bars you’ll ever make!
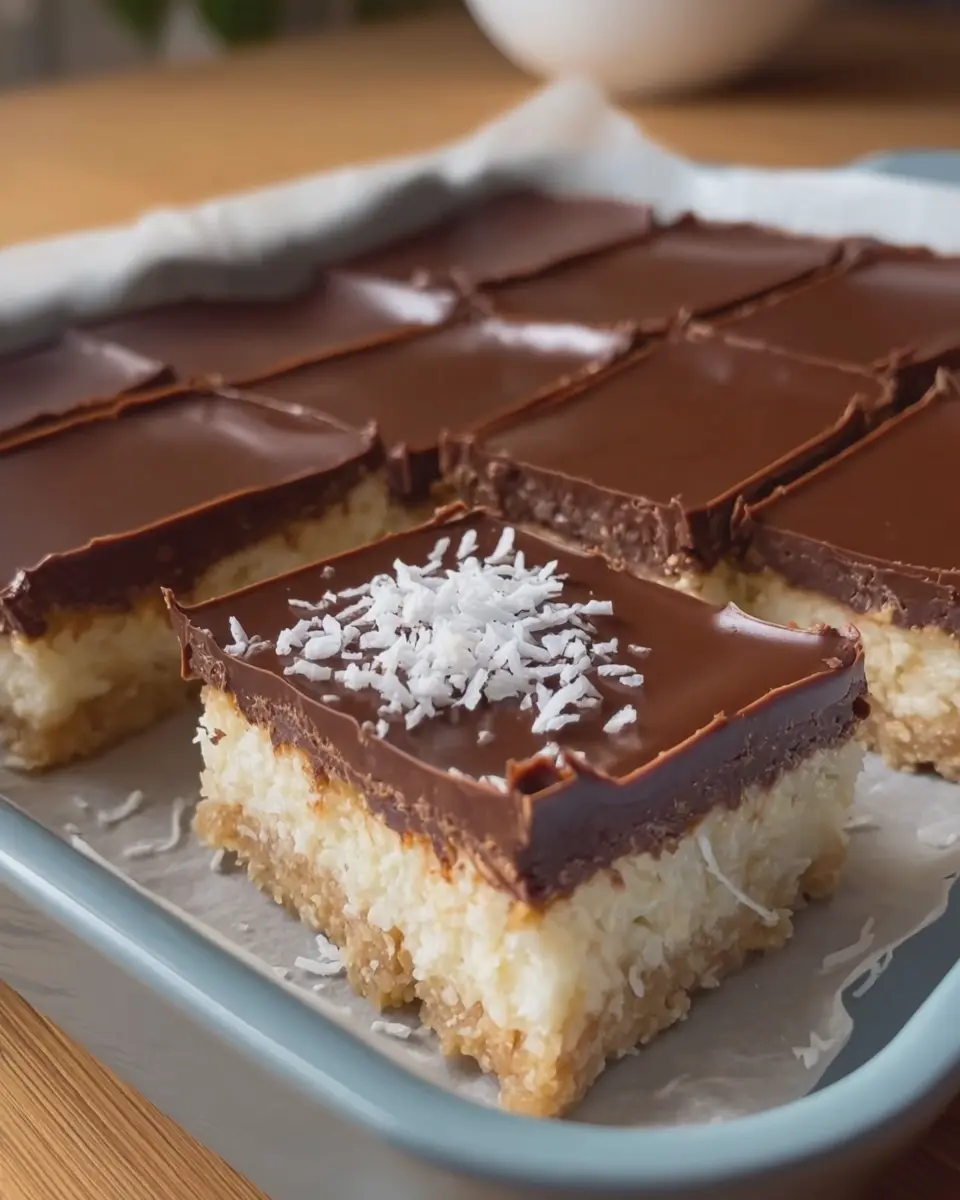
Ingredients for No-Bake Bounty Bars
Ingredients Overview
Creating delicious no-bake bounty bars is easier than you might think! This recipe requires a handful of simple ingredients that are often already in your pantry. These bars are not just quick to whip up; they also make for a perfect treat to share with friends or to enjoy during a cozy night in.
Specific Quantities for Each Layer
To bring your no-bake bounty bars to life, you’ll need the following:
-
For the Coconut Layer:
-
2 cups shredded coconut
-
1 cup sweetened condensed milk
-
1 tablespoon coconut oil
-
For the Chocolate Coating:
-
200g semi-sweet chocolate or dark chocolate
-
1 tablespoon coconut oil (for the coating)
If you’re interested in learning more about the benefits of using coconut in snacks, check out this health article on coconut benefits.
These bars are not only satisfying but also a delightful option for those busy weeknights. Have you ever thought about how incredible it is that you can enjoy a chocolate-covered treat without turning on the oven? Crafting your no-bake bounty bars is a breeze, and I can’t wait for you to taste the delightful result!
Preparing No-Bake Bounty Bars
Creating no-bake bounty bars is a delightful experience that blends tropical coconut with rich chocolate, bringing a little piece of paradise into your kitchen. Whether you’re whipping these up for a snack or a dessert to impress friends, this step-by-step guide will make it feel like a breeze. Let’s dive right into it!
Prepare the Baking Pan
First things first, grab a square baking pan—an 8×8 inch pan works beautifully for our no-bake bounty bars. Line the bottom with parchment paper, allowing some overhang on the sides. This little trick makes it easy to remove the bars later. Plus, no one wants to waste time scrubbing that sticky pan!
Crush the Biscuits
Next, it’s time to get some of that frustration out! Take your favorite digestive biscuits (high-quality ones will give a richer flavor) and crush them into fine crumbs. You can use a rolling pin and a zip-top bag, or if you’re feeling more tech-savvy, a food processor works like a charm too. Aim for a consistency similar to sand—this will help bind the base together.
Prepare the Cookie Base
In a medium bowl, combine your crushed biscuits with some melted butter (or a plant-based alternative if you prefer). Stir until all the crumbs are well-coated. This mixture will be the heart of your no-bake bounty bars, providing a deliciously crunchy texture. If you want to add a bit of sweetness, consider incorporating a tablespoon of brown sugar!
Press the Base into the Pan
Now that your cookie base is ready, transfer it into your lined baking pan. Press the mixture down firmly using a spatula or the back of a glass. The goal here is to create an even layer that will hold everything together when you slice into those delectable bars later.
Prepare the Coconut Filling
For the coconut filling, mix shredded coconut with sweetened condensed milk in a large bowl. If you’re aiming for a vegan version, coconut cream with maple syrup can work wonders too. Stir until the coconut is thoroughly coated—this filling is where all the tropical flavor comes in!
Add the Coconut Layer
Spread your coconut mixture evenly over the cookie base you’ve so diligently prepared. Make sure it’s well-distributed; no one likes an uneven bar! Pat it down gently to ensure a nice compact layer.
Prepare the Chocolate Topping
Next, melt your chocolate. You can use dark, milk, or even white chocolate—whatever pleases your palette! Simply place it in a microwave-safe bowl and microwave in short bursts, stirring in between, until smooth and glossy. The right chocolate topping can truly elevate your no-bake bounty bars.
Spread the Chocolate
Once your chocolate is melted, pour it over the coconut layer. Spread it gently with a spatula, ensuring every corner is covered evenly. This is where it all starts to come together, looking beautiful and promising decadence.
Refrigerate the Bars
Cover the baking pan with plastic wrap or foil, then pop it into the fridge for at least 2 hours. This chilling period allows the layers to set properly, making them easier to slice. You might find yourself peeking into the fridge occasionally in anticipation—trust me, it’s worth it.
Remove from the Pan
After a good chill, take the pan out and use the parchment paper overhang to lift your creation out. Place it on a cutting board. It’s just as satisfying to see it come out beautifully as it is to eat it!
Slice into Bars
Using a sharp knife, slice the block into bars of your desired size. Are these going to be bite-sized treats or more indulgent squares? The choice is yours!
Serve and Enjoy
Serve your no-bake bounty bars on a lovely platter or simply keep them in an airtight container. Get ready to watch everyone devour them as they share oohs and ahhs!
Store Leftovers
If, by some miracle, you have leftovers, store them in an airtight container in the fridge for up to a week. Trust me, they’re just as delicious after a few days!
So roll up your sleeves, gather your ingredients, and enjoy the process of making these mouthwatering no-bake bounty bars! Need some more inspiration? Check out BBC Good Food for additional variations and ideas. Happy baking!
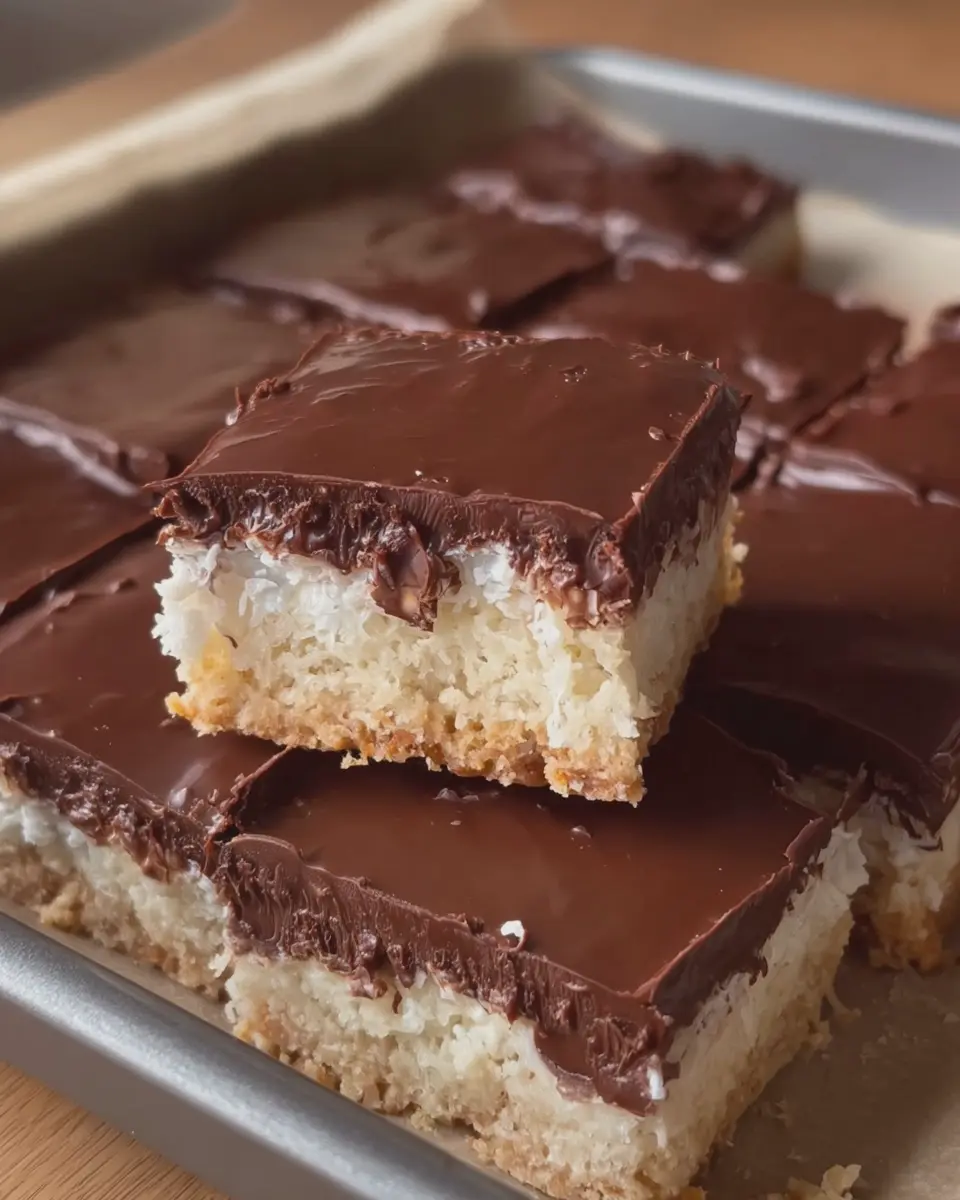
Variations on No-Bake Bounty Bars
Creating no-bake bounty bars at home is a delightful culinary adventure, and the best part is that you can personalize them to suit your taste. Here are some fun variations that can add a new twist to your classic bars.
Add Different Nuts or Seeds
One way to give your no-bake bounty bars a unique flair is by incorporating different nuts or seeds into the coconut filling. Almonds, for instance, add a delightful crunch and a sweet flavor. Or, consider using sunflower seeds for a nut-free option without compromising taste or texture.
- Almonds: Chopped or slivered, they offer a nice texture contrast.
- Walnuts: Rich and slightly bitter, they balance the sweetness nicely.
- Chia Seeds: Packed with nutrients, they also lend a fun texture.
Experimenting with these ingredients not only enhances flavor but also boosts the nutritional content. Don’t hesitate to swap in your favorite nuts or seeds based on dietary preferences or what you have available!
Using Dark Chocolate Instead of Milk Chocolate
If you’re a chocolate lover (and who isn’t?), consider making your no-bake bounty bars even more indulgent by using dark chocolate instead of the standard milk chocolate. Dark chocolate is not only rich and decadent but also contains higher levels of antioxidants and lower sugar content.
Why Choose Dark Chocolate?
- Health Benefits: Studies have shown that dark chocolate can improve heart health and boost mood.
- Flavor Profile: The bitterness of dark chocolate beautifully balances the sweetness of the coconut filling.
So, next time you whip up a batch of no-bake bounty bars, give these variations a try. You might find that a little twist can make a big difference!
For more fun ideas on variations, check out BBC Good Food or Serious Eats.
Cooking Tips and Notes for No-Bake Bounty Bars
Tips for achieving the perfect crunchy base
Getting that crunchy base right is key to the success of your no-bake bounty bars. Start by using a mix of crushed digestive biscuits and coconut flakes for an amazing texture. Make sure to blend them enough to create tiny pieces, but don’t turn them into a powder! If you want that extra crunch, consider adding chopped nuts like almonds or pecans. Just remember to adjust the sweetness if you add more ingredients; a little taste test goes a long way. For a slightly different flavor, you can also use gluten-free oats.
Notes on coconut texture
Coconut plays the star role in no-bake bounty bars, so the texture matters! Use sweetened shredded coconut for a chewy richness, and if you’re feeling adventurous, mix in unsweetened coconut flakes for a more pronounced taste. To add creaminess, blend some coconut cream into the mixture—this gives you that luxurious mouthfeel reminiscent of classic Bounty bars. Don’t be afraid to experiment; after all, the best ideas often come from improvisation! For more tips on working with coconut, check out this article from Coconut Merchant.
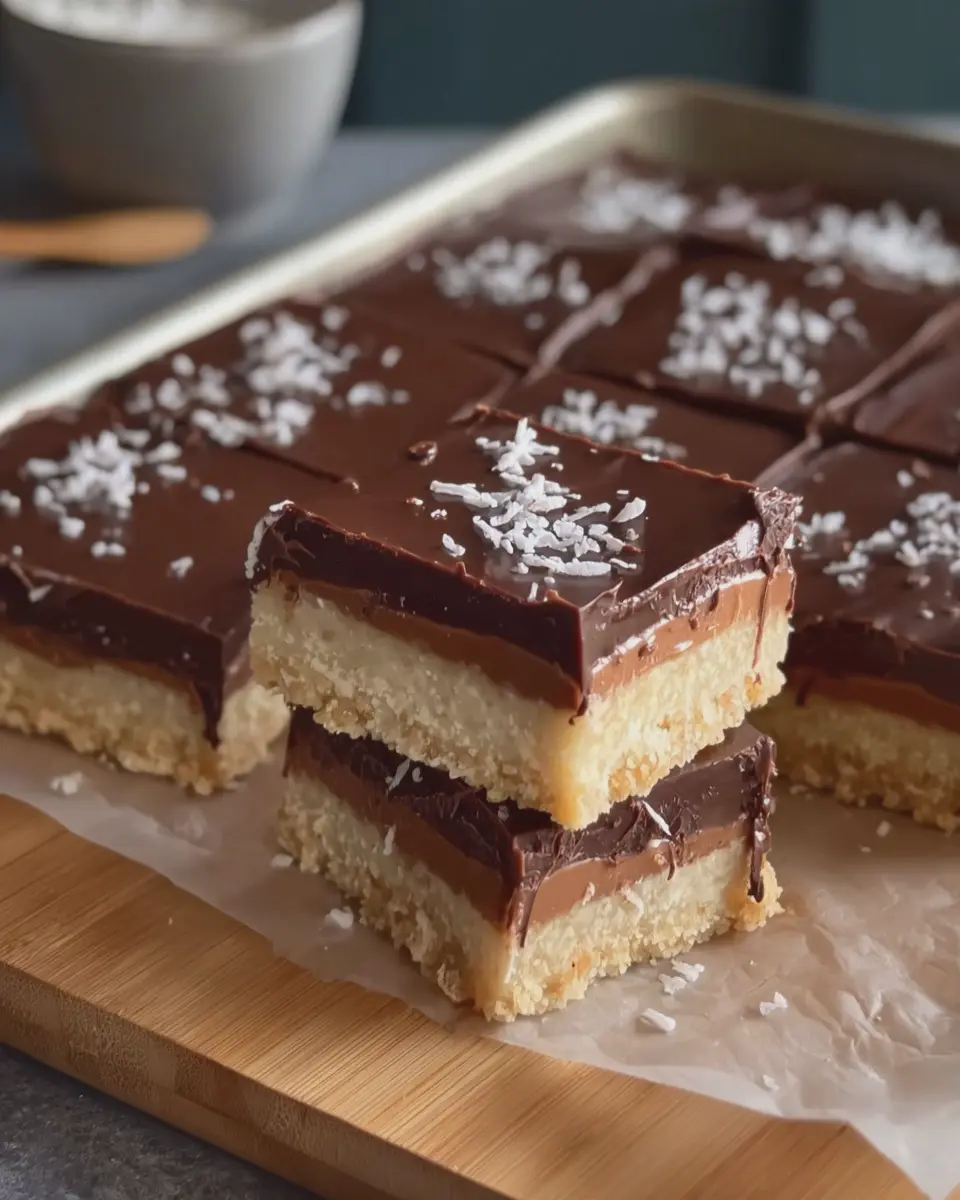
Serving Suggestions for No-Bake Bounty Bars
Pairing with Other Snacks
When it comes to enjoying no-bake bounty bars, think variety! These delightful coconut and chocolate treats pair wonderfully with:
- Fresh Fruits: Juicy strawberries or tart raspberries add a burst of flavor that complements the sweet richness of the bars.
- Nuts and Seeds: A handful of mixed nuts—perhaps almonds or walnuts—provides a satisfying crunch alongside the creamy texture.
- Dips: Consider serving with a side of creamy Greek yogurt or a light nut butter for dipping, enhancing the snack experience.
For a complete and nutritious snack, check out recipes from EatingWell that incorporate foods high in fiber.
Presentation Ideas for Gatherings
Looks matter, especially when entertaining! Elevate your no-bake bounty bars by:
- Charming Platters: Arrange your bars on a decorative platter, perhaps garnished with shredded coconut or mint leaves for a pop of color.
- Individual Portions: Wrap each bar in parchment paper and tie with twine for an appealing, portable treat perfect for party favors.
- Dessert Table Stunners: Create a dessert table featuring your bars amidst other sweet delights, such as cookies or fruit tarts for an enticing spread.
These cute and engaging presentation ideas will surely impress your guests and make your get-together a hit!
Time Breakdown for No-Bake Bounty Bars
When you’re craving a sweet treat but want to keep things simple, no-bake bounty bars are your go-to! Understanding the timing can help you plan.
Preparation Time
You’ll need about 15 minutes to whip up the ingredients and create the mixture. It’s quick and requires no fancy kitchen gadgets—just a mixing bowl and a spatula!
Chilling Time
Once your bars are formed, they’ll need a little patience during chilling time. Place them in the fridge for 1 to 2 hours to firm up perfectly. The waiting may feel tough, but trust me, the results are worth it!
Total Time
In total, you’re looking at around 1 hour and 15 minutes to 2 hours and 15 minutes for these delicious bars. Not too shabby for a treat that will wow your friends!
For more no-bake ideas, check out Culinary Hill or BBC Good Food.
Nutritional Facts for No-Bake Bounty Bars
When it comes to no-bake bounty bars, enjoying a delicious treat doesn’t have to mean sacrificing nutrition. Let’s break down the key nutritional aspects of these delightful, coconut-filled bars.
Calories per bar
Each no-bake bounty bar typically contains around 150-200 calories. This makes them a satisfying option for a quick snack or dessert without going overboard.
Breakdown of macronutrients
Here’s how the macronutrients stack up:
- Protein: Approximately 2-3 grams, providing a little boost to your daily intake.
- Carbohydrates: Roughly 15-20 grams, primarily from the natural sugars present in coconut and any added sweeteners.
- Fat: About 10-12 grams, largely derived from the healthy fats found in shredded coconut and nut butter.
These bars are not only a sweet treat but can also be made healthier by selecting high-quality ingredients like organic coconut or natural sweeteners. For more detailed insights into healthy eating, you might want to check out sources like the USDA Food Composition Database. Enjoy your no-bake bounty bars guilt-free!
FAQs about No-Bake Bounty Bars
How long do No-Bake Bounty Bars last?
One of the greatest joys of making no-bake bounty bars is how well they keep. In the fridge, these delightful treats can last about one to two weeks. Just make sure they’re stored properly in an airtight container to maintain their freshness. If you want to extend their lifespan, feel free to freeze them! When properly wrapped, they can stay good for up to three months. Just remember to let them thaw a bit before indulging.
Can I substitute ingredients in the recipe?
Absolutely! That’s the beauty of no-bake bounty bars. If you find yourself missing a key ingredient, there are often great alternatives:
- Coconut flakes: You can use unsweetened coconut for a healthier twist.
- Sweetener: Swap out honey or maple syrup with agave nectar or even a sugar substitute if you’re looking to reduce calories.
- Chocolate: If you prefer dark chocolate, go for it! It pairs excellently with the coconut filling.
These swaps can give your bars a unique twist, so don’t hesitate to experiment.
What’s the best way to store them?
For optimal freshness, the best way to store your no-bake bounty bars is in the refrigerator. Place them in an airtight container with parchment paper between layers to prevent sticking. If you choose to freeze them, let them cool completely and then wrap them well in plastic wrap or aluminum foil before placing them in a freezer-safe bag. This way, you’ll always have a delicious snack on hand!
For more tips on making and storing desserts like these, check out resources like The Kitchn and EatingWell. They offer insightful advice that could elevate your culinary skills.
Conclusion on No-Bake Bounty Bars
Recap of the Deliciousness and Ease of the Recipe
In summary, no-bake bounty bars are the ideal treat for those who crave something sweet without a lot of fuss. This recipe combines the delightful flavors of chocolate and coconut, creating a mouthwatering snack that’s both satisfying and simple to prepare.
No oven, no problem! You can whip these bars up in under an hour, making them perfect for busy weeknights or spontaneous gatherings. Plus, with minimal ingredients and equipment needed, you can enjoy homemade goodness with ease.
So why not give this fun treat a try? Your taste buds—and your friends—will thank you! For more delicious ideas, check out BBC Good Food for inspiration.
PrintNo-Bake Bounty Bars: Easy Indulgence for Coconut Lovers
A delicious and simple recipe for no-bake bounty bars that every coconut lover will enjoy.
- Prep Time: 15 minutes
- Cook Time: 2 hours chilling
- Total Time: 2 hours 15 minutes
- Yield: 16 bars 1x
- Category: Dessert
- Method: No-Bake
- Cuisine: International
- Diet: Vegetarian
Ingredients
- 2 cups shredded coconut
- 1 cup sweetened condensed milk
- 2 cups dark chocolate chips
- 1 tablespoon coconut oil
Instructions
- In a mixing bowl, combine shredded coconut and sweetened condensed milk until well mixed.
- Press the mixture firmly into a lined baking dish.
- Melt the dark chocolate chips and coconut oil together in a microwave or double boiler.
- Pour the melted chocolate over the coconut mixture and spread evenly.
- Chill in the refrigerator for at least 2 hours until set.
- Cut into bars and serve.
Notes
- Make sure to press the coconut mixture tightly for nice bars.
- Store any leftover bars in an airtight container in the fridge.
Nutrition
- Serving Size: 1 bar
- Calories: 180
- Sugar: 12g
- Sodium: 30mg
- Fat: 9g
- Saturated Fat: 7g
- Unsaturated Fat: 2g
- Trans Fat: 0g
- Carbohydrates: 22g
- Fiber: 3g
- Protein: 2g
- Cholesterol: 5mg
Keywords: No-Bake Bounty Bars, Coconut, Dessert