Introduction to Easter Jell-O Cups
Why Easter Jell-O Cups Are the Perfect Holiday Treat
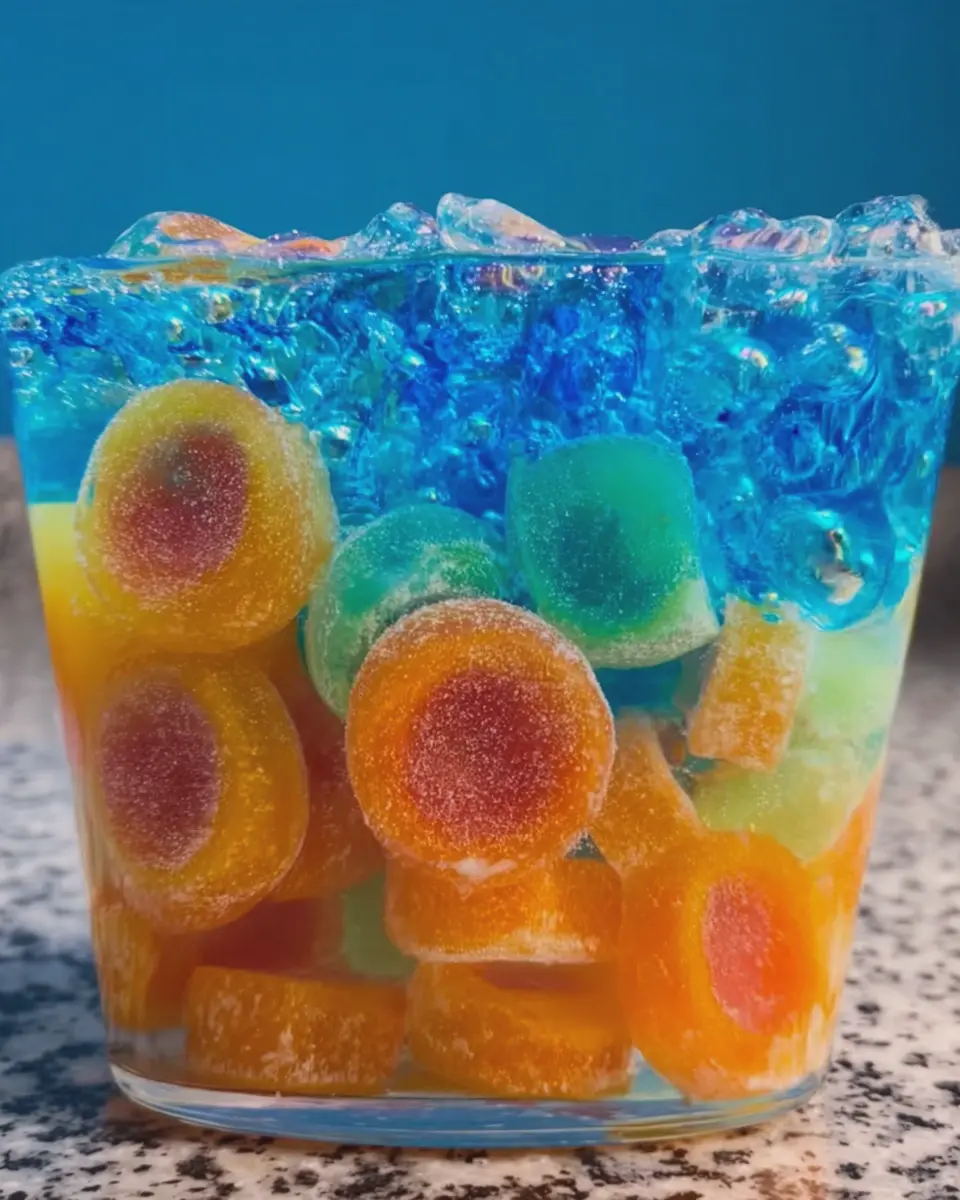
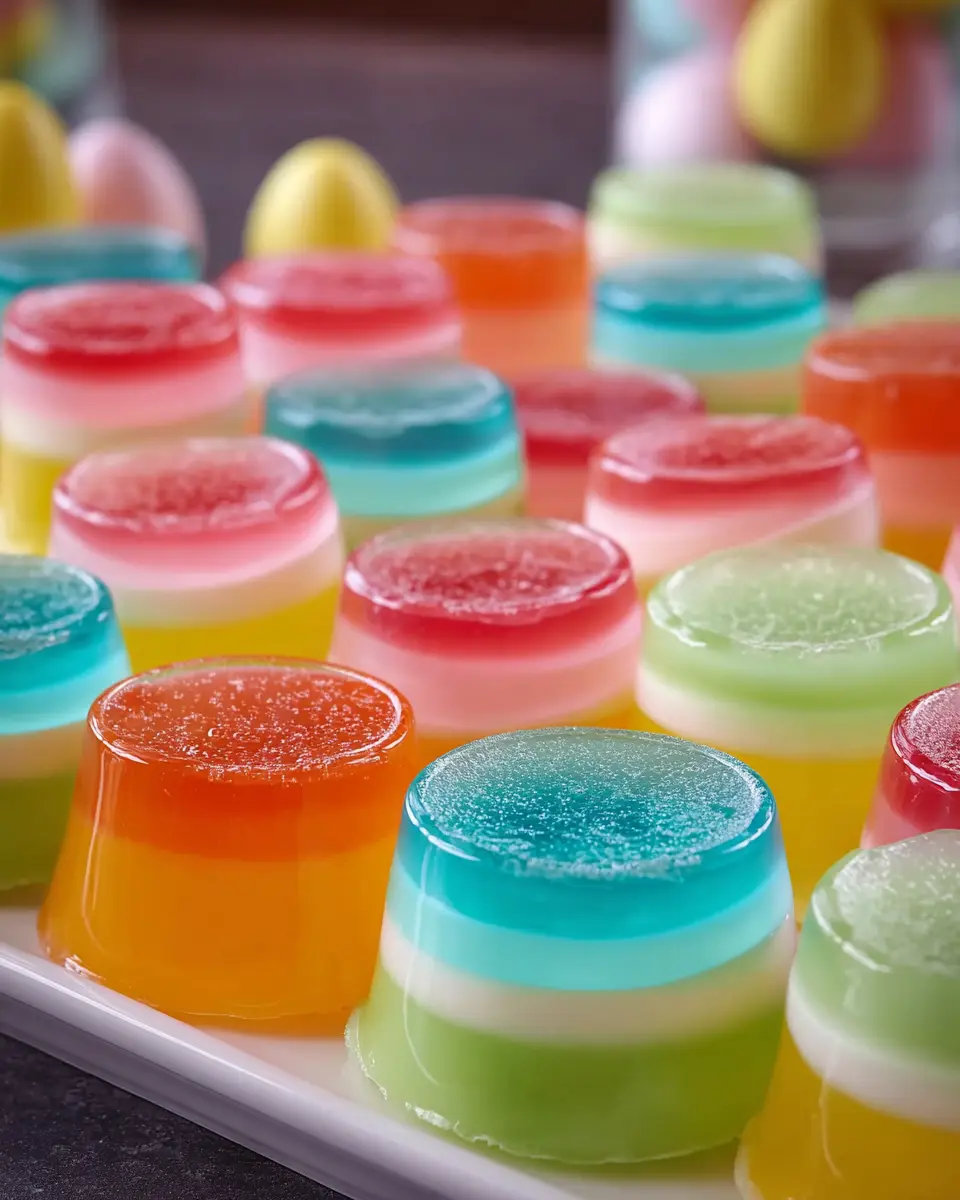
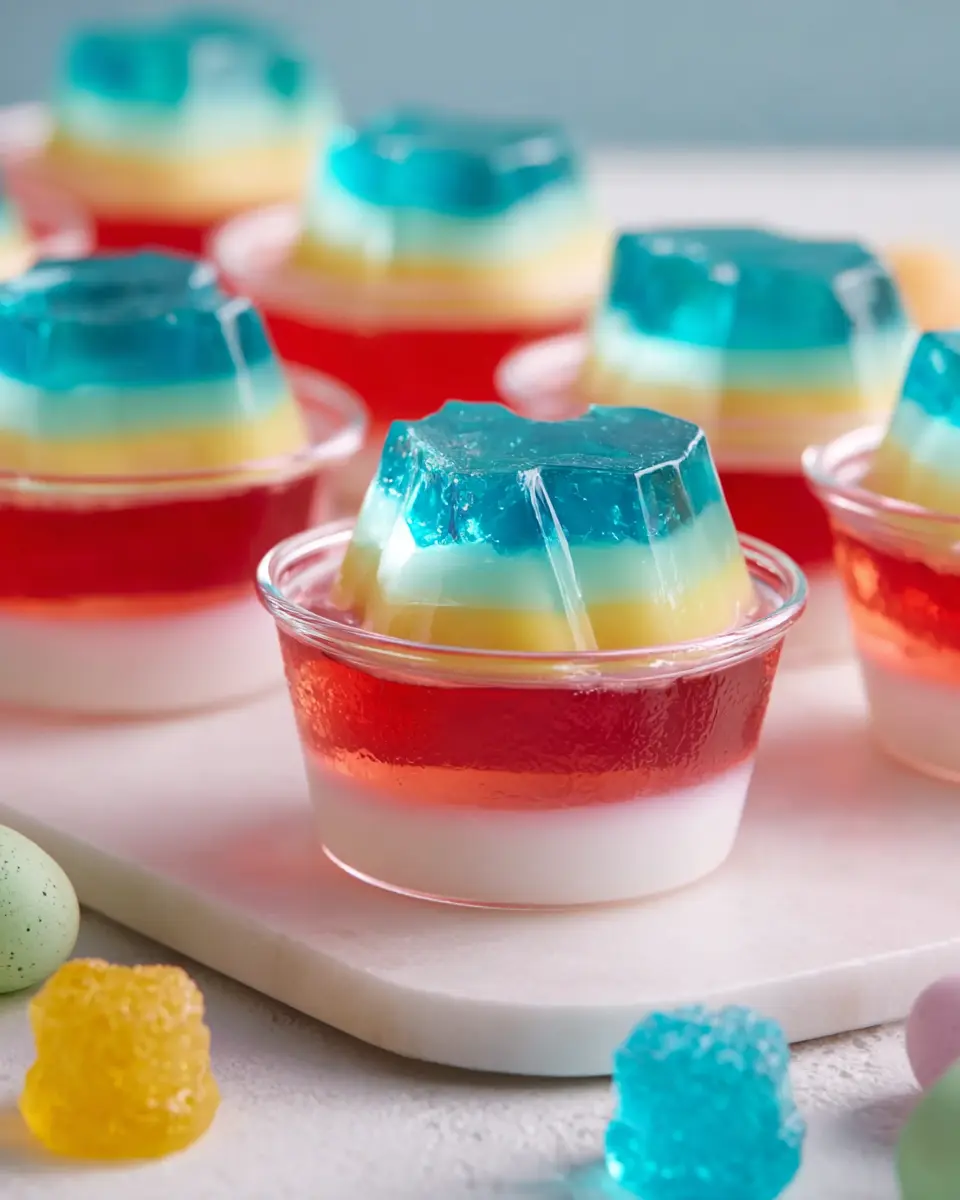
When you think of Easter, vibrant colors and whimsical decorations often come to mind. That’s where Easter Jell-O Cups shine! These delightful treats are not only a feast for the eyes but also a surefire way to conjure up nostalgia from your childhood. Remember those carefree moments of delight during holiday gatherings? Jell-O Cups can recreate that magic in your home, making them a must-have for your festive celebrations.
Imagine a table adorned with colorful, layered Jell-O Cups, each one holding a delightful burst of flavor. You might ask, why Jell-O? Well, it’s simpler than you think! Jell-O is versatile, easy to prepare, and appeals to a wide variety of tastes—perfect for family members of all ages. Plus, with a dash of creativity, you can customize these cups to fit your theme or flavor preference.
The Fun of Customization
One of the best parts about making Easter Jell-O Cups is the opportunity to get creative. You can mix and match flavors, colors, and even add unique toppings. Want to incorporate some fruit? Perhaps fresh strawberries or blueberries on top? Or how about a sprinkle of edible glitter for that festive sparkle? The options are endless!
- Layered Flavors: Consider mixing different flavored Jell-O for a beautiful ombre effect.
- Decorative Cups: Use clear plastic cups or mason jars to showcase your colorful layers and entice guests.
If you’d like some extra inspiration, check out this informative article on Jell-O desserts for various flavor combinations!
A Crowd-Pleaser
These cups are not just visually appealing; they’re also a hit among kids and adults alike. In fact, a survey by the National Confectioners Association found that more than 70% of people enjoy nostalgic treats during holidays. And what better way to celebrate than with something that reminds you of the joys of your childhood? So whether you’re hosting an Easter brunch or a small family gathering, consider whipping up a batch of Easter Jell-O Cups—they’re bound to be a conversation starter and a sweet ending to any meal!
By making these whimsical treats, you’re not just serving a dessert; you’re creating lasting memories and shared smiles. So roll up your sleeves and get ready to dive into a fun, flavorful Easter tradition!
Ingredients for Easter Jell-O Cups
Essential ingredients for a colorful dessert
Creating delightful Easter Jell-O Cups is easier than you might think! Here’s what you’ll need to whip up these vibrant treats:
- Gelatin – Choose your favorite colors and flavors! Popular ones include cherry, lemon, and blue raspberry.
- Whipped cream – This adds a creamy layer, but you can also opt for whipped topping for a lighter alternative.
- Cold water – Essential for blooming the gelatin; remember, the colder the water, the better!
- Plastic cups – Clear cups let those stunning layers shine through, enhancing their visual appeal.
Optional ingredients to customize your cups
Get creative with your Easter Jell-O Cups! Consider these fun add-ins:
- Fruit pieces – Fresh berries or diced fruits enhance both flavor and nutrition.
- Candy decorations – Mini chocolate eggs or sprinkles add a whimsical touch that kids love.
- Alternative toppings – If you’re looking for variety, try yogurt or a dollop of sour cream for a tangy twist.
Feel free to explore and experiment with these ingredients! You can find helpful tips and techniques for layering on this gelato expert site, making your creations irresistibly festive.
Step-by-step preparation of Easter Jell-O Cups
Creating delightful Easter Jell-O Cups is a fun way to celebrate the season. These colorful, layered treats not only brighten your table but also provide a refreshing dessert option. Follow this step-by-step guide to whip up these festive cups that are sure to impress your friends and family!
Gather your tools and setup
Before diving into the making of your Easter Jell-O Cups, it’s important to set up your workspace and gather the right tools. Here’s what you’ll need:
- Clear plastic cups or small glass jars for an appealing presentation
- Mixing bowls (preferably ones with a spout for easy pouring)
- Whisk or spoon for mixing
- Measuring cups and spoons
- A refrigerator to allow layers to set
Having everything ready makes the process smooth and enjoyable. Plus, when you’re organized, there’s less chance of spilling those vibrant layers—trust me, you don’t want to clean up a Jell-O mess!
Create the lime gelatin layer
The first step is preparing the lime gelatin layer. This bright green layer serves as a fresh base.
-
Prepare the Gelatin: Boil 1 cup of water and mix in a lime-flavored gelatin packet (about 3 oz). Stir until fully dissolved.
-
Add Cold Water: Stir in another cup of cold water to cool it down, ensuring you get that refreshing lime flavor without melting the layers later.
-
Pour and Refrigerate: Carefully pour the lime gelatin into your cups, filling them about a third of the way. Then, place them in the refrigerator for about 30 minutes, or until they are partially set. Keep an eye on ‘em—no one likes a full set of jiggly cups!
Work on the island pineapple layer
While the lime layer cools, it’s time to create the sweet and tropical island pineapple layer.
-
Mix the Pineapple Gelatin: Boil 1 cup of water and dissolve a packet of pineapple-flavored gelatin just like you did with the lime layer.
-
Incorporate Pineapple Juice: Instead of cold water, use 1 cup of chilled pineapple juice for enhanced flavor.
-
Combine and Chill: Let it cool slightly and then gently spoon this mixture over the partially set lime layer until the cups are about two-thirds full. Return them to the fridge to let this layer set—about another 30 minutes.
Add the strawberry layer
Next up is the enticing strawberry layer, which adds a beautiful red hue and delicious taste.
-
Prepare the Strawberry Gelatin: Mix another packet of strawberry gelatin with 1 cup of boiling water, stirring until dissolved.
-
Cold Water Addition: This time, add 1 cup of cold water, just like before, to keep the flavors bright and the layers distinct.
-
Careful Pouring: Once the pineapple layer has set, gently pour the strawberry mixture over it, filling the cups nearly to the top. A spoon can help with this so you don’t disturb the layers beneath.
Top it off with the berry blue layer
Now for the final pop of color with the berry blue layer.
-
Make the Berry Blue Gelatin: Boil 1 cup of water and dissolve your berry blue gelatin.
-
Chilling: Add 1 cup of cold water and allow the mixture to cool a bit. This last layer is not only important for the aesthetic but also enhances flavor complexity.
-
Layering Tip: Check that the strawberry layer is fully set before pouring the berry blue mixture on top. This ensures that your layers remain distinct and visually appealing.
Final touches with whipped topping
Once all your layers have set beautifully, it’s time for the ultimate finish: whipped topping!
-
Apply Whipped Topping: Generously dollop or pipe whipped topping on top of each cup—this is the cherry on top!
-
Creative Presentation: Consider adding a sprinkle of colorful Easter sprinkles or a tiny chocolate egg for an extra festive touch.
Now you’ve crafted delightful Easter Jell-O Cups that are as fun to make as they are to eat! Each layer not only looks inviting but also brings unique flavors to the table. Happy cooking! If you’re seeking more festive recipe ideas, don’t miss out on checking out sites like Food Network or Taste of Home for inspiration!
Fun variations on Easter Jell-O Cups
Exploring different color combinations
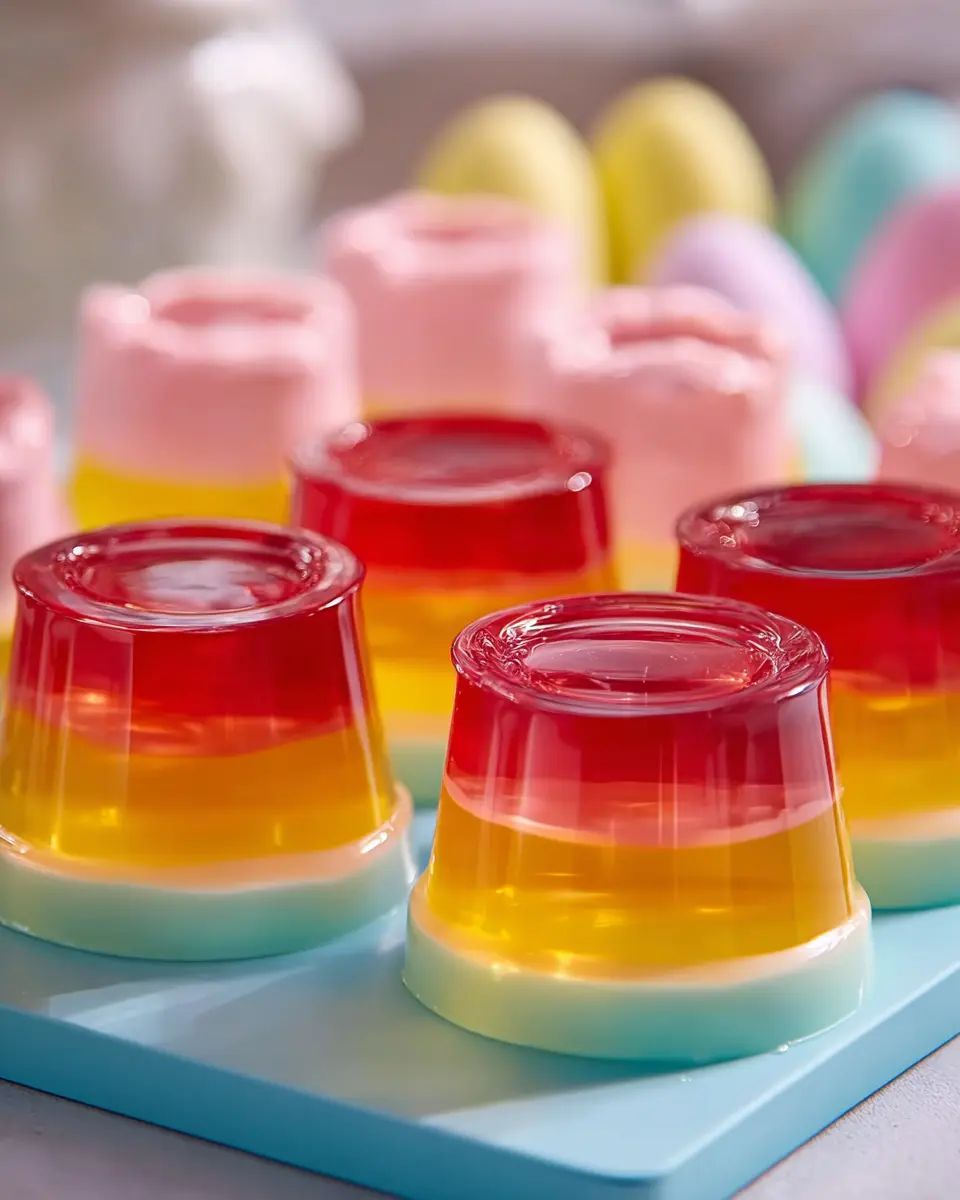
Bright and vibrant colors are what make Easter Jell-O Cups a hit during festive celebrations! Don’t hesitate to combine colors that reflect the joy of the season. For instance, layer pastel shades like soft pinks, blues, and yellows to create an ombre effect. Alternatively, go for bold combinations like electric blue and neon green for a fun twist that kids will love. You can even create a rainbow effect by using every color in the Jell-O box!
Pairing complementary colors can also result in stunning visual appeal. Why not mix cool colors with warm ones? It’s like a miniature work of art that you can enjoy after dinner! If you’re curious about color pairing, check out the Color Wheel for some inspiration.
Adding fruit or candy for extra delight
If you want to take your Easter Jell-O Cups to the next level, consider adding fruit or candy. Fresh strawberries, blueberries, or diced peaches not only enhance the flavor but also provide a nutritious boost. Fruit offers a refreshing contrast to the sweetness of the Jell-O and adds a beautiful visual element.
For a more playful approach, incorporate candy! Mini chocolate eggs or gummy bunnies can be nestled within the layers. This little surprise can turn an ordinary dessert into an exciting treat that sparks joy for your guests. You might also want to try using sprinkles or edible glitter to make your cups even more festive.
By combining these variations, you can make custom Easter Jell-O Cups that reflect your personal taste and creativity. Happy layering!
Cooking Tips and Notes for Easter Jell-O Cups
Common Mistakes to Avoid
When making your Easter Jell-O Cups, there are several pitfalls you want to steer clear of:
-
Not Allowing Layers to Set: One of the most common mistakes is rushing the layering process. Always let each layer fully set before adding the next. A good rule of thumb is to wait at least 30 minutes.
-
Mixing the Gelatin Incorrectly: Ensure you dissolve the gelatin completely. If not, you might end up with a grainy texture. Always follow the package instructions for best results.
-
Overfilling Cups: It’s tempting to fill them to the brim, but leave a little space for the final layer and for ease of eating.
Pro Tips for Ensuring Perfect Layers
Creating beautiful layers in your Easter Jell-O Cups is all about patience and technique:
-
Use a Dropper: For precise layering, consider using a dropper. This lets you carefully control how much Jell-O goes into each cup.
-
Chill Between Layers: Make sure your cups are chilled in the fridge while waiting for each layer to set. This helps each layer stick better to the one below it.
-
Decorate Thoughtfully: Add garnishes like whipped cream or colorful sprinkles for that festive touch.
For more gelatin-related tips, check out this guide. Enjoy your colorful creations this Easter!

Serving suggestions for Easter Jell-O Cups
Creative ways to present your Jell-O cups
Want to elevate your Easter Jell-O Cups presentation? Consider using clear plastic dessert cups, which showcase the vibrant layers beautifully. For a touch of whimsy, add edible flowers on top—think pansies or nasturtiums. They’re not just pretty; they’re also safe for consumption! You can also create an interactive experience: set up a “build your own Jell-O cup” station with various toppings like whipped cream, sprinkles, and crushed candies. Not only does this get everyone involved, but it also adds an element of fun to your gathering!
Pairing suggestions for a complete dessert experience
To create a delightful dessert spread, pair your Easter Jell-O Cups with light and refreshing accompaniments. Think fresh fruit skewers or mini cheesecakes topped with strawberries. You could also offer yogurt parfaits, which play well with the textures and flavors of the Jell-O. For a non-alcoholic beverage, consider a sparkling fruit punch—a perfect complement that keeps the celebration vibrant.
Looking for ideas? Check out allrecipes.com for inspiration!
Time Breakdown for Easter Jell-O Cups
Preparation Time
Making these Easter Jell-O Cups is both simple and enjoyable. You’ll need about 20 minutes for preparation. Gather your ingredients, mix the Jell-O flavors, and pour them into your chosen cups. Don’t forget to have fun! Let your creativity shine in this festive process.
Setting Time
Patience is key for the perfect Easter Jell-O Cups. The setting period will take approximately 4 hours in the refrigerator. The layers need time to firm up, so try to plan ahead—scheduling these cups for an evening before your big gathering will help you avoid last-minute chaos.
Total Time
Combining the preparation and setting times, your overall investment for these delightful treats will be about 4 hours and 20 minutes. Yet, with so little hands-on time, you can use the wait to plan your Easter festivities! It’s truly rewarding to present these colorful delights at your table.
Elevate your celebrations by serving alongside non-alcoholic beverages like sparkling water or fruit juices for a complete experience. For more tips on festive recipes, check out Food Network’s Party Planning Guide to inspire your next gathering!
Ready to dive into the flavors of spring with these fun treats? Your guests won’t be able to resist!
Nutritional facts for Easter Jell-O Cups
Calories per cup
Easter Jell-O Cups are a delightful treat during the festive season, but how do they fit into your dietary needs? Each cup contains approximately 100 calories, making them a relatively light dessert option. If you’re keeping an eye on your caloric intake, these cups offer a fun way to enjoy something sweet without going overboard.
Breakdown of key nutrients
When it comes to nutrition, it’s good to know what you’re enjoying. Here’s a quick look at what’s in your Easter Jell-O Cups:
- Carbohydrates: Around 25 grams, primarily from the gelatin and sugar.
- Sugars: Approximately 20 grams, adding that sweet taste we all love.
- Protein: Roughly 1 gram—while they don’t pack a protein punch, they can still fit into a balanced diet.
- Fat: Very minimal, usually less than 1 gram.
For more detailed insights, check out resources like the USDA’s food data. Keeping treats like these in moderation can lead to a healthier lifestyle while still letting you indulge in festive fun. Plus, they’re a great way to brighten up your Easter celebrations!
FAQs about Easter Jell-O Cups
Can I make these Easter Jell-O Cups ahead of time?
Absolutely! One of the best things about Easter Jell-O Cups is their make-ahead convenience. You can prepare them a day or two in advance, allowing the flavors to meld and setting them up for easy serving. Just make sure to store them in the refrigerator covered with plastic wrap or a lid. This not only keeps them fresh but also prevents any fridge odors from tainting their delightful taste.
What substitutes can I use for gelatin?
If you’re looking for alternatives to traditional gelatin, there are several options available. Agar-agar, a plant-based gelatin derived from seaweed, is a fantastic substitute for vegans or those preferring a vegetarian option. However, do note that the texture might differ slightly from standard gelatin. You can also try pectin, which is often used in jams and jellies. For a foolproof guide, check out resources like The Kitchn that provide insights into how to use these substitutes effectively.
Are there any allergy considerations with these cups?
When crafting your Easter Jell-O Cups, it’s wise to consider potential allergens. Common ingredients in Jell-O can include artificial colors or additives, so it’s crucial to read labels carefully. If you’re catering to individuals with food allergies, you might want to make these cups from scratch using natural fruit juices and sweeteners. This way, you control every ingredient, ensuring a safe and delicious treat for everyone. And as always, when serving guests, be transparent about your ingredients to help keep those with allergies safe.
Embrace this festive treat and enjoy creating your own Easter Jell-O Cups!
Conclusion on Easter Jell-O Cups
Recap of why these Jell-O cups are a must-try this Easter
Easter Jell-O Cups are an absolute delight that can elevate your celebrations. Not only are they visually appealing with their vibrant colors, but they also appeal to your taste buds with their sweet, satisfying flavors. These cups are super simple to create, making them perfect for both novice and seasoned bakers alike.
Imagine the joy on your friends’ faces as they dig into these colorful creations! You can even customize them to fit your theme or dietary preferences, ensuring everyone enjoys a bite. So this Easter, why not add a touch of fun and whimsy to your table with these delightful Jell-O cups? For a little inspiration, check out more fun Easter recipes at Food Network.
PrintEaster Jell O Cups: Easy & Fun Treats for Your Celebration
Bring a splash of color and fun to your Easter celebration with these easy and delightful Easter Jell O Cups. Perfect for kids and adults alike, these treats are a delicious way to celebrate!
- Prep Time: 10 minutes
- Cook Time: 0 minutes
- Total Time: 2 hours
- Yield: 12 servings 1x
- Category: Dessert
- Method: No-bake
- Cuisine: American
- Diet: Vegetarian
Ingredients
- 1 cup boiling water
- 1 cup cold water
- 1 package (3 oz) Jell-O (any flavor)
- 1 cup whipped cream
- Sprinkles for decoration
Instructions
- In a mixing bowl, dissolve the Jell-O in boiling water.
- Stir in cold water until well mixed.
- Pour the mixture into small cups and refrigerate until set.
- Once set, top with whipped cream and add sprinkles before serving.
Notes
- Feel free to use different Jell-O flavors for a colorful assortment.
- For a fun twist, layer different colors of Jell-O in the cups.
Nutrition
- Serving Size: 1 cup
- Calories: 120
- Sugar: 20g
- Sodium: 30mg
- Fat: 3g
- Saturated Fat: 2g
- Unsaturated Fat: 0g
- Trans Fat: 0g
- Carbohydrates: 25g
- Fiber: 0g
- Protein: 1g
- Cholesterol: 10mg
Keywords: Easter Jell O Cups, Jell-O, Easter treats, fun desserts