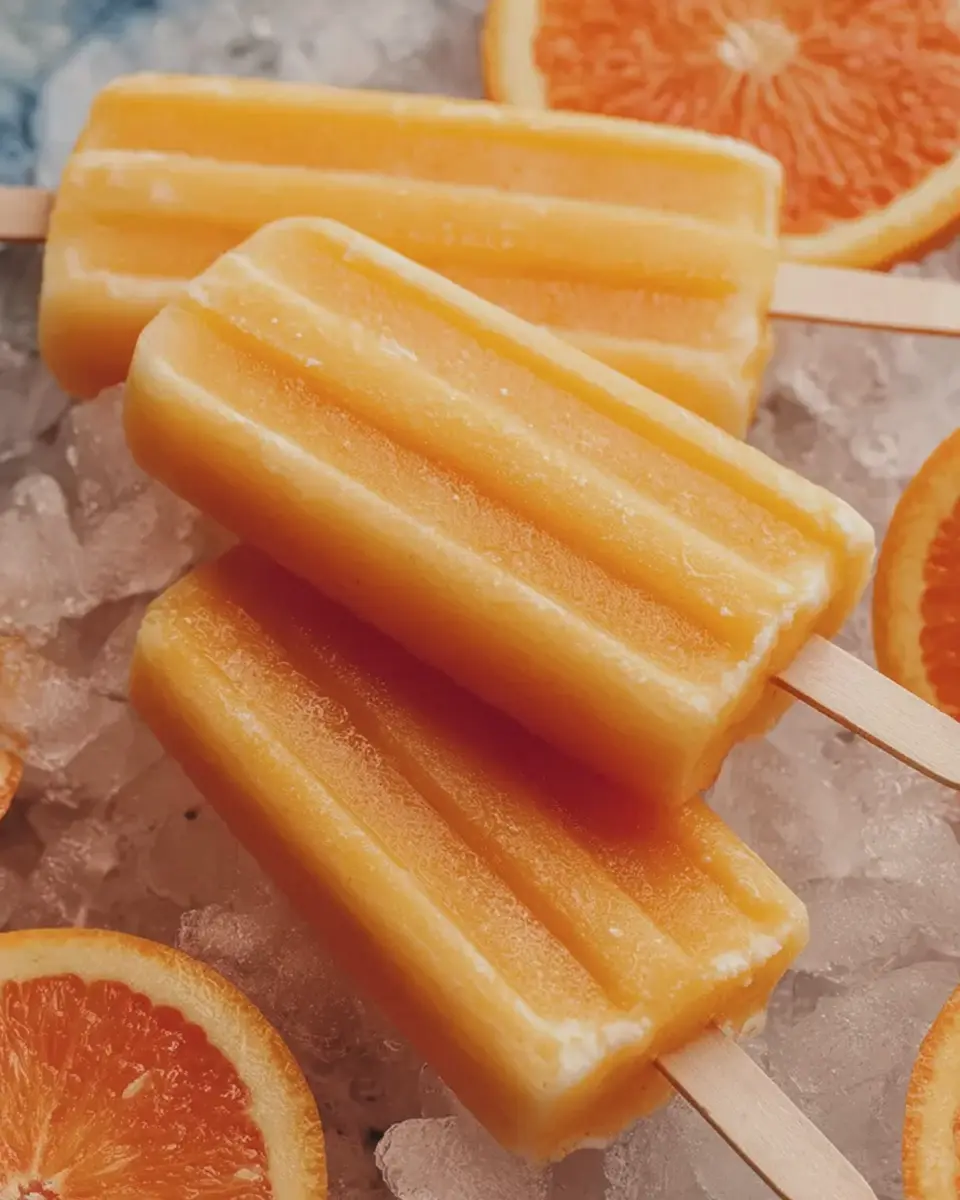
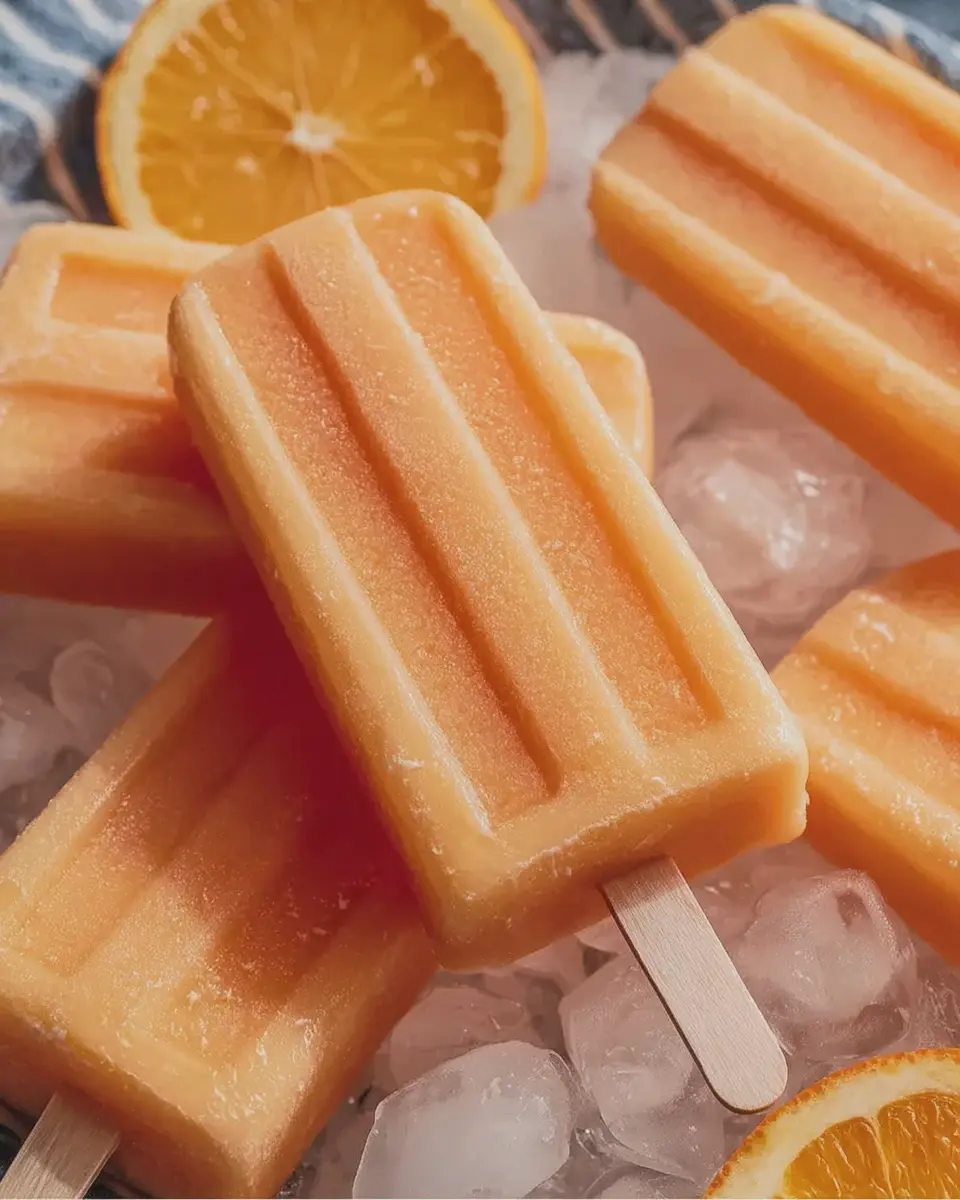
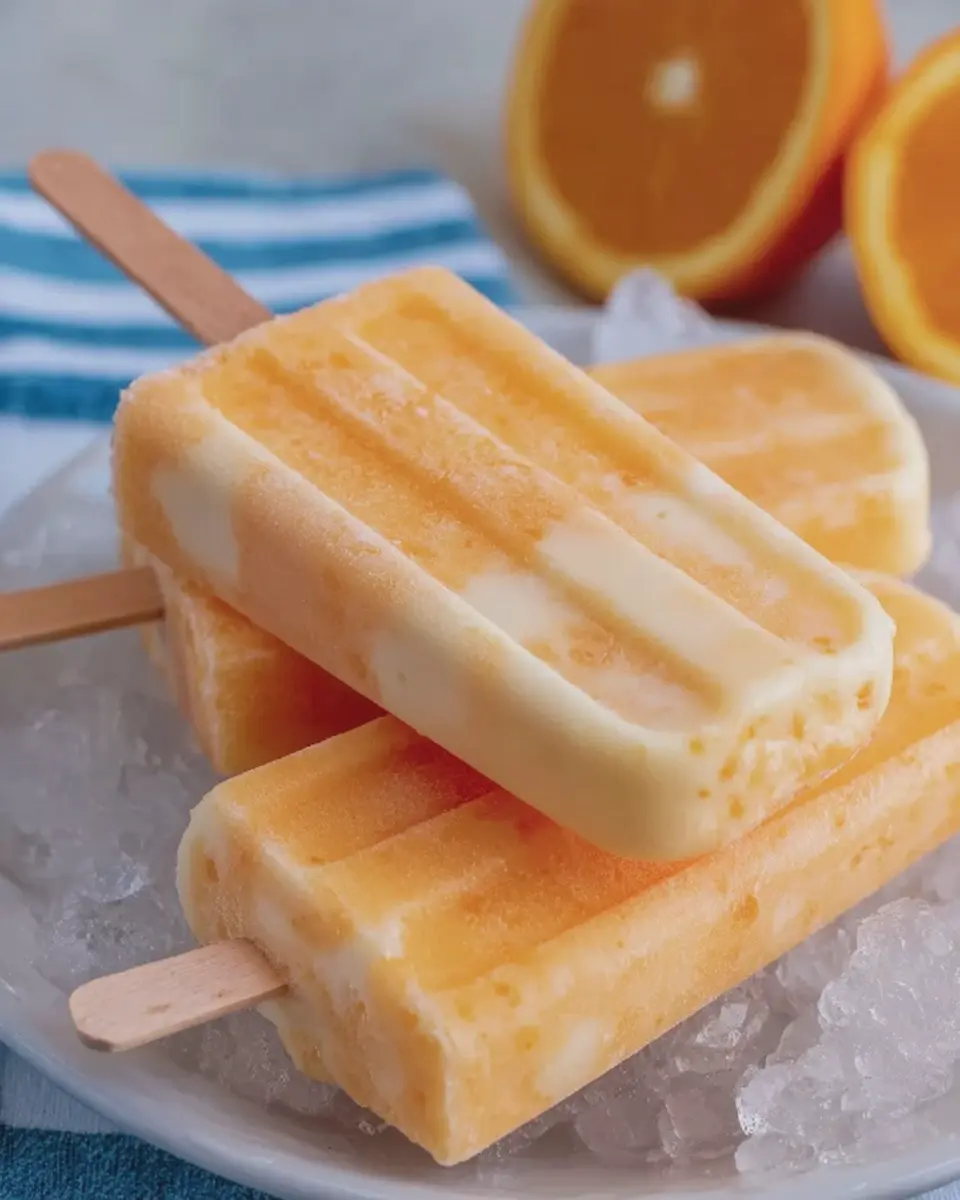
Introduction to Easy Orange Creamsicles
A nostalgic treat for all ages
Remember those summer days spent outside, laughing and playing, when all you wanted was a refreshing treat to cool off? For many of us, orange creamsicles are the epitome of that nostalgia. These delightful popsicles, with their creamy vanilla and vibrant orange flavors, have been a childhood favorite for generations. The good news? You can recreate this classic at home with minimal effort!
Growing up, I looked forward to hearing the ice cream truck’s familiar jingle, and nothing felt quite as rewarding as enjoying an ice-cold orange creamsicle after a long day of play. According to the National Ice Cream Retailers Association, frozen treats like these remain beloved because they evoke sweet memories while satisfying our cravings for coolness on hot days. It’s a timeless pleasure, perfect for sharing with your family or enjoying on your own.
Why you’ll love making these at home
So, what makes making easy orange creamsicles in your own kitchen so appealing? Here are a few reasons:
-
Customization: Tailor the creaminess and sweetness to your liking. You can use full-fat or low-fat yogurt and tweak the sugar content to create a healthier version without sacrificing taste.
-
Quality ingredients: Making your own means you can opt for fresh, organic oranges and high-quality dairy, avoiding artificial flavors and preservatives commonly found in store-bought versions. Plus, organic oranges are rich in vitamin C, making these popsicles not just tasty but also a bit nutritious.
-
Easy and fun: The preparation is straightforward, usually requiring less than 10 minutes of active time. Simply blend, pour, and freeze! It’s a perfect weekend project you can share with friends or children, encouraging them to get involved in the kitchen.
-
Creative possibilities: Once you master the basic recipe, you can experiment with different flavors. How about adding some fresh mint or mixing in other fruits? The choice is entirely yours.
With a little creativity, you can transform humble ingredients into a fun summer treat that perfectly captures the essence of carefree days.
If you’re ready to bring back those nostalgic flavors and create delightful memories, let’s dive into the recipe and get started!
Ingredients for Easy Orange Creamsicles
Essential ingredients for a creamy delight
To whip up easy orange creamsicles, you’ll need a handful of simple ingredients that come together to create a delightful frozen treat. Here’s what you’ll want to gather:
- Fresh orange juice: Aim for real, zesty orange juice for that authentic flavor. About 2 cups should do the trick.
- Sweetened condensed milk: This magical ingredient adds creaminess and sweetness. One can (14 oz) will provide a lovely texture.
- Heavy cream: For an ultra-creamy mouthfeel, use 1 cup of heavy cream. It’s the secret behind that lusciousness!
- Zest of an orange: Don’t skip this! A tablespoon of fresh zest enhances the orange flavor, making your creamsicles pop.
Optional additions for a flavor twist
Feeling adventurous? You can easily customize your easy orange creamsicles:
- Vanilla extract: A teaspoon of pure vanilla will add an aromatic depth.
- Greek yogurt: Replace part of the heavy cream with Greek yogurt for a tangy, healthier version.
- Seasonal fruits: Toss in some chunks of strawberries or peaches for a refreshing twist.
- Coconut cream: If you’re after a tropical vibe, replace heavy cream with coconut cream for a creamy coconut flavor.
These variations can transform your creamsicles from standard to sensational. Not only do they taste great, but you can also impress your friends. Who doesn’t love a homemade treat? Check out resources on nutrition to explore more on fruit benefits and ideas to stack your creamsicles with goodness.
Step-by-step Preparation of Easy Orange Creamsicles
Making easy orange creamsicles at home is not only a fun activity but also a surefire way to impress friends and family with a deliciously refreshing treat. Follow these simple, step-by-step instructions, and you’ll be savoring homemade creamsicles in no time!
Gather your ingredients and tools
Before you dive into the preparation, take a moment to gather everything you need. No one wants to scramble through the kitchen mid-recipe! Here’s what you’ll need:
-
Ingredients:
-
2 cups of SunnyD (or other orange juice of your choice)
-
1 can (14 ounces) of sweetened condensed milk
-
Tools:
-
Popsicle molds (you can find these at most kitchen supply stores or online)
-
Mixing bowl
-
Whisk
-
Measuring cups
With these ingredients and tools ready, you’re all set for some kitchen magic!
Mix SunnyD and sweetened condensed milk
Now that you have your ingredients, it’s time to bring them together. In a mixing bowl, pour in the SunnyD, which is the star of your creamy treat. It’s tangy and bursting with orange flavor! Next, add the sweetened condensed milk. This ingredient is essential for achieving that creamy texture that makes these easy orange creamsicles so wonderful.
Whisk until smooth and creamy
Grab your whisk and get ready to mix! Combine the SunnyD and sweetened condensed milk by whisking vigorously until the mixture is smooth and creamy. This step is crucial because you want to avoid any lumps that may spoil the delightful consistency. If you prefer a sweeter creamsicle, consider adding a dash of sugar or a splash of vanilla extract for an extra touch of flavor. Experts suggest that the balance of sweet and tangy flavors is key to a perfect frozen treat.
Pour into popsicle molds
Once your mixture is perfectly blended, it’s time for the fun part: pouring it into your popsicle molds. Carefully fill each mold, leaving a little space at the top. The mixture will expand slightly as it freezes, so don’t overfill! This is also the moment to think creatively. Want to make a layered effect? Consider adding a scoop of yogurt or an extra splash of fruit juice for a colorful twist.
Insert sticks and freeze
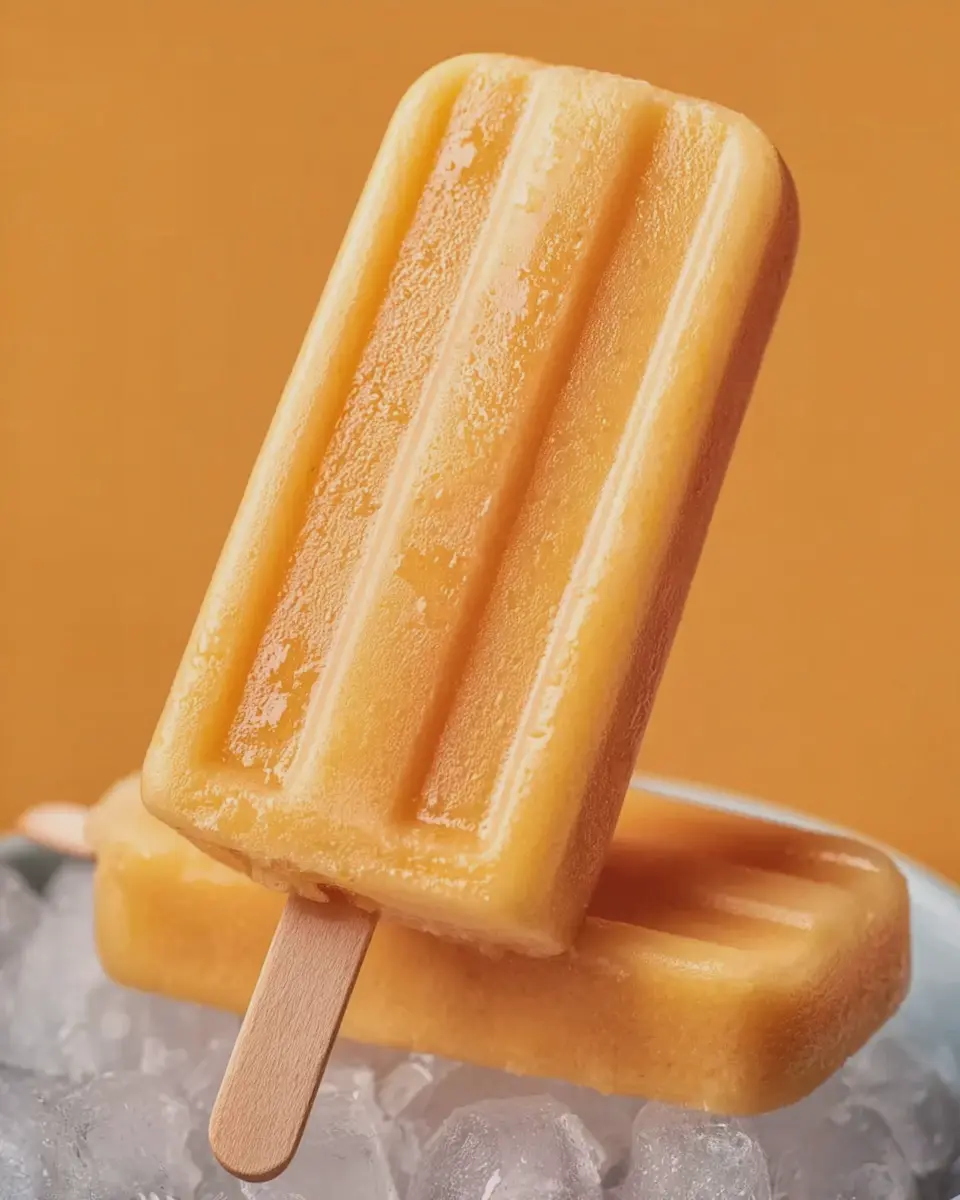
After you’ve filled the molds, it’s time to insert the sticks. If your molds come with lids, secure them, or simply insert the sticks directly into the mixture. Pop the molds into the freezer and let them sit for at least 4 to 6 hours, or until they are completely solid. The anticipation can be hard, but trust me, it’s worth the wait!
Removing from molds
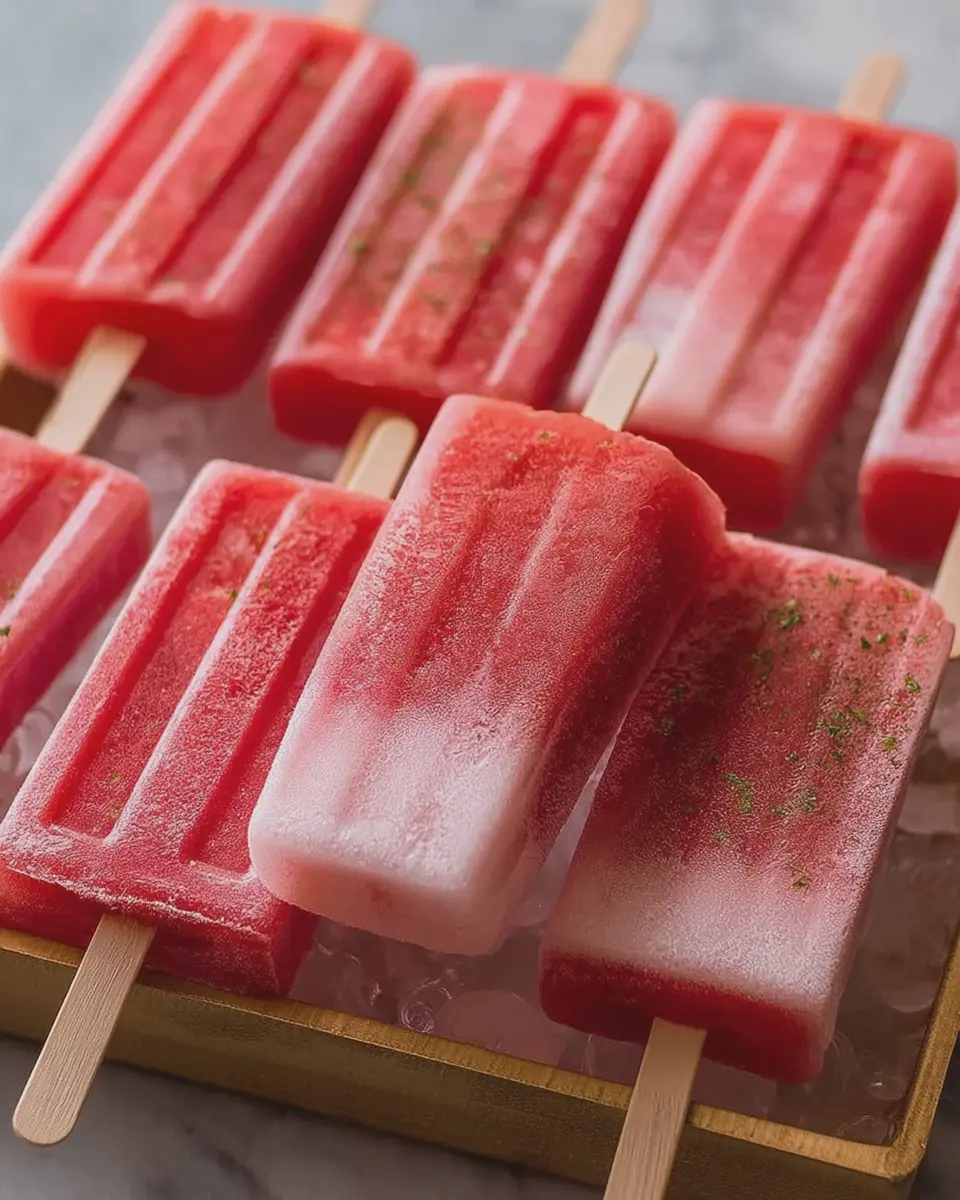
Finally, the moment you’ve been waiting for has arrived—it’s time to enjoy your easy orange creamsicles. To remove them from the molds, run warm water over the outside of the molds for a few seconds. This will loosen the creamsicles, allowing them to slip out easily. If they still seem stuck, gently twist the molds to release them. Serve immediately, and watch faces light up with joy!
These easy orange creamsicles are not just a treat; they’re a delightful way to cool off during hot days. Want more delicious recipes? Check out some refreshing variations on your favorite summer desserts at Food Network or Allrecipes for additional inspiration. Making your own frozen treats is a rewarding experience that’s both fun and fulfilling!
Variations on Easy Orange Creamsicles
When you’re enjoying your easy orange creamsicles, why not jazz them up a bit? There are countless variations to explore that can add a refreshing twist and elevate your popsicle game. Let’s dive into some delicious options!
Tropical Creamsicle with Pineapple
Imagine biting into a tropical creation that feels like a vacation in a popsicle. For a refreshing tropical creamsicle, add fresh pineapple or even pineapple juice to your orange base. The tangy sweetness of the pineapple pairs beautifully with the citrus flavor, creating a harmony of tastes that transports you to sunny shores.
What you’ll need:
- 1 cup fresh pineapple chunks
- Your basic orange creamsicle mixture
Simply blend the pineapple until smooth and fold it into your orange mixture before pouring it into the molds. This delightful twist will make your easy orange creamsicles a standout treat, perfect for summer gatherings! Consider checking out this guide on pineapple benefits for a bit of nutrition insight.
Berry-Infused Orange Creamsicles
Want to add an exciting burst of flavor? Try berry-infused easy orange creamsicles! Strawberries, blueberries, or raspberries can give a beautiful color and another layer of complexity to your frozen treat. The natural sweetness of the berries balances the tartness of the oranges, making for a delightful experience.
Berry Fusion Steps:
- Add 1 cup mixed berries (fresh or frozen) to your base.
- Blend until smooth and then mix it into the orange creamsicle base for a marbled effect!
This vibrant twist isn’t just about taste — it’s also about aesthetics. Your easy orange creamsicles will look as fabulous as they taste! Want to learn more about the health benefits of berries? Check out this article on berries and health.
With these variations, your easy orange creamsicles will never be boring again! Enjoy experimenting and invite your friends to join the fun.
Cooking Tips and Notes for Easy Orange Creamsicles
Achieving the Perfect Texture
Creating easy orange creamsicles is all about the right balance. You’ll want a creamy texture that complements the refreshing orange flavor. Here are a few tips:
- Use full-fat yogurt or cream for richer, creamier pops. Low-fat versions tend to freeze harder, leading to an icy texture.
- Blend thoroughly: Make sure your mixture is smooth and well-combined. A good quality blender can help achieve that creamy consistency.
- Add a dash of vanilla to enhance the flavor and add depth. It makes a noticeable difference!
Storing and Freezing Tips
Once your pops are ready, it’s crucial to store them properly:
- Air-tight containers are essential to prevent freezer burn. Consider using silicone molds, as they’re pliable and make for easier removal.
- Keep them away from strong-smelling foods in the freezer, as pops can absorb odors.
- Label and date your pops: They’re best enjoyed within three months for optimal taste, but we doubt they’ll last that long!
For more inspiration and tips on fruity pops, check out resources like Culinary Leaf or Serious Eats. Happy cooking!
Serving Suggestions for Easy Orange Creamsicles
Pairing with Fresh Fruit
To elevate your easy orange creamsicles, consider serving them alongside a vibrant selection of fresh fruit. Oranges, berries, and tropical fruits like mango or pineapple create a delightful tableau that enhances both flavor and presentation. The juicy sweetness of strawberries or the tartness of raspberries makes for an exciting contrast to the creamy texture of your creamsicles. Not only do these fruits add color to your dessert table, but they also provide a refreshing companion that balances the creamy richness. Plus, you’re adding natural vitamins and nutrients to the mix!
Creative Serving Ideas for Gatherings
When hosting a get-together, presentation is key. Serve your easy orange creamsicles on a colorful platter with a drizzle of chocolate or a sprinkle of crushed nuts for added texture. You could also pop them into a clear cup with a festive straw for a fun, portable option.
Consider making mini versions using ice cube trays or popsicle molds for easy sharing. This approach prompts guests to try a variety of flavors, turning dessert into an interactive experience! For even more festive flair, set up a toppings bar where guests can customize their creamsicles with crushed cookies, sprinkles, or fresh mint.
For more serving tips, check out this fruit pairing guide or explore creative dessert ideas that can complement your gathering!
Time Breakdown for Easy Orange Creamsicles
Preparation Time
Making easy orange creamsicles is a breeze! You’ll need about 10 minutes for preparation. This includes gathering your ingredients and mixing them together—perfect for a busy afternoon when you crave a refreshing snack.
Freezing Time
The next step is where patience comes in. Let your mixtures freeze for at least 4 to 6 hours. If you can manage to wait overnight, even better—this ensures the best texture and flavor.
Total Time
In total, you’re looking at around 4 to 6 hours and 10 minutes, including prep time. It’s truly a small time investment for a delightful treat! If you’re curious about variations, check out Epicurious for more creative ideas. Happy freezing!
Nutritional Facts for Easy Orange Creamsicles
When you’re whipping up easy orange creamsicles, it’s crucial to know what you’re indulging in! Each serving contains approximately 110 calories, making it a guilt-free treat, especially perfect for warm days.
Key Nutrients Explained
These delicious creamsicles aren’t just tasty; they’re also packed with important nutrients:
- Vitamin C: Oranges are renowned for their high vitamin C content, boosting your immune system and enhancing skin health.
- Calcium: The creamy element often comes from dairy, providing a good source of calcium necessary for strong bones.
- Natural Sugars: While sweet, most of the sugar comes from the natural fruit, keeping it healthier than many store-bought alternatives.
Feeling good about what you treat yourself to is essential, right? For more detailed nutritional insights, check out resources like the USDA FoodData Central or Healthline’s in-depth articles on vitamins and minerals.
So, the next time you crave a refreshing dessert, don’t hesitate to reach for your homemade easy orange creamsicles!
FAQs about Easy Orange Creamsicles
When it comes to making easy orange creamsicles, it’s normal to have plenty of questions. Here are some of the most common FAQs to help guide you on this tasty journey.
Can I use fresh orange juice instead of SunnyD?
Absolutely! While SunnyD offers a unique flavor that’s loaded with sweetness, using fresh orange juice is a fantastic alternative. Fresh juice can give your easy orange creamsicles an authentic, zesty taste. Just make sure to strain out any pulp if you prefer a smoother texture. For additional creaminess, consider adding a dash of vanilla extract or yogurt to the mix!
How long can I store these in the freezer?
Once your easy orange creamsicles are frozen solid, they can be stored in the freezer for up to three months. To maintain freshness, wrap them in plastic wrap or keep them in an airtight container. Make sure to mark the date on the container, so you keep track of how long they’ve been chilling!
What are some alternative recipes for creamsicles?
If you’re feeling adventurous, why not explore other variations? Here are a few ideas:
- Berry Creamsicles: Substitute orange juice for your favorite berries, like strawberries or raspberries.
- Peach Melba Creamsicles: Use peach puree and a hint of vanilla for a summery twist.
- Coconut Lime Creamsicles: Blend coconut milk with lime juice for a tropical vibe.
For more creative creamy frozen treats, check out resources like Food Network or Serious Eats. Enjoy crafting your delicious creations!
Conclusion on Easy Orange Creamsicles
Recap of why these are a must-try at home
Making easy orange creamsicles at home is not only simple but also a delightful way to beat the heat. With just a handful of ingredients, you can whip up creamy, zesty treats that encapsulate the essence of summer. These treats are perfect for gatherings, a refreshing snack after work, or even a special dessert for movie nights. Plus, they can be healthier than store-bought options, allowing you to indulge guilt-free.
Encouragement to experiment with flavors
Don’t hesitate to let your creative juices flow! While this recipe highlights the classic orange flavor, think about how you could mix in other fruits or perhaps a splash of coconut for a tropical twist. The beauty of easy orange creamsicles lies in their versatility. Check out resources like Food Network or Serious Eats for flavor ideas and inspirations. You’ll find that experimenting can lead to even more delightful combinations that suit your palate perfectly!
PrintEasy Orange Creamsicles: Refreshingly Indulgent Treat for All Ages

Enjoy the delightful taste of Easy Orange Creamsicles, a refreshing treat perfect for hot days and loved by all ages.
- Prep Time: 15 minutes
- Total Time: 4 hours 15 minutes
- Yield: 10 popsicles 1x
- Category: Dessert
- Method: Freezing
- Cuisine: American
- Diet: Vegetarian
Ingredients
- 2 cups orange juice
- 1 cup heavy cream
- 1/2 cup sugar
- 1 teaspoon vanilla extract
Instructions
- In a mixing bowl, combine orange juice, heavy cream, sugar, and vanilla extract.
- Whisk the mixture until the sugar is dissolved and everything is well blended.
- Pour the mixture into popsicle molds.
- Insert sticks and freeze for at least 4 hours or until solid.
- To serve, run the molds under warm water for a few seconds to loosen the popsicles.
Notes
- For a creamier texture, you can use half-and-half instead of just heavy cream.
- Feel free to add zest from the oranges for more flavor.
Nutrition
- Serving Size: 1 popsicle
- Calories: 120
- Sugar: 18 grams
- Sodium: 15 milligrams
- Fat: 7 grams
- Saturated Fat: 4 grams
- Unsaturated Fat: 2 grams
- Trans Fat: 0 grams
- Carbohydrates: 14 grams
- Fiber: 0 grams
- Protein: 1 gram
- Cholesterol: 25 milligrams
Keywords: Easy Orange Creamsicles, orange popsicles, homemade treats, summer snacks