Introduction to Heavenly Lemon Oreo Dessert Bars
When it comes to satisfying your sweet tooth, there’s something undeniably special about homemade desserts. Have you ever bitten into a store-bought treat and felt that familiar pang of disappointment? The flavors just don’t compare! Making your own desserts allows you to tailor everything to your taste—from the sweetness level to the textures. Plus, there’s a certain joy in baking that simply can’t be replicated by grabbing something off the shelf.
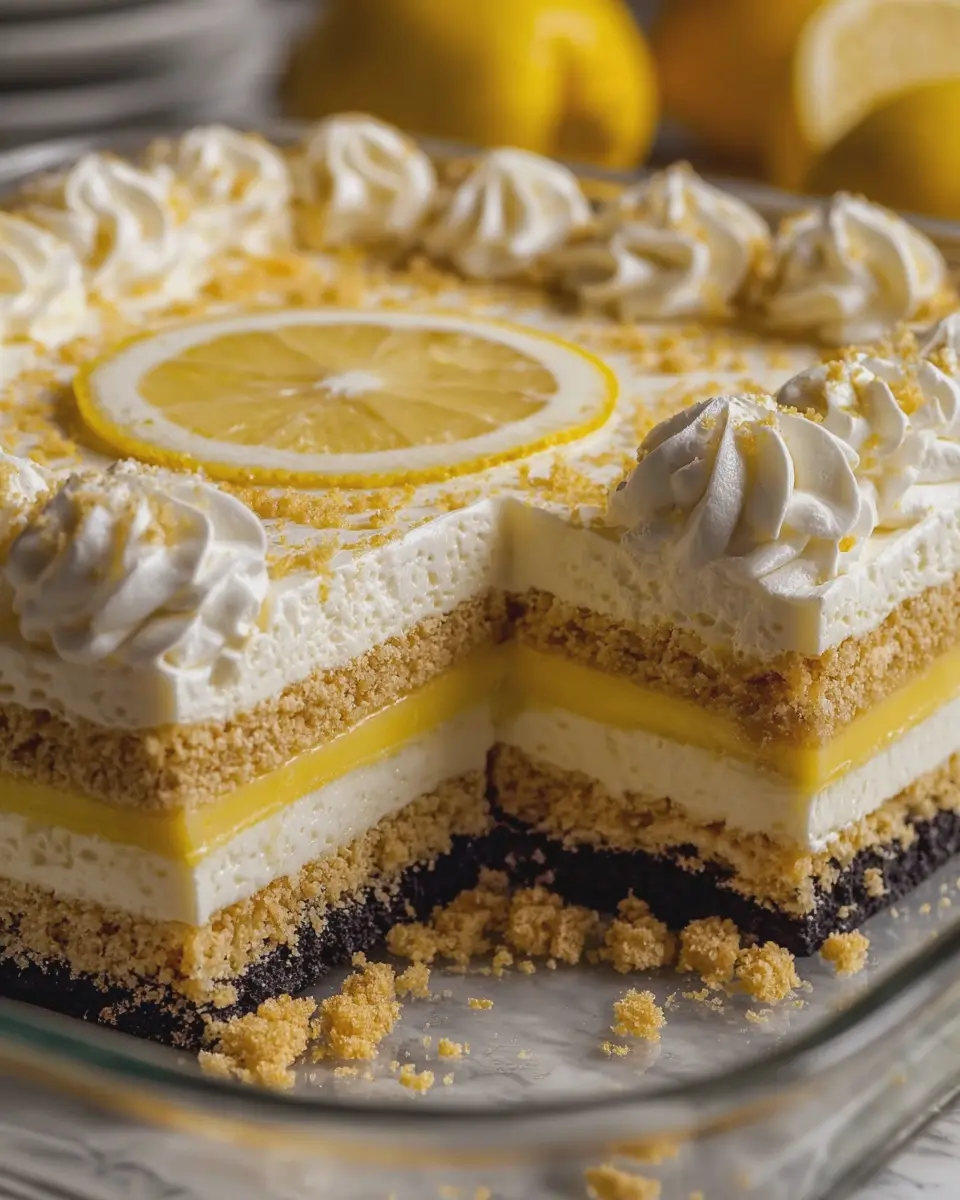
Imagine the intoxicating aroma of freshly baked Lemon Oreo dessert bars wafting through your kitchen. These Heavenly Lemon Oreo Dessert Bars bring bright, citrusy notes together with the classic flavor of Oreos, making for an irresistible combination that’s perfect for entertaining or simply enjoying at home.
Why Homemade Desserts Are Worth It
Here are a few reasons why whipping up your own desserts is worth every minute:
- Quality Control: You know exactly what goes into your recipes. No preservatives or mystery ingredients here!
- Customization: Want extra lemon zest or a sprinkle of coconut? Go for it! You can make these bars uniquely yours, accommodating any dietary preferences or cravings.
- Freshness: There’s nothing like a freshly baked dessert. Trust me, it tastes a million times better than its store-bought counterpart.
Speaking of freshness, did you know that baking from home can also be more economical? According to the USDA, the price of ingredients like flour, sugar, and lemons are often lower if you purchase in bulk!
Moreover, the satisfaction of sharing your creations with friends and family can be incredibly rewarding. Picture this: a weekend gathering where you serve up these delectable bars, and your guests rave about them. You become the star of the evening, and all thanks to your Lemon Oreo dessert masterpiece!
So why not get started? Gather your ingredients and preheat that oven! Trust me, once you experience the joy and taste of your own baking, you’ll wonder how you ever settled for anything less.
For more about the benefits of homemade desserts, be sure to check out this informative article on cookinglight.com!
Ingredients for Heavenly Lemon Oreo Dessert Bars
Creating a lemon Oreo dessert that tantalizes your taste buds starts with gathering the right ingredients. Here’s what you’ll need to whip up these delightful bars:
Sweet and Zesty Base
- 1 package of Lemon Oreos: These provide a deliciously tangy and creamy flavor that forms the heart of your dessert.
- 1/2 cup of unsalted butter (melted): Helps bind the crust together and adds richness.
Creamy Layer
- 8 oz cream cheese: Make sure it’s softened to blend smoothly into your filling.
- 1/2 cup granulated sugar: Balances the tartness and gives the filling that perfect sweetness.
- 1 cup of lemon juice: Freshly squeezed is ideal for an authentic zing.
Topping for that Extra Touch
- 1 cup whipped cream: To crown your bars and add a light, airy texture.
- Zest from one lemon: For garnish, adding color and an extra burst of flavor.
Once you’ve gathered these ingredients, you’re all set to create a truly heavenly lemon Oreo dessert. If you’re keen to explore more about the benefits of using fresh lemon juice, check out this article by Healthline on the nutritional perks of lemons. Plus, don’t forget to keep your work area clean—hygiene is key in the kitchen! For more tips, consider visiting Food Safety news. Happy baking!
Preparing Heavenly Lemon Oreo Dessert Bars
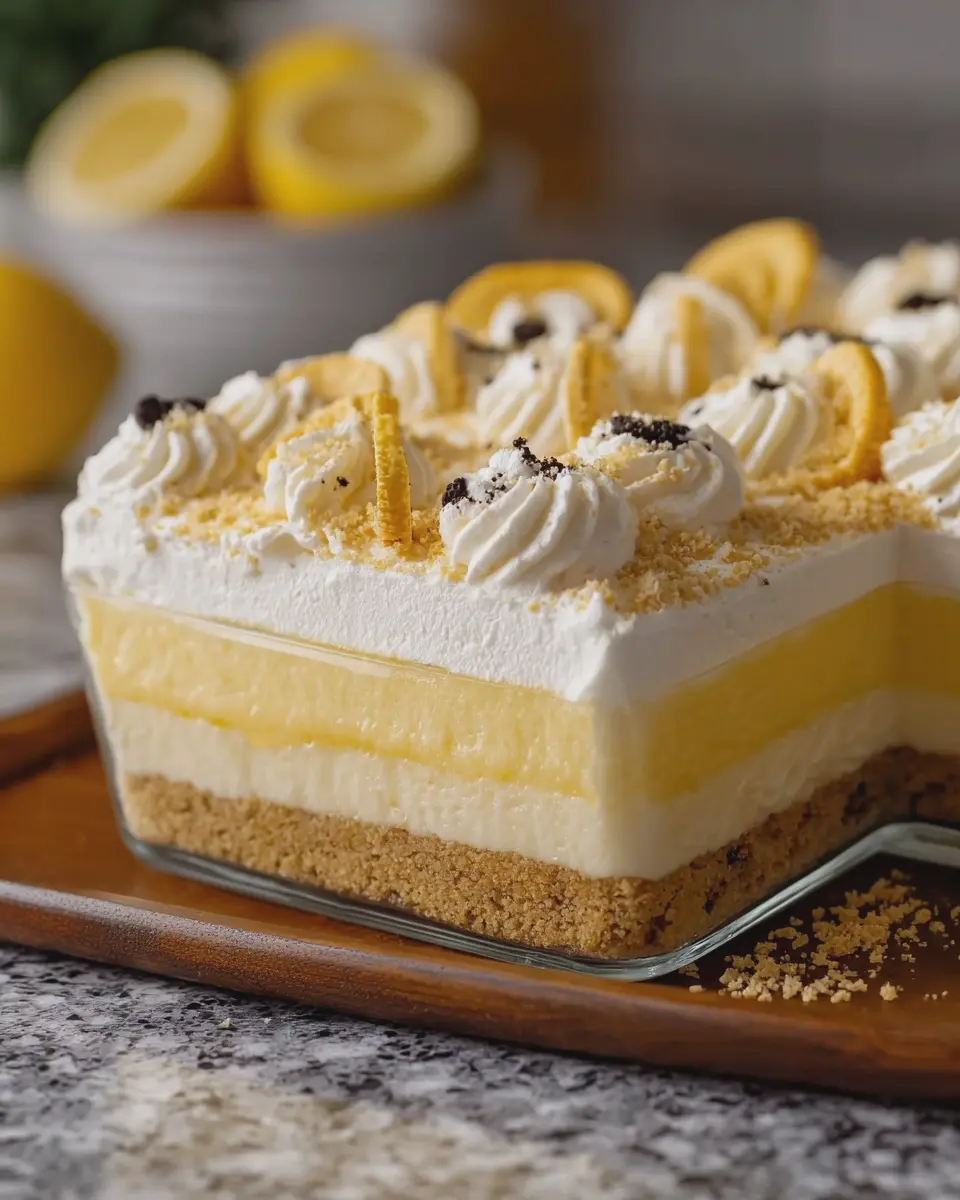
If you’re looking for a deliciously refreshing treat to impress your friends at your next gathering or simply indulge your sweet tooth, you need to whip up these Heavenly Lemon Oreo Dessert Bars. Layered with a buttery Golden Oreo crust, a creamy filling, and a zesty lemon pudding, this dessert combines the perfect balance of sweet and tangy. Let’s dive into each step to make this lemon Oreo dessert a delightful centerpiece at your table!
Prepare the Golden Oreo Crust
First things first—let’s get that gorgeous crust ready. You’ll need:
- 24 Golden Oreos
- 1/4 cup of unsalted butter, melted
-
Crush the Oreos: Start by placing the Golden Oreos in a food processor. Pulse them until they turn into fine crumbs. If you don’t have a food processor, don’t worry; you can put them in a zip-top bag and crush them with a rolling pin. Just make sure they’re finely ground!
-
Mix with Butter: In a medium bowl, combine the Oreo crumbs and melted butter. Stir until all the crumbs are coated with butter and the mixture resembles wet sand.
-
Press into the Pan: Line an 8×8-inch baking dish with parchment paper for easy removal later. Pour the crumb mixture into the pan and evenly press it down using the back of a measuring cup or your fingers. Make it firmly packed to ensure it holds together.
Whip Up the Cream Cheese Layer
While the crust is setting, let’s create that luscious cream cheese layer that’ll make your lemon Oreo dessert truly divine! You will need:
- 8 oz cream cheese, softened
- 1/2 cup powdered sugar
- 1 cup whipped topping (like Cool Whip)
-
Beat the Cream Cheese: In a large bowl, beat the softened cream cheese with a hand mixer until it’s smooth and creamy.
-
Add Sugar and Whipped Topping: Gradually mix in the powdered sugar until combined. Then, gently fold in the whipped topping until everything is light and fluffy.
-
Spread Over the Crust: Pour this heavenly mixture over your cooled Golden Oreo crust and spread it evenly.
Create the Zesty Lemon Pudding Layer
This is where the magic happens! For the lemon pudding layer, gather:
- 2 boxes (3.4 oz each) of instant lemon pudding mix
- 4 cups cold milk
- Zest from 1 lemon (optional, but highly recommended)
-
Mix Pudding: In a mixing bowl, combine the lemon pudding mix and cold milk. Whisk together until the pudding thickens, which should take about 2 minutes.
-
Add Zest: For an extra citrus kick, fold in some fresh lemon zest. This little addition will elevate the flavor.
Assemble the Layers
Now, it’s time to bring it all together! Carefully pour the lemon pudding over the cream cheese layer.
-
Smooth it Out: Use a spatula to gently smooth the pudding layer, ensuring it covers the cream cheese evenly.
-
Top with Whipped Cream: Optional but delightful, dollop some additional whipped topping on top of the pudding layer for extra creaminess and visual appeal. You can also sprinkle some crushed Oreos or lemon zest on top for a finishing touch.
Chill and Set Before Serving
The hardest part is over! Now, you just need to let your lemon Oreo dessert chill.
-
Refrigerate: Cover the dish with plastic wrap and place it in the refrigerator for at least 4 hours, or ideally overnight. This allows all those layers to set beautifully.
-
Slice and Serve: Once set, lift the dessert out of the pan using the parchment paper. Cut into squares and serve chilled. Your guests will be begging for the recipe!
This delightful lemon Oreo dessert is sure to brighten up any occasion. For more twists on classic desserts, consider checking out other fun recipes over at Food Network or Bon Appétit for endless inspiration! Enjoy your baking.
Variations on Heavenly Lemon Oreo Dessert Bars
Lemon Raspberry Dessert Bars
Looking for a vibrant twist on the classic lemon Oreo dessert? Consider adding fresh raspberries for a burst of flavor that perfectly complements the zingy lemon. Simply fold in some crushed raspberries into your filling for an inviting layered creation. Not only will the raspberry add a lovely pink hue, but their tartness will enhance the overall sweetness of the bars, creating a delightful balance.
Want to elevate your dessert further? Top with a sprinkle of lemon zest or drizzle a light icing made with powdered sugar and lemon juice. This easy adaptation not only looks stunning but also introduces new textures and flavors that will keep your friends asking for the recipe!
Gluten-Free Lemon Oreo Dessert Options
If you’re catering to friends with gluten sensitivities, don’t worry—there are plenty of ways to make a scrumptious lemon Oreo dessert that everyone can enjoy. You can easily swap out regular Oreos for gluten-free alternatives, which are widely available these days.
Additionally, consider utilizing almond flour or coconut flour in your crust for a nutty twist that adds depth. A simple gluten-free version could just be:
- Use gluten-free Oreos
- Substitute with almond flour for the base
- Follow the same delicious filling recipe
Looking for more guidance? Check out resources like the Gluten-Free Living website for tips on ensuring a safe, gluten-free baking experience.
These variations not only provide options for those with dietary restrictions but also keep the dessert exciting. So whether you’re after a fruity upgrade or looking to accommodate your friends, these creative spins on lemon Oreo dessert bars are sure to impress.
Cooking Tips and Notes for Heavenly Lemon Oreo Dessert Bars
When you take on the delightful challenge of making lemon Oreo dessert bars, a few handy tips can elevate your experience and result!
Perfecting Your Crust
-
Choose the Right Cookies: For that delightful crunch, crush your Oreo cookies finely. A food processor works great, but a rolling pin and a zip bag can do the trick as well!
-
Butter Matters: Using melted butter in your crust ensures it binds well without being overly greasy. Be sure it’s cooled slightly before mixing it in with the cookies.
Lemon Layer Love
-
Fresh vs. Bottled Lemon Juice: While bottled lemon juice is convenient, fresh lemon juice can make a world of difference in flavor. The zest adds even more brightness!
-
Temperature Check: Ensure your cream cheese is at room temperature for easy mixing and a smooth filling.
Final Touches
- Chill Time is Key: Allow your lemon Oreo dessert bars to chill in the fridge for at least two hours. This helps them set up nicely and makes slicing easier.
For further inspiration and tips, sites like The Kitchn or Serious Eats can provide a wealth of information on dessert-making. Enjoy your baking adventure!

Serving Suggestions for Heavenly Lemon Oreo Dessert Bars
When it comes to serving your delightful Lemon Oreo dessert bars, presentation and pairing are key. You want these treats to shine and complement any occasion, whether it’s a casual gathering with friends or a festive celebration. Here are a few ideas that will leave your guests asking for seconds.
Garnish for a Punch of Flavor
- Fresh Berries: Top each bar with a medley of fresh raspberries or blueberries. Their tartness will beautifully balance the sweetness of the Lemon Oreo dessert.
- Whipped Cream: A dollop of lightly sweetened whipped cream adds a lovely touch and enhances the creamy texture.
Drink Pairings
Consider pairing these bars with refreshing beverages:
- Iced Tea: A sweetened iced tea with a hint of lemon can elevate the experience. Try adding a sprig of mint for an extra pop of flavor.
- Lemonade: Go classic! A chilled glass of lemonade, perhaps with some mint or ginger, harmonizes perfectly with the dessert’s tanginess.
Creative serving ideas
- Individual Servings: Cut the bars into bite-sized pieces and serve on a platter. Your guests can enjoy them as finger foods.
- Dessert Boards: Create a dessert board with your Lemon Oreo dessert bars alongside other treats like cookies, fruits, and small cakes for an eye-catching display.
Don’t hesitate to get creative—your guests will appreciate the thoughtful touches! If you’re in the mood for more ideas, check out Martha Stewart for additional serving inspirations.
Time Breakdown for Heavenly Lemon Oreo Dessert Bars
Planning your kitchen time is essential when making delicious treats like these Lemon Oreo Dessert Bars. Here’s a quick breakdown to help you prepare with ease!
Preparation time
Getting started is half the fun! Spend about 15-20 minutes blending the flavors together. You’ll be mixing crushed Lemon Oreos, cream cheese, and whipped topping for that dreamy filling!
Chilling time
Patience is key for this dessert! Allow your bars to chill in the refrigerator for at least 4 hours. This not only helps the flavors meld beautifully but also gives them that perfect, firm texture for slicing.
Total time
When all is said and done, you’re looking at a total time of about 4 hours and 20 minutes. It might seem a bit lengthy, but trust me, the Lemon Oreo Dessert will be worth every minute! Enjoy the process and maybe grab a book to read while you wait. For some easy reading on dessert basics, check out resources like The Kitchn or Serious Eats.
Nutritional Facts for Heavenly Lemon Oreo Dessert Bars
When indulging in these delightful Lemon Oreo Dessert Bars, it’s good to know what you’re treating yourself to! Let’s break down the essentials:
Calories
Each bar packs around 200 calories, making it a satisfying yet manageable sweet treat for an afternoon pick-me-up or after-dinner delight.
Sugar Content
With approximately 15 grams of sugar per serving, these bars offer a zesty sweetness without overwhelming your palate. For those watching their sugar intake, enjoy them in moderation.
Protein
You’ll find about 2 grams of protein per bar. While they’re not a protein powerhouse, pairing them with a side of Greek yogurt could bump up your protein intake nicely.
For more on maintaining a balanced diet while enjoying desserts, check out resources from Healthline or ChooseMyPlate.gov. Enjoy your sweet adventures while also being mindful of what you eat!
FAQ about Heavenly Lemon Oreo Dessert Bars
Can I make these bars ahead of time?
Absolutely! One of the best features of these Heavenly Lemon Oreo Dessert Bars is their make-ahead flexibility. You can prepare these bars a day in advance, allowing the flavors to meld beautifully. Just make sure to refrigerate them overnight and cover them tightly with plastic wrap. When you’re ready to serve, simply slice and indulge in those refreshing zesty layers.
What can I use instead of Golden Oreos?
Not a fan of Golden Oreos? No problem! You can substitute them with regular Oreos for a chocolatey twist that adds a fun spin to your lemon oreo dessert. Alternatively, using any vanilla wafer or graham cracker can work too; each option offers a unique flavor profile that complements the tangy lemon filling. You could even try crushed ginger snaps for a hint of spice!
How do I store leftover dessert bars?
Storing your leftover bars is a breeze! Place any uneaten slices in an airtight container and refrigerate them for up to five days. If you want to save them for a later date, consider freezing them. Just wrap each bar individually in plastic wrap, then place them in a freezer-safe bag. Properly stored, they can last for up to three months! When you’re ready to enjoy, thaw them in the fridge.
For more inspiration on how to elevate your dessert game, check out this helpful guide on no-bake desserts. Balancing the creamy filling with something crispy is not just a treat; it’s a delightful experience for your taste buds!
Conclusion on Heavenly Lemon Oreo Dessert Bars
In closing, Heavenly Lemon Oreo Dessert Bars truly encapsulate the essence of indulgence with a refreshing twist. These bars are an effortless way to bring a burst of zest to your dessert table. The creamy lemon layer complements the crunchy, chocolatey Oreo base perfectly, offering a delightful contrast that will have your guests raving.
Whether you’re hosting a weekend gathering or simply want to surprise your family with a sweet treat, this lemon Oreo dessert is a winning choice. So why wait? Gather your ingredients, whip up these bars, and get ready to experience dessert bliss! Don’t forget to share your creations on social media or leave a comment below. Check out this article on the benefits of citrus fruits for even more tasty tips!
PrintLemon Oreo Dessert: The Easy Indulgence for Every Home Cook

An easy and delicious dessert featuring Lemon Oreos, perfect for satisfying sweet cravings.
- Prep Time: 20 minutes
- Cook Time: 0 minutes
- Total Time: 2 hours 20 minutes
- Yield: 12 servings 1x
- Category: Dessert
- Method: no-bake
- Cuisine: American
- Diet: vegetarian
Ingredients
- 1 package Lemon Oreo cookies
- 8 ounces cream cheese, softened
- 1 cup powdered sugar
- 1 cup whipped topping
- 2 cups milk
- 1 package instant lemon pudding mix
Instructions
- Crush the Lemon Oreos and layer them at the bottom of a pan.
- In a bowl, mix the softened cream cheese and powdered sugar until smooth.
- Fold in the whipped topping and spread over the Oreo layer.
- In a separate bowl, whisk together the milk and instant lemon pudding mix until thick.
- Pour the lemon pudding over the cream cheese layer and spread evenly.
- Chill for at least 2 hours before serving.
Notes
- For an extra tangy flavor, add zest from one lemon to the cream cheese mixture.
- Keep leftovers covered in the refrigerator for up to 3 days.
Nutrition
- Serving Size: 1 slice
- Calories: 300
- Sugar: 25g
- Sodium: 200mg
- Fat: 15g
- Saturated Fat: 5g
- Unsaturated Fat: 8g
- Trans Fat: 0g
- Carbohydrates: 35g
- Fiber: 1g
- Protein: 3g
- Cholesterol: 15mg
Keywords: Lemon Oreo Dessert, easy dessert, no-bake dessert